Chapter 40
Chapter 40. ALS Assist. Introduction. You may need to be familiar with AEMT and paramedic skills. These include: Advanced airway techniques Intravenous (IV) therapy Cardiac monitoring. Advanced Airway Techniques.

Chapter 40
E N D
Presentation Transcript
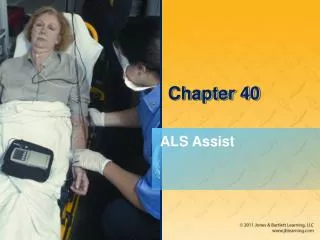
Chapter 40 ALS Assist
Introduction • You may need to be familiar with AEMT and paramedic skills. • These include: • Advanced airway techniques • Intravenous (IV) therapy • Cardiac monitoring
Advanced Airway Techniques • Establishing and maintaining an airway is the single most important EMT skill. • Most conscious patients can maintain their own airway. • Other patients may require an oropharyngeal or nasopharyngeal airway. • Advanced airway management provides better airway protection and ventilation.
Anatomy and Physiology of the Airway (1 of 5) • The respiratory system consists of all the body structures used for breathing. • Upper airway includes the nose, mouth, throat (pharynx), and larynx (vocal cords). • Lower airway includes the trachea, bronchi, and lungs.
Anatomy and Physiology of the Airway (3 of 5) • The respiratory system: • Delivers oxygen to body • Removes carbon dioxide • This process takes place on two levels: • Alveolar-capillary exchange • Capillary-cellular exchange
Anatomy and Physiology of the Airway (5 of 5) • Each living cell of the body requires a regular supply of oxygen. • Some cells, such as those in the heart, brain, and nervous system, need a constant supply to survive. • Other cells can tolerate short periods without oxygen.
Basic Airway Management (1 of 2) • Always assess the airway first in an injured or ill patient. • Open the airway. • Use the head tilt–chin lift maneuver in a patient with no suspected spinal injury. • Use the jaw-thrust maneuver if there is a possibility of spinal injury.
Basic Airway Management (2 of 2) • Assess the airway and evaluate the need for suctioning to remove: • Foreign bodies • Liquid • Blood • Determine if the patient needs an airway adjunct.
Endotracheal Intubation (1 of 2) • Insertion of a tube into the trachea to maintain the airway • If done through the mouth, it is called orotracheal intubation. • If done through the nose, it is called nasotracheal intubation. • Tube passes directly through the larynx between the vocal cords and trachea.
Endotracheal Intubation (2 of 2) • Very effective method • Indicated for: • Patients who cannot protect their own airway • Patients who need prolonged artificial ventilation
Equipment (1 of 8) • Assemble all the equipment. • Laryngoscope handle and blade • Properly sized endotracheal (ET) tube • Stylet • 10-mL syringe • Water-soluble lubricant for the ET tube • Suction unit with rigid and soft-tip catheters
Equipment (2 of 8) • Assemble all the equipment (cont’d). • Magill forceps • Stethoscope • Commercial securing device • Secondary confirmation device
Equipment (3 of 8) • Laryngoscope • Used to sweep the tongue out of the way and align the airway so the vocal cords can be visualized • Endotracheal tubes • Proper-sized tube for adults ranges from 7.0 to 8.5 mm
Equipment (5 of 8) • Endotracheal tubes (cont’d) • Use the largest-diameter ET tube that will pass easily through the vocal cords. • For children, use a resuscitation tape device. • A standard 15/22-mm adapter attaches to any ventilation device.
Equipment (7 of 8) • Stylet • Inserted into the ET tube to add rigidity and shape during intubation • Bend the tip to form a gentle curve. • Do not insert past Murphy’s eye.
Equipment (8 of 8) • Syringe • Use a 10-mL syringe to test for air leaks in the ET tube before intubation. • Other equipment • A suction unit may be needed to clear secretions or blood. • A commercial securing device ensures that the tube does not move.
The Sellick Maneuver • Can be used to intubate a patient who has no cough and/or gag reflex • Helps reduce the chance of regurgitation and aspiration of stomach contents • Follow the steps in Skill Drill 40-1. • Be sure to correctly identify anatomic landmarks.
The Intubation Procedure (1 of 7) • You may intubate only if authorized by off-line or online medical control. • Be sure to use standard precautions. • An intubation attempt should not take more than 30 seconds. • Begins when ventilation stops and the laryngoscope blade is inserted • Ends when ventilation begins again
The Intubation Procedure (2 of 7) • Intubation is a multiple-person task. • First EMT applies and uses the AED. • Second and third EMTs perform CPR at a ratio of 30 compressions to 2 ventilations. • Fourth EMT prepares and intubates the patient. • Follow the steps in Skill Drill 40-2 to perform orotracheal intubation.
The Intubation Procedure (3 of 7) • You must use a secondary method of confirming proper tube placement. • Esophageal detector devices • End-tidal carbon dioxide detectors • Capnography monitors • These devices are not 100% guaranteed.
The Intubation Procedure (4 of 7) • Source: The LIFEPAK® 15 defibrillator monitor courtesy of Physio-Control. Used with permission of Physio-Control, Inc., and according to the Material Release Form provided by Physio-Control.
The Intubation Procedure (5 of 7) • Primary confirmation is: • Direct visualization of the tube passing through the vocal cords • Auscultating good bilateral breath sounds • Seeing the patient’s chest rise and fall with each ventilation • Never let go of the ET tube until it is secured.
The Intubation Procedure (6 of 7) • Intubation complications • Intubating the right main stem bronchus • Intubating the esophagus • Aggravating spinal injury • Increased hypoxia • Patient vomiting
The Intubation Procedure (7 of 7) • Intubation complications (cont’d) • Laryngospasm • Trauma • Mechanical failure • Patient intolerant of the endotracheal tube • Decrease in heart rate
Multilumen Airways (1 of 4) • Advanced airways that do not require visualization of the vocal cords for placement • Examples include the Combitube and pharyngeotracheal lumen airway. The Combitube
Multilumen Airways (3 of 4) • Contraindications • Conscious or semiconscious patients with a gag reflex • Children younger than 14 years • Adults shorter than 5′ • Patients who have ingested a caustic substance • Patients who have an esophageal disease
Multilumen Airways (4 of 4) • Removing the multilumen airway • If the patient will no longer tolerate the airway, it should be removed. • Remember that the patient will likely vomit when the airway is removed, so a suction unit must be readily available. • Simply deflate both balloon cuffs and gently remove the tube.
Single Lumen Airway (1 of 3) • King LT airway • Single lumen airway that is blindly inserted into the esophagus • Consists of a curved tube with ventilation ports located between two inflatable cuffs • Intended in patients who are taller than 4′
Single Lumen Airway (2 of 3) • Source: Courtesy of King Systems
Single Lumen Airway (3 of 3) • Laryngeal mask airway • Consists of two parts: the tube and the mask or cuff • After blind insertion, the device molds and seals itself around the laryngeal opening by inflation of the mask.
Gastric Tubes (1 of 2) • Sometimes a patient may require placement of a tube through the nose or mouth that extends into the stomach. • Cardiac arrest patients • A nasal or oral gastric tube relieves gastric distention. • May be used by ED staff to lavage the stomach in cases of overdose
Gastric Tubes (2 of 2) • Proper placement can be confirmed by: • Aspiration of stomach contents with a syringe • Listening with a stethoscope as air is introduced into the tube with a syringe • Radiograph on arrival at the ED
Continuous Positive Airway Pressure (1 of 3) • Used in breathing patients who are alert and able to follow commands and have reduced function of the alveoli due to: • Congestive heart failure • Chronic obstructive pulmonary disease • Asthma
Continuous Positive Airway Pressure (2 of 3) • A tight-fitting mask is placed over the mouth and nose and connected to an oxygen source. • Delivers flow rates of at least 50 L/min • May be helpful in patients with severe respiratory distress
Continuous Positive Airway Pressure (3 of 3) • Courtesy of Respironics, Inc., Murraysville, PA. All rights reserved.
Intravenous Therapy • Develop a routine to follow as you assemble the appropriate equipment. • This will help you keep track of your equipment and the steps necessary to complete successful IV administration.
Indications • Many medications used by ALS crews are given by the IV route. • A fluid bolus may be indicated for patients who: • Are dehydrated because of vomiting or excessive diarrhea • Have experienced blood loss because of hemorrhage
Choosing an IV Solution (1 of 3) • In the prehospital setting, the choice of IV solution is limited to: • Isotonic crystalloids • Normal saline • Lactated Ringer’s solution • D5W is often reserved for administering medication.
Choosing an IV Solution (2 of 3) • Each IV solution bag is wrapped in a protective sterile plastic bag. • Guaranteed to remain sterile until the posted expiration date • Once the wrap is torn, the IV solution has a shelf life of 24 hours.
Choosing an IV Solution (3 of 3) • The bottom of each bag has two ports: • An injection port for medication • An access port for connecting the administration set • The more common prehospital volumes are 1,000 mL and 500 mL.
Choosing an Administration Set (1 of 3) • An administration set moves fluid from the IV bag into the patient’s vascular system. • Each set has a piercing spike protected by a plastic cover.
Choosing an Administration Set (2 of 3) • Drip sets come in two primary sizes. • A microdrip set allows 60 gtt/mL. • A macrodrip set allows 10 to 15 gtt/mL.
Choosing an Administration Set (3 of 3) • Preparing an administration set • Verify the solution and check for clarity. • To spike the bag with the administration set, follow the steps in Skill Drill 40-3. • Saline locks (buff caps) are a way to maintain an active IV site without running fluids through the vein.
Catheters • Hollow, laser-sharpened needle inside a hollow plastic tube that is inserted into a vein • Select the catheter size based on the: • Need for the IV • Condition of the patient’s veins • Location for the IV