Reading & Writing Across the Continuum Week 7
610 likes | 757 Vues
Join Deb Miller Allen for Week 7 of the Reading and Writing Across the Continuum course. This session will include discussions on Chapter 8, submission of content unit plans, and final announcements. We will focus on essential spelling rules including C-K, D-G-E, T-C-H, and the Final E rule. The writing process will be explored with extensions into practical applications. Breaks are scheduled at 5:15 and 6:30 PM. Enhance your understanding of spelling, writing techniques, and effective content planning.

Reading & Writing Across the Continuum Week 7
E N D
Presentation Transcript
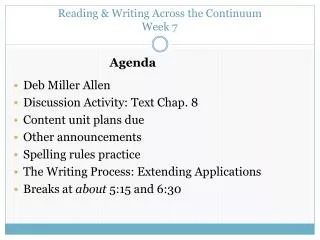
Reading & Writing Across the ContinuumWeek 7 Agenda • Deb Miller Allen • Discussion Activity: Text Chap. 8 • Content unit plans due • Other announcements • Spelling rules practice • The Writing Process: Extending Applications • Breaks at about 5:15 and 6:30
Spelling Rules Spelling Rules Review C-K Rule If a word ends in , the last part of the word is spelled with c-k. Examples? D-G-E Rule If a word ends in , the last part of the word is spelled with d-g-e. Examples?
Spelling Rules T-C-H Rule If a word ends in , the last part of the word is spelled with t-c-h. Examples?
Spelling Rules Final E Rule make + ing = making When a word ends in and you add an ending that, drop the E. bore + ed = love + ly= agree + able =
Spelling Rules Final E Rule make + ing = making When a word ends in and you add an ending that, drop the E. bore + ed = bored love + ly= agree + able =
Spelling Rules Final E Rule make + ing = making When a word ends in and you add an ending that, drop the E. bore + ed = bored love + ly = lovely agree + able =
Spelling Rules Final E Rule make + ing = making When a word ends in and you add an ending that, drop the E. bore + ed = bored love + ly = lovely agree + able = agreeable
Spelling Rules Doubling Rule grab + ed = grabbed When a word ends in, and you add an ending that begins with a vowel, you . run + ing= break + able = glad + ness =
Spelling Rules Doubling Rule grab + ed = grabbed When a word ends in, and you add an ending that begins with a vowel, you . run + ing = running break + able = glad + ness =
Spelling Rules Doubling Rule grab + ed = grabbed When a word ends in, and you add an ending that begins with a vowel, you . run + ing = running break + able = breakable glad + ness =
Spelling Rules Doubling Rule grab + ed = grabbed When a word ends in, and you add an ending that begins with a vowel, you . run + ing = running break + able = breakable glad + ness= gladness
Spelling Rules Y to I Rule happy + ness = happiness When a word ends in, and you add any endingexcept , you . friendly + er = carry + ing = scary + est =
Spelling Rules Y to I Rule happy + ness = happiness When a word ends in, and you add any endingexcept , you . friendly + er = friendlier carry + ing = scary + est =
Spelling Rules Y to I Rule happy + ness = happiness When a word ends in, and you add any endingexcept , you . friendly + er = friendlier carry + ing = carrying scary + est =
Spelling Rules Y to I Rule happy + ness = happiness When a word ends in, and you add any endingexcept , you . friendly + er = friendlier carry + ing = carrying scary + est = scariest
Spelling Rules Plural Variation If a word ends in, you add to make it plural. Examples?
Spelling Rules Contractions A contraction is made from two words. The apostrophe shows . Examples?
SPED 510 Reading & Writing Across the Continuum the Writing process Extending the applications
Review: Teaching the Writing Process Explicitly Lesson 1. Concept instruction–teaching the critical features with examples and flawed examples Lesson 2. Teaching the process Modelinghow to Prepare, Organize, and Write using a think sheet Lesson 3. Prompting students to plan and write a first draft together Lesson 4. Modeling Edit using an editing think sheet Prompted practice using flawed examples Partner editing
Review: Teaching the Writing Process Explicitly Lesson 5. Model revising Prompted practice using flawed examples Writing final draft Lesson 6. Proofreading Lesson 7. Individually selected topics Lesson 8. Individually selected topics (continued) Lesson 9. Individually selected topics (continued)
Teaching the Writing Process Extending the Application Critical Questions: How can fact paragraphs be extended to writing expository/informational reports? What are the critical features of an expository report, a descriptive paragraph, and a personal narrative. What are the text structures for imaginative stories and persuasive essays? How does the method of teaching critical features differ for imaginative stories than for other modes of writing?
Expository/Informational Reports Bird by Bird Starting with short reports Writing longer reports Acknowledgement: Based on ideas and materials from Anita Archer
Short Reports Prerequisite skill: Writing a fact paragraph. A. Start by examining the product. Lesson 1. Concept instruction a. Introduce the product by talking about its purpose: A short report explains or gives information about a specific topic using facts, details, and examples. Present a short but well-written example. Read together and point out critical features.
Short Reports c. List critical features: • A short report has several paragraphs. • It tells about one specific topic. • The first paragraph tells what it is or what it does. • It answers questions the reader might have about the topic. • It has facts, details and examples that make it easy to understand.
Short Reports d. Examine a second example. Read the example together, discussing its features as you read. : • Does it have several paragraphs? • Does it tell about one specific topic? • Does the first paragraph tells what it is or what it does? • Does it answer questions the reader might have about the topic? • Does it have facts, details and examples that make it easy to understand?
Short Reports B. Continue by teaching the process. Lesson 2. Review of the process and demonstration of planning a. Review critical features. b. Review the process (POWER): Prepare, Organize, Write, Edit, Rewrite. Briefly describe each step. c. Explain and model the Prepare part of the process while students observe.
Prepare Pick a report topic. Make it specific.
Prepare 2. Brainstorm questions concerning your topic. Example:traffic jams What are traffic jams? What causes traffic jams? How can traffic jams be prevented?
PRACTICE ACTIVITY With your partner, think of another possible topic for an informational report. Make it specific. Then think of 3-4 possible questions reflecting what the reader may want to know about the topic.
Prepare Gathering facts, information and examples for the report One idea: Index cards Another idea: Gathering Grid
Prepare Better idea! 3. Write each question in the center of a piece of paper.
Prepare Select appropriate reference materials: websites, encyclopedias, trade books, magazine articles. Choose at least two. Read your reference materials and map important facts, details, and examples around the topiclabel.
Prepare Lesson 3. Guiding students in preparing a report a. Review the five steps of preparing a report. b. Guide students through the steps of the process. Choose a broad topic related to a social studies or science unit (1) Pick a report topic; make it specific. (2) Brainstorm questions (3) Make think sheets. (4) Select reference materials.. (5) Map important facts.
Organize Lesson 4. Demonstration of organizing and first draft writing Put topic sheets in order. Show the order by putting a letter on each sheet.
Organize 3. For each topic sheet: • Cross out ideas you won’t use. • Connect ideas that go together. • Number ideas in the order you want to write about them.
Organize Teacher models on think sheet A. Teacher prompts students as, together, they organize think sheet B. Have students organize think sheet C themselves.
Write b. Model (or prompt) writing the first paragraph (W) from think sheet A. • Start with page A. • Write your facts as sentences. • Use paragraph form. c. Give your report a title. The title should: • Tell what the report is about. • Make the topic sound interesting to the reader. d. Have students begin writing the first drafts of their own report, (referring to the topic chosen and think sheets developed in Lesson 3). * or prompt
Edit Lesson 5. Introducing editing • First, edit for overall understanding • Next, edit each paragraph
Rewrite Lesson 6. Writing the final draft a. Have students write the final draft. b. Students may also add graphics and illustrations to their report. Lesson 7. Proofreading a. Review the proofreading strategy. b. Have students proofread sentences and make corrections on their final drafts.
Lesson 8, 9, 10, etc. Reports on other individually selected topics a. Review the critical features of a short report. b. Review strategy steps. c. Assist students as needed as they plan and organize first drafts on individually selected topics. d. Assist students as needed as they edit, partner edit, revise, and rewrite their narratives.
Longer Reports Lesson 1 a. Start by examining the product (a long report). b. Point out these differences: • A longer report answers more questions readers might have about the topic. • A longer report uses more references: at least 3. • A longer report has more paragraphs. • The longer report has an introduction. • The longer report has a conclusion. • The longer report has a bibliography.
Longer Reports Lesson 2 Guide students through the Prepare steps, modeling the new parts of the process. • For a longer report, you might brainstorm 5-6 questions. 1. What are seashells? 2. Where can seashells be found? 3. How are seashells formed? 4. Are there different kinds of seashells? 5. How are seashells used?
Longer Reports • NEW: Create a Bibliography page and write down your references:
Longer Reports Organize: Add think sheets for the Introduction and Conclusion.
Longer Reports Write: • Model how to write an introduction. The introduction should: • Gain the attention of the reader? • Tell what the report is about.
Longer Reports • Have students write the body of the report from their think sheets. • Model how to write a conclusion. The conclusion should: • Review the major points. • Restate a thoughtful idea from the introduction.