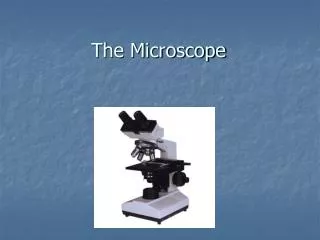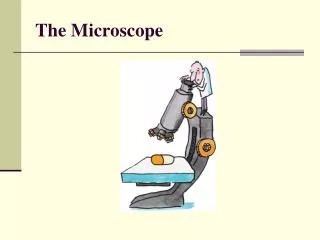
THE MICROSCOPE
THE MICROSCOPE. Outcomes: select microscopes effectively, safely, and accurately for collecting data (213-3 and 213-8) and compile, organize and display evidence to facilitate the interpretation of data. Why should we care about Microscopes?.

THE MICROSCOPE
E N D
Presentation Transcript
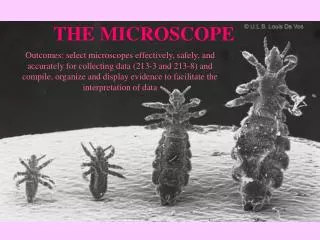
THE MICROSCOPE Outcomes: select microscopes effectively, safely, and accurately for collecting data (213-3 and 213-8) and compile, organize and display evidence to facilitate the interpretation of data
Why should we care about Microscopes? • Different types of microscopes have been used to look at human cells, identify minerals, solve crimes, see how freezing affects food, study metals, and find the causes of crop diseases. • They are an essential tool in medicine too: • Used to identify the causes of many deadly diseases like malaria and tuberculosis. • Help to find out why a person or animal died.
Why care about microscopes? • Scientists can even use a microscope to figure out where illegal drugs come from. • Ex. looking at opium crystals through a microscope reveals different shapes depending on where the poppies they came from were grown. This information can help pinpoint the source of illegal drugs. • The possibilities for what you can find out with a microscope are endless. • You might identify something new and it may even get named after you!
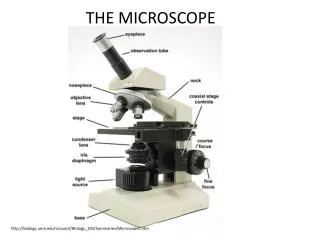
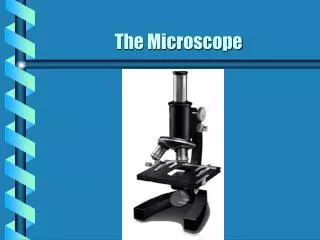
Parts of the Compound Light Microscope: 1. Ocular lens or eyepiece: ours are 10x magnification. You can get ones that are monocular or binocular. 2. Body tube: contains mirrors and prisms which direct the image to the ocular lens. 3. Nosepiece: holds the objective lenses, rotates, note the positive stops for each lens. 4. Objective lenses: usually 3-4 on our scopes, 4x, 10x, 43x, 100x oil immersion (red banding). Total magnification = ocular power x objective power.
5. Stage: platform on which slides are mounted for viewing; some scopes have mechanical stages. Learn how to clip the slide in position properly. 6. Stage Clips: holds the slide on the stage when magnifying. Always use your stage clips!
7&8. Focusing knobs: Located on side of microscope - Coarse adjustment knob: innermost or largest knob. Moves the stage the most, mostly used to get the specimen in the screen. USE ONLY WITH LOW POWER LENS • Fine adjustment knob: outermost or smallest knob. Moves the stage a little, brings the object into sharper focus
9. Arm: connects the body tube with the base; use it to carry the microscope. 10. Condenser Lens: directs light into the object being viewed 12. Light source: our scopes have built in light sources. The pushbutton switch is located (most often) behind the light lens on the base
11. Diaphragm: the diaphragm controls the amount of light which passes to the specimen and can drastically affect the focus of the image. Two types: • iris diaphragm: Look for a lever just under the stage near the front. • dial type: Just below the stage is a rotating dial having different size apertures (holes); this type is useful for creating a pseudo dark field effect.
Caring for your microscope To carry a microscope, always use one hand to hold the arm and your other hand to support the base. To keep the lens clean, never touch their surfaces with your fingers. Use only lens tissue (Kimwipes) to clean their surfaces. Do not adjust any of the focussing knobs until you are ready to use the microscope.
continued… 4. Always focus using the coarse adjustment knob first, with the low-power objective lense in position. 5. Do not use the coarse adjustment knob when either the medium-power lens or high-power objective lens is in position. 6. Cover the microscope when it is not in use, or store in the appropriate cupboard after finishing.
Microscope Safety Quiz TRUE OR FALSE??
Microscope Safety QuizTRUE OR FALSE?? • ALWAYS use two hands to carry the scope • TRUE: Always carry with two hands in an upright position so it won’t slip. NO EXCEPTIONS! NEVER carry the scope upside down, for the ocular can and will fall out
Any cloth can be used to clean the lenses of the microscope. • FALSE: Use lens paper to clean all lenses before each lab session and after using the oil immersion lens. • DO NOT EVER, NOT NOW, NOT EVER, USE ANYTHING BUT LENS PAPER TO CLEAN THE LENSES. Other papers are too impure and will scratch the optical coating on the lenses. Also, do not use any liquids whencleaning the lenses - LENS PAPER ONLY!
In order to get proper magnification and resolution, you should always adjust the objective lens so that it makes contact with the cover slip of a slide or wet mount stains being viewed. • FALSE: NEVER allow the lens of a light microscope to touch the coverslip/slide/ specimen!!! Any contact with corrosive chemicals (stains) could destroy the lens!!). (exception: oil only for oil immersion lenses)
If you have a problem using your microscope, a good idea would be to get out a tool kit and try to repair it on your own. • FALSE: NEVER attempt to repair your own microscope. Always notify your teacher when problems arise.
Use the stage clips to secure the slide in place. • TRUE (clearly!) If they’re there, they have a purpose.
Before returning your microscope to the storage area remove any slides from the stage and rotate the nose piece to the lowest power objective. • TRUE: The lowest power lens is farthest from the stage and, therefore, is less likely to be damaged. Slides left on the stage may also damage the lenses.
Remove the electrical cord by yanking it from the opposite end from the plug and then proceed to swing it over your head like a lassoo. (yelling “Yeehaw!”~) • FALSE: Remove the electrical cord from the socket by the plug. Do not pull on the cord!
Types of Microscopes • Light Microscope • Electron Microscope • Transmission Electron Microscope • Scanning Electron Microscope
The Electron Microscope • Electron microscopes use beams of electrons instead of light. • The electron beam is moved around using magnets which act like the lenses in an ordinary microscope. • First invented in Germany in 1932 (200x magnification – not clear) • 1937 Canadian James Hillier made one with 7000x magnification!!! • Electron microscopes can magnify objects over 2 000 000 times!!
Transmission Electron Microscope • Can examine structures within a non-functioning cell. • Thin section of specimen are prepared and coated in plastic. • Only dead cells can be observed. Helicobacter pylori White Blood Cell
Bacteria: E.Coli 3D image Specimens often coated in thin layer of gold to produce a sharper image. Scanning Electron Microscope head of insect Pollen granules
Completing A Scientific Drawing • Only use white unlined paper & sharp pencil • Make it large enough to see all details • Do not color; May stipple (dots) • Label using lower case letters, to the right with horizontal lines pointing to the object • Give it a title at the top • Total magnification used at the bottom • (eyepiece magnification * objective magnification)