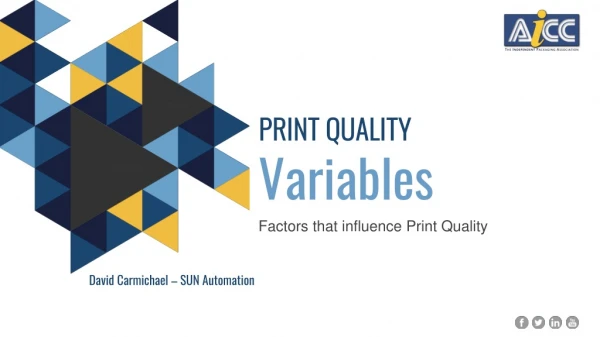
Mastering Print Quality and Colour Accuracy
Elevate your print projects to new heights! Discover expert strategies to evaluate print quality, master colour precision, and select outstanding printing services. Embark on your journey to print perfection today!

Mastering Print Quality and Colour Accuracy
E N D
Presentation Transcript
In the world of printing, the quality and colour accuracy of your printed materials can make or break the success of your project. Whether it’s a business brochure, a wedding invitation, or any other type of print job, understanding how to compare print quality and colour accuracy among different printing providers is essential to ensure the best results. In this article, we’ll delve deeper into this topic, providing a comprehensive guide with detailed insights and explanations. Step 1: Know Your Printing Needs – A Detailed Exploration Understanding your printing needs is not just a preliminary step; it’s the cornerstone of a successful printing project. To achieve the best print quality and colour accuracy, it’s crucial to begin with a clear, comprehensive understanding of what you require. Let’s delve deeper into the key considerations that form the backbone of this process: Purpose of the Project: The purpose of your print project is the driving force behind every decision you make in the printing process. It shapes the design, format, and quality requirements, ultimately determining the success of your project. Here are some common purposes for print projects: ● Promotional Material: If your project serves as promotional material for your business, it should be eye-catching, informative, and reflect your brand identity. It could be anything from business cards and brochures to banners and posters. ● Personal Celebration: In the case of personal projects like wedding invitations, birthday cards, or holiday newsletters, the purpose is to create a meaningful and memorable keepsake. Personal projects often prioritise aesthetics and sentimentality. ● Educational Material: Educational projects, such as textbooks or training manuals, focus on delivering information in a clear and structured manner. The primary purpose here is to facilitate learning. ● Artistic Expression: For artists and creatives, print projects can be a means of artistic expression. Whether it’s a gallery poster or a portfolio book, the purpose is to convey a unique and creative message. ● Information Dissemination: Newspapers, magazines, and newsletters aim to inform and engage readers. The purpose is to convey news and information effectively.
By defining the purpose of your project, you can make informed decisions about design elements, paper quality, and the quantity of prints needed. For instance, a promotional brochure may prioritise vibrant colours and high-quality paper to leave a lasting impression on potential customers, while a personal photo album could emphasise aesthetics and durability to preserve cherished memories. Size, Format, and Quantity: The size, format, and quantity of your print project play a pivotal role in determining the logistics and cost of production. Here’s a closer look at these factors: ● Size: The dimensions of your print project can vary significantly. Standard print sizes, such as letters or legal, offer convenience and cost-effectiveness. Custom sizes, on the other hand, allow for more creative flexibility but may involve higher production costs. Large-format printing, which includes posters and banners, demands special attention to design and printing capabilities. ● Format: The format of your print project refers to its layout and presentation. Common formats include booklets, flyers, brochures, postcards, and posters. The format you choose should align with your project’s purpose and the information or visuals you intend to convey. For example, a booklet may be ideal for an instructional manual, while a flyer could be a great choice for a promotional event. ● Quantity: The quantity you need is closely tied to your project’s purpose and intended distribution. If you’re producing materials for a small, niche audience, a limited print run may suffice. Conversely, large-scale promotional campaigns or widely distributed materials will require larger quantities. Print providers often offer volume-based pricing, so having a clear grasp of your quantity requirements helps in budgeting effectively. For instance, if you’re designing wedding invitations, you’ll likely want a smaller quantity but with an emphasis on quality and aesthetics. Conversely, if you’re creating promotional flyers for a major event, the quantity required will be higher, making cost-efficiency a priority. Moreover, choosing the right size, format, and quantity is not solely about logistics; it’s also about the visual impact and the message you want to convey. A larger format may be more eye-catching, while a compact design could be more practical. Therefore, aligning these factors with your project’s purpose is essential.
Paper, Ink, Binding, and Finishing: The choice of paper, ink, binding, and finishing options plays a crucial role in the quality and appearance of your printed materials. Let’s explore these elements in detail: ● Paper: Paper is the canvas of your print project. The type of paper you choose affects not only the visual appeal but also the tactile experience of your materials. There is a wide range of paper options available, including: ● Glossy Paper: Glossy paper provides a shiny, reflective surface that enhances colour vibrancy and sharpness. It’s often used for marketing materials to make images and graphics pop. ● Matte Paper: Matte paper offers a non-reflective, soft finish. It’s ideal for projects that require a sophisticated, understated look, such as fine art prints. ● Textured Paper: Textured paper adds depth and character to your print. It can convey a sense of luxury and uniqueness, making it suitable for high-end invitations or specialty products. ● Recycled Paper: Environmentally conscious projects may opt for recycled paper, which conveys a commitment to sustainability. The choice of paper should align with your project’s purpose and design. For instance, a corporate brochure may benefit from the slick appearance of glossy paper, while an elegant wedding invitation may demand a textured or matte paper for a more sophisticated feel. ● Ink: The selection of ink type is essential for achieving colour accuracy and vibrancy. The primary options include: ● CMYK (Cyan, Magenta, Yellow, Black): CMYK is the standard colour model used in colour printing. It’s based on four ink colours—cyan, magenta, yellow, and black. Using CMYK ensures that your printed colours are accurate and consistent. ● Pantone colours: Pantone is a standardised colour system used for precise colour matching. It’s often used in branding and logo materials to maintain colour consistency. ● Spot colours: Spot colours refer to premixed inks that are used to achieve specific colours. They are common in offset printing and can be essential for maintaining brand consistency.
Selecting the appropriate ink type is essential to achieve the desired colour accuracy. The choice often depends on your project’s colour requirements, such as matching a brand’s exact colour or achieving specific design effects. ● Binding: The method of binding your printed materials depends on the format and purpose of your project. Common binding options include: ● Saddle-Stitching: This method involves stapling the centerfold of a booklet or brochure. It’s cost-effective and suitable for materials with a lower page count. ● Perfect Binding: Perfect binding is often used for softcover books, catalogs, or magazines. It provides a clean, professional finish. ● Spiral Binding: Spiral binding is practical for materials that need to lay flat when open, such as calendars or cookbooks. ● Case Binding: Case binding is a durable, high-quality option often used for hardcover books. The choice of binding method depends on the durability and presentation of your project. For example, a high-end coffee table book may benefit from case binding, while a quick-reference manual could be efficiently bound using spiral binding. ● Finishing: Finishing options add the final touches to your printed materials, enhancing both their aesthetics and functionality. Some common finishing techniques include: ● Lamination: Lamination provides a protective layer, making your prints more durable and resistant to wear and tear. ● Embossing and Debossing: These techniques create raised or recessed design elements on the page, adding a tactile dimension to your prints. Budget and Deadline: Every project has budget constraints and deadlines. It’s essential to establish a clear budget that includes all printing-related expenses. This budget should account for the choice of paper, ink, finishing, and the printing provider’s services. Likewise, you must be aware of your project’s deadline, as this will affect your choice of printing provider and the feasibility of your project. Knowing your printing needs down to the finest detail will not only help you make informed decisions but also allow you to communicate your requirements effectively to potential printing providers. Being honest about your requirements is vital, as it forms the basis of your project’s success.
Step 2: Request Samples and References Once you’ve established your printing needs, it’s time to dig deeper into the capabilities and reliability of potential printing providers. Here’s how you can go about it: ● Samples: One of the most effective ways to evaluate a printing provider’s capabilities is to request samples. These samples can be from their previous work or small print samples they offer. By examining physical samples, you can see and feel the actual products they produce. This hands-on experience allows you to assess the paper quality, colour accuracy, and overall print quality. It’s a tangible way to determine if a printing provider can meet your standards. ● References: In addition to samples, you should also ask for references from the printing provider. References are testimonials from previous or current clients who have worked with the provider. Contact these references and inquire about their experience with the printing provider. Ask questions about the provider’s reliability, communication, adherence to deadlines, and overall customer service. Their feedback can provide valuable insights into the provider’s reputation and performance. Moreover, consider placing a small order with the printing provider. This serves a dual purpose: you can assess the quality of the product they deliver and gauge how well they handle the communication and ordering process. This step is all about gathering real-world evidence of the printing provider’s abilities. Step 3: Use Standard colour Systems To achieve consistent colour accuracy across different printing providers, it’s crucial to use standard colour systems. These systems provide a common language and reference for describing and matching colours across various devices and media. The most commonly used colour systems include: ● Pantone: Pantone is a widely recognised colour-matching system used in various industries, from graphic design to fashion. Each Pantone colour is assigned a unique code, making it easy to specify exact colours for your print project.
● CMYK (Cyan, Magenta, Yellow, Black): CMYK is the standard colour model used in colour printing. It’s based on four ink colours – cyan, magenta, yellow, and black. By specifying colours in CMYK, you can ensure that the printing provider reproduces your colours accurately. ● RGB (Red, Green, Blue): RGB is the colour model used for digital screens and devices. If your project involves both print and digital elements, it’s important to convert colours from RGB to CMYK to maintain consistency. Using these standard colour systems, you can communicate your colour preferences and expectations to the printing providers effectively. It also allows you to check if the providers can reproduce the desired colours accurately and consistently. This is particularly important for maintaining brand consistency and ensuring that your prints align with your vision. Step 4: Conduct a Press Check A press check is a crucial step in the print production process, especially when your project is complex, expensive, or mission-critical. It’s your opportunity to inspect the quality and colour accuracy of the printed materials before they go into mass production. ● In-Person Press Check: In an in-person press check, you or a designated representative visit the printing facility to review the printed materials as they come off the press. This hands-on approach allows you to make immediate corrections or adjustments if necessary. It’s a meticulous inspection to ensure that the print quality meets your expectations. ● Remote Press Check: When visiting the printing facility isn’t feasible, some printing providers offer remote press checks. In this case, you may receive digital proofs or live video streams from the press. While not as hands-on as an in-person check, it still provides an opportunity to review the print quality and colour accuracy. Conducting a press check is your final assurance that the printed materials align with your expectations. It ensures the highest level of quality and colour accuracy and is a must for projects where perfection is paramount.
Step 5: Evaluate the Results The final and critical step in comparing print quality and colour accuracy among different printing providers is evaluating the results. This step is where you determine the success of your print project by conducting a detailed assessment of various aspects. Let’s delve deeper into each of these evaluation methods: 1. Visual Inspection: Visual inspection is the first and most intuitive method of assessing your printed materials. It’s a visual examination of the final product that involves scrutinising the colour accuracy, print quality, and overall appearance. Here’s how you can effectively carry out a visual inspection: ● Colour Accuracy: Examine the printed colours and compare them to your original design. Look for any noticeable discrepancies or colour shifts. Ideally, the colours should match your specifications, ensuring that your branding and design elements are accurately represented. ● Print Quality: Evaluate the overall quality of the print. This includes checking for sharpness, clarity, and the absence of blurriness or pixelation. Ensure that text is legible and images are clear and vibrant. ● Overall Appearance: Consider the aesthetic aspect of your printed materials. Does the finished product look professional and visually appealing? Are there any blemishes, streaks, or misprints that detract from the visual appeal? Pay attention to details, as even small imperfections can be noticeable. Visual inspection is a subjective evaluation, relying on the human eye to identify potential issues. It’s a fundamental step that provides immediate feedback on the overall quality of your print project. 2. Magnification: For a more detailed and in-depth assessment, especially when dealing with fine details and small text, magnification tools come into play. These tools enable you to closely examine the smallest elements of your print project, revealing subtle flaws that may not be immediately visible to the naked eye. ● Fine Details: Magnification tools, such as magnifying glasses, microscopes, or loupe lenses, allow you to zoom in on fine details. This is particularly important when your
project involves intricate graphics, tiny text, or intricate patterns. By magnifying the print, you can ensure that every element is clear and free of defects. ● Small Text: When dealing with tiny text, magnification helps in confirming legibility. It ensures that even the smallest letters and characters are crisp and well-defined. This is crucial for projects that include legal disclaimers, contact information, or other small text elements. Using magnification tools provides a more comprehensive view of your print project, allowing you to catch even the most minute imperfections that could impact the overall quality. 3. Densitometry: Densitometry is a scientific method used to measure the density of printed ink on a page. It involves comparing the printed ink density with the expected values to assess the accuracy of colour reproduction. Densitometry is especially useful for ensuring consistent colour output and density across different printing providers. Here’s how it works: ● Measuring Ink Density: Densitometers are specialised devices that measure the amount of ink deposited on a page. Each ink colour—cyan, magenta, yellow, and black—is assessed individually. By comparing the measured densities with the expected values, you can identify any deviations. ● Consistency Check: Densitometry helps you ensure that colour density remains consistent throughout the print run. Inconsistent ink density can lead to variations in colour, impacting the overall colour accuracy of your project. Densitometry provides an objective and quantifiable assessment of colour density, allowing you to verify that your printed materials align with your colour specifications. ● Spectrophotometry and Colourimetry: Spectrophotometry and colourimetry are advanced scientific methods used to measure colour accurately. These tools provide precise data on colour accuracy and can help you ensure that the printed colours match your specifications with the utmost precision. ● Spectrophotometry: Spectrophotometers are devices that measure the spectral characteristics of light reflected from a printed surface. They can analyse the colour of a sample, break it down into its individual colour components, and provide precise colour
data. Spectrophotometry is widely used in industries where colour accuracy is paramount, such as graphic design and packaging. ● Colourimetry: colourimetry focuses on the visual perception of colour. It’s based on the human eye’s sensitivity to different colours and involves colour matching using standard colour spaces like CIELAB. colourimeters are used to measure colour values and compare them to established colour standards. These scientific methods are invaluable for projects that demand the highest level of colour accuracy, such as branding materials or product packaging. By utilising spectrophotometry and colourimetry, you can ensure that your printed colours are not only accurate but also precisely matched to your intended specifications. In summary, evaluating the results of your print project is a comprehensive process that involves visual inspection, magnification, densitometry, and advanced colour measurement techniques like spectrophotometry and colourimetry. These methods, both subjective and objective, provide a thorough assessment of colour accuracy and print quality, ensuring that your printed materials meet your standards and align with your vision. By meticulously assessing your prints, you can confidently determine the success of your project and make informed decisions when choosing printing providers for your future projects.