Download
1 / 42
420 likes | 1.1k Vues
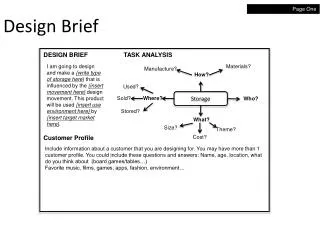
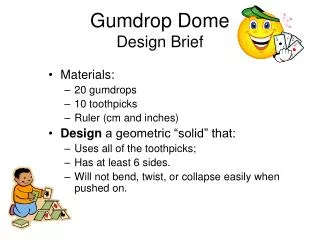
Gumdrop Dome Design Brief. Materials: 20 gumdrops 10 toothpicks Ruler (cm and inches) Design a geometric “solid” that: Uses all of the toothpicks; Has at least 6 sides. Will not bend, twist, or collapse easily when pushed on. .

E N D
Gumdrop DomeDesign Brief • Materials: • 20 gumdrops • 10 toothpicks • Ruler (cm and inches) • Design a geometric “solid” that: • Uses all of the toothpicks; • Has at least 6 sides. • Will not bend, twist, or collapse easily when pushed on.
Middle School Math & EngineeringNCTM ConferenceApril 2009 • Presented by Diane Leighty April 24, 2009 diane.leighty@powhatan.k12.va.us
Gumdrop DomeDesign Brief • Materials: • 20 gumdrops • 10 toothpicks • Ruler (cm and inches)
Create Your Design – 10 minutes • Design a geometric “solid” that: • Uses all of the toothpicks; • Has at least 6 sides. • Will not bend, twist, or collapse easily when pushed on. • Build your design. • Test your design by gently pushing on all sides. • If time allows improve your design or create a different design that will meet the criteria.
Share Results – 2 minutes • Share with the whole group your design, and how well it “worked” – was it able to sustain itself from the force of a “push”?
Application of the Lesson • What is needed in order for your students to successfully complete this design challenge? • How can you adapt this lesson for your students? • What questions can you ask the students?
Why are we here? • Problem Solving • Communication Skills • Team Work • Making Connections • Prepare students for their future!
Problem Solving • Allows for creativity – no one right answer • Challenges students of varying academic abilities • Hands-on activities effective way to help students retain math and science concepts • Encourages innovation • Prepares students for the real world
Communication Skills • Practice reading and following directions • Allows students to discuss and evaluate solutions with peers • Encourages variety of forms of communication – drawings, formulas, graphs • Practice oral presentations to a group
Group Work • Shows the power of working as a team and listening to the ideas of others • Allows students of varying skills to make useful contributions • Practice social skills needed in the work place
Pulling It All Together • Math • Science • Reading • Writing • Research • History • Oral Presentations
FUN! • Students are enthusiastic about meeting challenges • Allows students to develop skills within a context • Project based – students are able to follow the design cycle to see how an idea is developed, tested and improved
Engineering as a Career • Very marketable • Multiple disciplines • Research, design, sales, management • Energy efficiency, Alternative energy, Homeland Security, Global Warming
Get the Word Out! • Develop student interest beginning at an early age. • Develop critical thinking, creativity, problem solving skills. • Develop connections with real world situations. • Understand and convey to students that careers in engineering can be fun, challenging, highly rewarding. • Types of engineering are varied and changing constantly – newest are biomedical and nanotechnology engineers
Engineering Skills For ALL! • Communication • Creativity/Inventiveness • Critical Thinking Skills/Problem Solving • Applied math & science • Research skills • Collaboration – team work!
What Engineers DO…. • Math • Calculating beam sizes, duct sizes, concrete thickness • Utilizing formula’s • A lot of simple addition, subtraction, multiplication, division • Must Avoid Mistakes! • Science • Analyze Forces (Wind, Earthquake, Gravity) • Understand Airflow (Ductwork) • Utilize Heat Transfer Theory (Cooling Water, Boilers)
Knowledge and Skills Required • Routine Daily Requirements • Reading Graphs • Field Measurements • XYZ Coordinate Interpretation • Develop Microsoft Excel spreadsheets • Converting metric to US Standard • Converting “Ft-in” to decimal • Scaling drawings (ratio)
Engineers must have…. • Communication Ability • Verbal • With team members • With Clients • Written • Reports • Letters • Memos • Ability to work with a team
Standards Of Learning • Measurements, unit conversions • Size, shape, material characteristics • Data collection, graphical representation • Scale models • Valid conclusions from analyzing data • Experimental results in written form
Website for Virtual Field Trips& Summer Engineering Camp • http://www.msinnovation.info/ACEC/index.html • http://engineeringcampmyers.com/experiences
How Engineering? The Nuts and Bolts
Before • Try the activity yourself • Collect all materials • Box materials for groups • Set ground rules with your class • Determine groups • Decide what you will assess and build it into the directions
Introduction • Share your enthusiasm • DO NOT pass out materials until time to use them (generally AFTER giving students time to think and design) • Give clear, specific instructions both verbally and in writing • You group the students (2 – 4 in a group) • Try to make competition against a standard rather than group against group
While They Work • Walk around and ask students to tell you what they are doing and why • Encourage sharing of ideas between groups ( collaborating, not copying) • Ask questions to help students who are stuck – refrain from telling them what to do • Make sure students are recording data
To Wrap Up • Allow time for sharing results that includes self assessment and reflection – Did they accomplish what they set out to do? Why or why not? • Connect the activity back to the real world through research or examples of the principles they have worked with
After They Finish • Record results in photographs, sound or video recordings, displays, graphs • Leave time to clean up • Provide opportunities for improvements or extensions
Tips • Set time limits – allow more time than you think you will need • Establish a signal to tell students to stop working and listen • Give each team member a role – materials manager, information officer, spokesperson • Be flexible, smile, have fun!
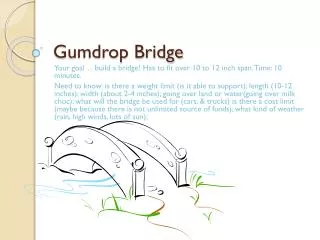
Design Challenge Pasta Bridge Design and build a bridge • that will hold the most weight.. • that uses no more than 1lb of pasta, including no more than one lasagna noodle. • that will allow a matchbox car to cross. The car must not fall through the bridge as it crosses. • that spans 12 inches across two classroom chairs. 10 minutes to plan – 20 minutes to build – TEST – 15 minutes to improve design – 10 minutes for final discussion
Materials for Design Challenge • Various types of pasta: (wagon wheels, spaghetti, lasagna, linguine, rotini, ziti, shells) • Yard stick or tape measure • Glue • Tape • String • Matchbox Car • ½ and 1 lb. Baggies of Sand or alternate weights • Paper Plates • Scales for weighing pasta
Discussion • What did you learn from the activity? • How can you use this activity to differentiate instruction? Meet the needs of students with learning disabilities?
Design Challenge • Build a tower using only straws and modeling clay on a piece of heavy stock cardboard that serves as a base. Raise one end of the cardboard base so that the tower tilts by 10 degrees. Measure the angle with a protractor. Wait 30 seconds, then record any change in the tower's appearance. • Increase the base tilt by another 10 degrees. Wait 30 seconds, then record any change in the tower's appearance. Continue increasing the tilt angle by ten-degree increments, until the tower topples. 10 minutes to build tower – 15 minutes to complete tests on the tower.
Materials for use • straws • modeling clay • scissors • heavy stock cardboard • protractor
Discussion of Activity • How can the activity be varied? • Can other SOL be incorporated into the activity? • How could you make this activity interdisciplinary? Include other teachers (English, History, Science, Art)?
New Boxes From Old • Take a cereal or other packaging box and cut it up to make a new box that is cube-shaped. It should have the same volume as the original box.
Materials for Challenge • Rectangular boxes, such as cereal, crackers, or pasta; and boxes containing macaroni and cheese, pudding or cake mixes; or boxes containing hot chocolate, tea, or instant oatmeal packets. Computer diskette boxes and boxes holding contact lens solutions and toothpaste also work well. • Masking tape, transparent tape • Sturdy scissors, one per pair if possible • Rulers (metric), one per pair if possible • Large envelopes or zipper-style plastic bags (a mix of quart and gallon size), one per pair • Large paper clips, one per pair
Cost-Effective Egg Drop • You are on a team on the TV show “The Apprentice.” Donald Trump explains your task, “The business world is always about one thing, money. However, not only do products from companies have to be of quality, but they must also be cost-effective. Your task is • to create a container protective enough that an egg placed inside will not break if dropped at the lowest possible price. • At the end of the task, all teams will test their packages by dropping them from a window of “Trump Tower.” The team with lowest cost but effective packaging will win the task. The rest of you, I will see in the board room, and someone will be fired.”
Materials for Challenge • Eggs, enough for one per student and some extra (in case the egg breaks before dropping) • Tape: Duct tape, masking tape, clear tape, packaging tape etc. • Glue Foam rubber • Scissors Bubble wrap (6” squares) • String Cotton Balls • Rubber bands Balloons • Ziploc bags Cardboard boxes • Styrofoam Plastic Cups
Smores Packaging • Create a package that will keep your s’more cool and dry. It will need to keep your chocolate and marshmallow from melting during the heat test (45 seconds under a hair dryer on high). Your package will also need to keep your graham cracker and marshmallow dry when 1 cup of water is poured over it. Cost is another concern. Engineers want to design good packages at the lowest possible cost. You have a budget of 50 cents which means you can not spend more than 50 cents on your package but you can spend less.
What’s Next? • Start with one per 9-week grading period • Integrate into regular curriculum – NOT an add-on! • Keep it SIMPLE! • Work together – Collaborate with other teachers. • Ask your PTO/parents to contribute materials.
Where can we get the lessons? • Powhatan website: • www.powhatan.k12.va.us/teachers/engineering/EngineeringLessons.html • Children’s Engineering websites • http://www.childrensengineering.com/ • http://www.doe.virginia.gov/VDOE/Instruction/CTE/te/K-5/Engineering/ • http://www.childrensengineering.com/everydaydesignbriefs.htm
PBS Websites • Building Big – PBS website http://www.pbs.org/wgbh/buildingbig/educator/index.html • Zoom – PBS website http://pbskids.org/zoom/activities/sci/