Junctional Emergency Treatment Tool
190 likes | 425 Vues
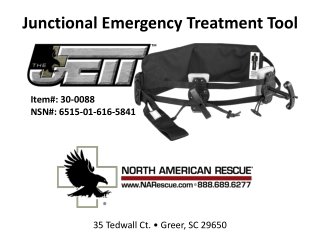
™. Junctional Emergency Treatment Tool. Item#: 30- 0088 NSN #: 6515-01-616-5841. 35 Tedwall Ct. • Greer, SC 29650. Anatomy of the JETT ™ ( Junctional Emergency Treatment Tool). Instructions Overview.

Junctional Emergency Treatment Tool
E N D
Presentation Transcript
™ Junctional Emergency Treatment Tool Item#: 30-0088 NSN#: 6515-01-616-5841 35 Tedwall Ct. • Greer, SC 29650
Instructions Overview The Junctional Emergency Treatment Tool (JETT™) includes two individually adjustable compression pads in a single tool, allowing for simultaneous occlusion of blood flow to both lower limbs (bilateral) with an easy to apply, pre-assembled, ready-to-use belt solution. The unique design of the JETT™ allows for patient transport while the device is in place and includes a lanyard and toggle solution to ensure that the Threaded T-Handle (windlass axle) does not loosen due to vibration or bumps during transport. In cases where there are bilateral injuries, the JETT™ offers a simple, safe solution for occluding blood flow to both lower extremities. This expanded capability is built into every JETT™, meaning that with standardized training the device will be pre-positioned for rapid bilateral application whether the casualty requires a unilateral or bilateral treatment. High extremity wounds in the thigh/groin region where tourniquets cannot be placed or are less effective require equipment such as the JETT™ to stop the bleeding and potentially save the life of a casualty that would otherwise bleed out in minutes. Penetrating trauma, blast injuries and amputation are examples of injuries that may require treatment with this device.
STEP 1: PATIENT ASSESSMENT 1.1 Determine that the injury is not amenable to treatment with a standard tourniquet (ie: high in the thigh and/or groin region) 1.2 Determine if a bilateral or unilateral application is required
STEP 2: PATIENT PREPARATION 2.1 Remove any gear, items in pockets or debris that might interfere with the placement of the JETT™ or cause additional trauma.
STEP 3: DEVICE DEPLOYMENT 3.1 Unroll the device in preparation for application
STEP 3.2: PLACEMENT of the JETT™ 3.2.A Slide the belt with “This Side Toward Casualty” facing up under the body at the lower back 3.2.B Locate the Superior Iliac Crest and Pubic Bone, which are connected by the Inguinal Ligament 3.2.A 3.2.B
STEP 3.2: PLACEMENT of the JETT™ 3.2.C Lifting the hips, position the belt under the buttocks so that the buttocks pad is centered behind the casualty and the pressure pads are immediately below (inferior to) the Inguinal Ligament
STEP 3.3: PLACEMENT of PRESSURE PADS 3.3.A Palpate to determine the location of the Inguinal Ligament 3.3.B Angle the pressure pads parallel to the Inguinal Ligament (approximately 30°) pointing midline toward the feet making sure that both pads are correctly positioned 3.3.C Ensure that casualty’s genitals are clear of the area where the pads will be positioned 3.3.B
STEP 3.4: BUCKLE & TIGHTEN 3.4 Buckle the belt, then firmly tighten by pulling the loop handle while stabilizing the belt with your other hand on top of the belt on the casualty (remove ALL slack)
STEP 3.5: REASSESS PAD PLACEMENT 3.5 Reassess the pad placement to ensure that they are still in the correct location below the inguinal ligament
STEP 3.6: TIGHTEN 3.6 With one hand on the base plate, grip the threaded T-handle and rotate it clockwise to tighten
STEP 3.7: HEMOSTASIS 3.7 Increase pressure until bright red bleeding stops (hemostasis is achieved) and If the extremity is intact, check to confirm that distal pulse has been occluded
STEP 3.8: LOCK 3.8 Insert the toggle into the opening on the threaded T-handle (pulling the handle in clockwise rotation) and cinch it tight at the base plate in order to secure the device
STEP 3.10: RECORD TIME 3.9 Repeat as necessary with the other threaded T-handle for bilateral injuries 3.10 Note time of application on Writeable Area
STEP 4: MONITOR 4.1 Assess frequently (every 5 minutes) to ensure that bleeding is still controlled (or based on your medical protocols) 4.2 Assess after any movement to ensure that pressure pads are in correct location and that pressure was not reduced during movement (hemostasis is maintained) 4.3 Device should only be removed under physician supervision (or based on your medical protocols) 4.4 Device application should not exceed 4 hours
Warnings & Cautions Warning: • Do not leave applied for longer than 4 hours • Inguinal use only Caution: • For use by trained personnel • Tighten until hemostasis is achieved • Reassess casualty condition after movement or every 5 minutes (or based on your medical protocols) • Caution: Federal law restricts this device to sale by or on the order of a physician