Scaling and Dimensioning
Scaling and Dimensioning. Lecture 17. Topics For Today. Review Dimensioning Discuss Scaling and How To Use Your Scale AutoCAD 2D Book – Lesson #6 Wednesday – Lab #6 Gears, Sprockets and Chains Thursday – Quiz on Dimensioning!!!. Review – Dimensioning Terminology. Dimensioning .

Scaling and Dimensioning
E N D
Presentation Transcript
Scaling and Dimensioning Lecture 17 Autumn Quarter
Topics For Today • Review Dimensioning • Discuss Scaling and How To Use Your Scale • AutoCAD 2D Book – Lesson #6 • Wednesday – Lab #6 • Gears, Sprockets and Chains • Thursday – Quiz on Dimensioning!!! Autumn Quarter
Review – Dimensioning Terminology Autumn Quarter
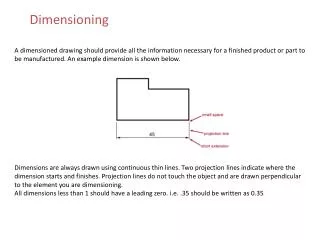
Dimensioning • The dimensions will be placed so that they all read from one direction • Lettering will be 1/8” high (3 mm) • Do Not Crowd – Use guidelines • 1st Dimension at least 3/8” (10 mm) away from object • Additional Dimensions should be placed ¼” (6 mm) away from the previous dimension Autumn Quarter
Review – Dimensioning Standards (.25 in) (.375 in) Autumn Quarter
Dimensioning Guidelines • Dimension positive cylinders on the non-circular view. • Dimension negative cylinders (holes) on the circular view • Precede the numerical value with a phi for all diameters Autumn Quarter
Dimensioning Cylinders • Positive cylinders Negative cylinders Autumn Quarter
Dimensioning Cylinders - Standards • Radii are used for half a cylinder or less • Locations of cylindrical features are given from center line to center line • Do not dimension to the curved boundary of a cylinder Autumn Quarter
Dimensioning – A Procedure • Sketch Dimensions lightly on the first pass • Dimension Positive Shapes • Dimension negative shapes • Locate features by • Finished surface to finished surface • Finished surface to center line • Center line to center line • Other locating dimensions Autumn Quarter
Dimensioning – A procedure (cont.) • Add notes • Check dimensions for completeness • Are any of them crowded? • Edit dimensioning • Darken dimensions Autumn Quarter
Symmetry Holes in the center of a cylindrical object are automatically located Dimensioning Basic Shapes– Assumptions Autumn Quarter
Scaling Drawings – Your Scale Full Size Inches – Increments of 50ths Full Size Metric – Increments of millimeters Full Size Inches – Increments of 1/32 Half Size Inches – Increments of 1/16 Autumn Quarter
Notes on Scaling Drawings • Always Dimension with the True Dimension… no matter what the scale. • Be sure to include the scale used for the drawing in the title block. • There are many more scales available with different multiplication factors. Autumn Quarter
Dimensioning with AutoCAD • Follow AC2D Lesson 6 closely to gain a working knowledge of the options for dimensioning with AutoCAD. • Setting up the dimension properties to match the drawing is very important. Autumn Quarter
AutoCAD Dimensioning Notes • Linear Dimension vs. Aligned Dimension • A Linear Dimension is Horizontal or Vertical between any two points • An Aligned Dimension is created on the angle between the two points • Ordinate Dimensions • Locate all features with X or Y values based from an origin point • Used commonly with CNC Machines Autumn Quarter
Common AutoCAD Dimensioning Practices • Do not adjust text size, arrow size, leader size, etc. in the Dimension Style Manager • Rather, adjust the Scale factor so all parts of the dimension are re-sized together. • Lesson 6 instructs you to adjust specific values – follow the steps given for this drawing. • Use Scale for most other drawings. Autumn Quarter
PRACTICE PRACTICE PRACTICE!!! • The best way to learn any technique/subject is to practice • Try opening previous drawings and adding dimensions • Be careful to fully dimension the part without over-dimensioning • Ask the TA/Professor to check your work Autumn Quarter
Assignments • Dwg 33 – AutoCAD 2D – Lesson #6 • Basic Dimensioning and Notes • Follow lesson – Print with standard title block • Dwg 34 – Scale 1-4, Scale 2-4, & Scale 3-4 • Practice with reading and creating dimensions on different scales. • Follow instructions on sheets Autumn Quarter


