Chapter 5 Interrupts
Chapter 5 Interrupts. Checklist. The following tools will be used in this lesson: MPLAB X, Integrated Development Environment (v1.8 or later, free) MPLAB XC16, C compiler (v1.11 or later, free) The following pieces of documentation will be used during this lesson:


Chapter 5 Interrupts
E N D
Presentation Transcript
Checklist The following tools will be used in this lesson: • MPLAB X, Integrated Development Environment (v1.8 or later, free) • MPLAB XC16, C compiler (v1.11 or later, free) The following pieces of documentation will be used during this lesson: • PIC24FJ128GA010 Datasheet –DS39747 (latest rev.) • PIC24F Reference Manual Chapter 29. - RTCC Make sure they are available and/or installed and ready to use on your computer. You can download them from Microchip web site at: http://www.microchip.com/mplabx And http://www.microchip.com/xc16
Interrupt Service Routines • The PIC24 keeps all interrupt vectors in Interrupt Vector Table (IVT) • MPLAB XC16 compiler automatically associates interrupt vectors with “special” user defined C functions as long as : • They do not return any value (use type void). • No parameter can be passed to the function (use parameter void). • They cannot be called directly by other functions. • Ideally, they should not call any other function. • The following example illustrates the syntax that could be used to associate a function to the Timer1 interrupt vector: void__attribute__ (( interrupt)) _T1Interrupt ( void) { // interrupt service routine code here... } // InterruptVector
The _ISR Macro • In practice, to avoid the verbose syntax __attribute__ (( interrupt)) it is more convenient to use the predefined macro _ISR as in the following example: void _ISR _T1Interrupt (void) { // interrupt service routine code here... } // _InterruptVector
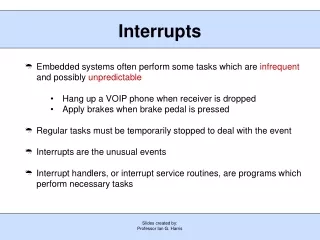
PIC24 Interrupt Sources • The PIC24 GA010 family allows for the following list of interrupt sources: • 5 x External pins with level trigger detection • 22 x External pins connected to the Change Notification module • 5 x Input Capture modules • 5 x Output Compare modules • 2 x Serial port interfaces (UARTs) • 4 x Synchronous serial interfaces (SPI™ and I2C™) • Parallel Master Port • And among the internal sources we count: • 5 x 16-bit Timers • 1 x Analog-to-Digital Converter • 1 x Analog Comparators module • 1 x Real Time Clock and Calendar • 1 x CRC generator • NOTE: The PIC24F GA1, GB1, DA2 and GB2 families add several more peripherals sources each capable of generating additional interrupt events, including: several additional Timers, a USB interface (GBx), and a CTMU or touch sensing interface.
Interrupt Control • Each interrupt source has 5 associated control bits, allocated in various special-function registers: • The Interrupt Enable bit (suffix-IE). When cleared, the specific trigger event is prevented from generating interrupts. When set, it allows the interrupt to be processed. At power on, all interrupt sources are disabled by default. • The Interrupt Flag (suffix –IF).A single bit of data, is set each time the specific trigger event is activated. Once set, it must be cleared (manually) by the user. • The Priority Level (suffix –IP). Interrupts can have up to 7 levels of priority. Should two interrupt events occur at the same time, the highest priority event will be served first. Three bits encode the priority level of each interrupt source.Within an assigned priority level there is also a natural (or default) priority amongst the various sources in the fixed order of appearance in the IVT table. • The PIC24 current execution priority level is kept in the SR register in three bits referred to as IPL0..IPL2. • Interrupts with a priority level lower than the current value of IPL will be ignored. • At power on, all interrupt sources are assigned a default level of 4 and the processor priority is initially set at level zero.
Interrupt Nesting • Interrupts can be nested so that a lower priority interrupt service routine can be, in his turn, interrupted by a higher priority routine. • This behavior can be changed by the NSTDISbit in the INTCON1 register of the PIC24. • When the NSTDIS bit is set, as soon as an interrupt is received, the priority level of the processor (IPL) is set to the highest level (7) independently of the specific interrupt level assigned to the event. • This prevents new interrupts being serviced until the present one is completed. In other words when NSTDIS bit is set, the priority level of each interrupt is used only to resolve conflicts, in the event that multiple interrupts should occur simultaneously. In this case all interrupts will be serviced sequentially.
Template for Using Timer1 main() { // 2. initializations _T1IP = 4; // this is the default value anyway TMR1 = 0; // clear the timer PR1 = PERIOD-1; // set the period register // 3. configure Timer1 module T1CON = 0x8020; // enabled, prescaler 1:64, internal clock // 4. init the Timer 1 Interrupt control bits _T1IF = 0; // clear the interrupt flag, before _T1IE = 1; // enable the T1 interrupt source // 5. main loop while( 1) { // your main code here } // main loop } // main
Template for Using TMR1 (cont) // 1. Timer1 interrupt service routine void _ISR _T1Interrupt( void) { // insert your code here // ... // remember to clear the interrupt flag before exit _T1IF = 0; } //T1Interrupt
Example using Timer1 #include <config.h> intdSec = 0; int Sec = 0; int Min = 0; // 1. Timer1 interrupt service routine void _ISR _T1Interrupt( void) { // 1.1 your code here dSec++; // increment the tens of a second counter if ( dSec > 9) // 10 tens in a second { dSec = 0; Sec++; // increment the seconds counter if ( Sec > 59) // 60 seconds make a minute { Sec = 0; Min++; // increment the minute counter if ( Min > 59)// 59 minutes in an hour Min = 0; } // minutes } // seconds // 1.2 clear the interrupt flag _T1IF = 0; } //T1Interrupt main() { // 2. initializations _T1IP = 4; // this is the default value anyway TMR1 = 0; // clear the timer PR1 = 25000-1; // set the period register TRISA = 0xff00; // set PORTA LSB as output // 3. configure Timer1 module T1CON = 0x8020; // enabled, prescaler 1:64, internal clock // 4. init the Timer 1 Interrupt control bits _T1IF = 0; // clear the interrupt flag, before _T1IE = 1; // enable the T1 interrupt source // 5. main loop while( 1) { // your main code here PORTA = Sec; } // main loop } // main
Testing Timer1 Interrupt • Build for Debugging using Debug>Debug Project • Set a breakpoint • Run the application • Until breakpoint reached
Enabling the Secondary Oscillator OSCCON register: • The contents of the OSCSCON register are protected. • They require use of a special unlock sequence. • MPLAB XC16 offers a convenient builtin funciton: __builtin_write_OSCCONL( 2);
Initializing the RTCC • The RTCC is protected by lock sequence, use a specific XC16 builtin function to unlock it: __builtin_write_RTCWEN(); • After this step, initializing the RTCC, set the date and time as follows: _RTCEN = 0; // disable the module // example set 12/01/2006 WED 12:01:30 _RTCPTR = 3; // start the loading sequence RTCVAL = 0x2006; // YEAR RTCVAL = 0x1100; // MONTH-1/DAY-1 RTCVAL = 0x0312; // WEEKDAY/HOURS RTCVAL = 0x0130; // MINUTES/SECONDS // optional calibration //_CAL = 0x00; // enable and lock _RTCEN = 1; // enable the module _RTCWREN = 0; // lock settings
Practical Rules • Keep it short and simple. Make sure the interrupt routines are the shortest/fastest possible, and under no circumstances should you attempt to perform any processing of the incoming data. Limit the activity to buffering, transferring and flagging. • Use the priority levels to determine which event deserves to be serviced first, in the case two events might be triggered simultaneously. • Consider very carefully whether you want to face the additional complexity and headaches that result from enabling the use of nested interrupt calls. If the interrupt service routines are short and efficient, the extra latency introduced by waiting for the current interrupt to be completed before a new one is serviced is going to be extremely small. • If you determine that you don’t really need nesting, make sure the NSTDIS control bit is set to prevent it: _NSTDIS = 1; // disable interrupt nesting (default)
Notes for C Experts • The interrupt vector table (IVT) is an essential part of the crt0 code segment for the PIC24. Two copies of it are required to be present in the first 256 locations of the program memory. • One is used during normal program execution, • The second (or Alternate IVT) during debugging. • These tables account for most of the size of the crt0 • Subtract 256 words (or 768 bytes) from the file size of the executable code to obtain the “net” code size.
Notes for the Assembly Experts • The _ISRFAST macro can be used to declare a function as an interrupt service routine and take advantage of a set of four shadow registers. • This allows the processor to automatically save the content of the first 4 working registers (W0-W3, i.e. the most frequently used ones) and most of the content of the SR register in special reserved locations, without requiring the use of the stack • The shadow registers provide the fastest possible interrupt response time. • There is only one set of such registers. This does not limit us to use only one interrupt in the entire application, but rather to use _ISRFAST only in applications that have all interrupts with the same priority level or, if multiple levels are in use, reserve the _ISRFAST options only for the interrupt service routines with the highest level of priority.
Notes for the PIC MCU Experts • The PIC24 peripheral libraries can help simplify use of complex peripheral modules. For example the RTCC initialization: #include <rtcc.h> RtccInitClock(); RtccWrOn(); // unlock and enable writing to RTCC rtccTimeDateTD = { 0x06, 0x20, // year 0x01, 0x11, // day, month 0x12, 0x03, // hour, weekday 0x30, 0x01};// sec, min RtccWriteTimeDate( &TD, FALSE); • But it can also obfuscate your code and create dependencies on files you have limited/no control on. What do you expect the following call to do? mPORTACloseAll()
Tips and Tricks • Since version 3.00 of the PIC24 C compiler (now XC16) a new attribute has been added as required for every interrupt service routine: • Use __attribute__ (( no_auto_psv))To relieve the compiler from the need to save the PSV register (see chapter 6). This is the fastest option. • Use __attribute__ ((auto_psv))To ask the compiler from to save the PSV register. This is the safest option if you are modifying the contents of the register in your application. • You can redefine the _ISR and _ISRFAST macros to include by default the no_auto_psv attribute: #if __C30_VERSION__ >= 300 #undef _ISR #define _ISR __attribute__((interrupt,no_auto_psv)) #undef _ISRFAST #define _ISRFAST __attribute__((interrupt,shadow,no_auto_psv)) #endif
Tips And Tricks • The PIC24 architecture has no single control bit that disables all interrupts • The assembly instruction disican disable interrupts for a limited number of cycles. • If there is a section of code that requires all interrupts to be temporarily disabled, you can use the following pair of inline assembly commands to bracket the code section: __asm__ volatile("disi #0x3FFF"); // disable temporarily all interrupts// your code here// ... DISICNT = 0; // re-enable all interrupts
Suggested Excercises • Rewrite the RTCC interrupt example to use the rtcc.h library and blink an LED at 1Hz • Output time and/or date on a 7 segments LED display using a few I/O ports
Recommended Readings • Curtis, K. E. (2006), Embedded Multitasking, Newnes, Burlinghton, MAKeith knows multitasking and what it takes to create small and efficient embedded control applications. • Brown, G. (2003), Flying Carpet, The soul of an airplane, Iowa State Press, Ames, IOGreg has many fun episodes from the real life of a general aviation pilot who uses his plane for recreation as well as a family utility.
Online Resources • http://www.niell.org/nixie_clock/Nixieclock.htmlA PIC based clock with a retro style, using glowing Nixie tubes • http://www.aopa.orgThis is the web site of the Aircraft Owners and Pilot Association. Feel free to browse through the web site and access the many magazines and free services offered by the association. You will find a lot of useful and interesting information in here.