Driver
U Suck at Golf makes high quality, entertaining golf products that bring you and your buddies more good times on and off the course.

Driver
E N D
Presentation Transcript
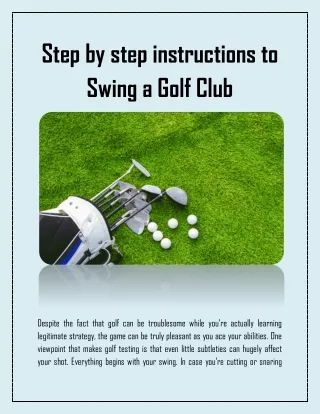
Step by step instructions to Swing a Golf Club Despite the fact that golf can be troublesome while you're actually learning legitimate strategy, the game can be truly pleasant as you ace your abilities. One viewpoint that makes golf testing is that even little subtleties can hugely affect your shot. Everything begins with your swing. In case you're cutting or snaring
your ball, in case you're simply not getting the correct yardage out of your shot, or in the event that you've never hit a golf ball in your life, here's the inside scoop on the best way to get the best out of your golf swing. Click here Driver Section 1 Mastering the Stance 1. Start with your front foot somewhat in front of the ball. Spot your feet so your front foot is somewhat in front of the ball; this way your club will rest close to the focal point of your body. Your feet ought to be somewhat more extensive than shoulder-width separated with your golf ball toward the center of your position. •Play your greater clubs, (for example, half breeds or drivers) more towards your front foot, and more modest clubs (like irons) towards the center of your position. •If you're a right-gave player, it will be the inverse. Your left foot will be around one foot — regularly less — nearer to the opening than the ball is. •If you're a left-gave player, your correct foot will be nearer to the opening than the ball is. 2. Draw near enough to the ball so the center of the club face arrives at the ball with your arms out straight yet loose. Try not to stand so near the ball that you need to twist your elbows to oblige the club situating. Simultaneously, don't stand so distant that your arms are completely outstretched. You need your chest area to be marginally bowed toward the ball and your middle twisted away
from the objective, however not significantly so. Slant your chest area somewhat away from your objective. Take more here Driver 3.Check your arrangement. Arrangement is the bearing your feet and shoulders are pointed in. You need to adjust your feet and shoulders with the goal that a fanciful line passing from your back shoulder to front shoulder — and back foot to front foot — is pointed straightforwardly at your objective. This is called keeping your arrangement "square." •To check your arrangement, get into your position and spot a golf club on the teeing territory along the tips of your toes. Step back from the golf club and take a gander at the heading it's pointing in. It ought to be pointed either at your objective, or at the actual opening. 4. Curve your knees marginally. Rather than being a hardened life sized model, attempt to receive an "athletic position" by bowing your knees somewhat. Attempt a work on swing with your knees absolutely directly to perceive how hard it is — and how unnatural it feels — to swing a golf club without somewhat bowed knees. •Balance your weight somewhat on the bundles of your feet. Albeit this is more troublesome than adjusting your weight behind you, it is simpler to move your weight forward, and afterward in reverse, as you play out your swinging movement. Click here Driver
•Distribute your weight equitably on both your feet. Get the impact points of your feet off the ground marginally one after another, moving your weight between your front and back foot, to figure out an even position. Despite the fact that you'll move your weight during your backswing, and afterward your downswing, you'll need to get going with an even weight dissemination. Section 2 Getting a Grip 1. Whichever grasp you decide to utilize, hold the club with a casual hold. A casual grasp will permit the club head to turn over when you swing, giving you better exactness and generally better distance. This is alluded to as shutting through effect. Likewise with most things in golf, the harder you attempt, the more awful things get, as investing more effort may make your muscles tense, obstructing your swing. Attempt to keep it agreeable and characteristic. 2. Attempt the baseball hold. This is an essential grasp like how baseball players hold a slugger, henceforth the name. Note: For every one of the three of the accompanying holds, the left hand (on a right-gave golf player) will be similarly situated. Read more here Driver •Place your left hand under the golf club, bending your fingers over the club with the goal that they hold it safely. The golf club ought to rest right where your palm meets your fingers; your left thumb ought to be guided straight down the club toward the club head.
•Bring your correct hand under the golf club so your correct pinky finger is serenely contacting your left forefinger. Your correct hand ought to be simply underneath your left on the club. •Tighten your grasp on the highest point of the club so the help part of your palm lays on top of the left thumb. Your correct thumb ought to point marginally left-of- focus, while your left thumb ought to point somewhat right-of-focus. 3. Attempt the cover hold. While there's nothing amiss with the baseball hold, the fingers are basically separated from each other, which hinders your hands from cooperating. The cover hold associates the fingers by covering them. This grasp offers to some degree greater strength. •Start off with your mind in the baseball hold. Rather than keeping your correct pinky and your left pointer one next to the other, lift your correct pinky up. Move your correct hand up the grasp, and rest your correct pinky either on the joint between the left file and the left center, or on top of the actual pointer. 4. Attempt the interlocking hold. This hold offers likely the most steadiness of the three by interlocking the left and right hands on the underside of the club. This hold is utilized by golf greats Jack Nicklaus and Tiger Woods. Click here Driver To accomplish the interlocking hold, get going with the baseball grasp. Then, fit the left pointer between the joint of the correct pinky and ring fingers while taking the correct pinky and fitting it between the left file and center fingers. Your correct pinky and left list are basically holding each other in an interlocking "x."
5. Pick whichever hold feels the most agreeable. Each hold has its particular focal points and disservices, and there are a lot more varieties of these grasps that we haven't referenced — frail or solid holds, and so on Investigation with golf holds until your swing feels generally good and you fix a portion of your most noticeably awful inclinations. •The interlocking hold, for instance, is generally endorsed for golf players with little hands (think Nicklaus), while the covering grasp is difficult for individuals with more modest hands to utilize. •If you're having issues with a cut (ball moves left and afterward drastically ideal for right-gave golf players), think about changing endlessly from the "feeble" variant of your hold in case you're utilizing it. •If you're having issues with a snare (ball moves right and afterward significantly left for right-gave golf players), think about changing ceaselessly from the "solid" rendition of your grasp in case you're utilizing it. Section 3 Swinging the Club 1-Start your backswing. The backswing is the place where you lift the club back from its beginning position and bring it over your head. Attempt to pivot the middle on the backswing by moving load from the bundle of your front foot to the wad of your back foot. Focus on the three unmistakable periods of the backswing: •Phase one: Move the hands straight back while keeping them near your back leg. Attempt to keep your front arm straight while you do this. As the club head pivots
in reverse between your left arm and the club shaft, the shaft turns out to be practically corresponding to the ground. Click here Driver •Phase two: Continue a slight wrist break as you move your arm corresponding to the ground. The club ought to be generally opposite to one side arm (for right- gave golf players). The finish of the club ought to point marginally outside the golf ball. •Phase three: Rotate your middle back significantly further with the goal that the clubhead voyages somewhat behind your hands at the highest point of the backswing. Your front arm should twist somewhat during the last period of the backswing. 2. Finish your downswing. When swinging down, it should feel like you are hauling or somewhat pulling the top of the club so it falls behind all the other things. Permit the 90-degree lower arm/shaft point to build, at that point loosen up quickly through the effect region. This makes enormous clubhead speed while permitting the body to move moderately gradually and look after control. •Right before sway, attempt to bolt your front arm again so that it's totally straight once more, exactly how it was the point at which you began your backswing. •During your downswing, move your weight from the chunk of your back foot to the bundle of your front foot. Permit your knees to advance toward your objective. Attempt to keep your front knee flexed, particularly in case you're hitting a driver, as this will help your front leg take your weight.
3. Make a point to have the shaft inclining forward toward the objective right now of effect. This will help guarantee that your hands are in front of the club head during sway, which thus helps the club head strike the ball prior to traveling through the ground. Remember to utilize your hips to swing energy into your shot; don't simply depend on your hands to create the force. Read Driver 4. Make sure to finish. It isn't basic how far back you take the club, however on the off chance that you discharge the club accurately, you ought to finish totally. Your belt clasp will confront the objective, the club will have swung through to a position to some degree behind you, and you will be adjusted on your lead foot with the back foot adjusted on its toe. You ought to have the option to easily hold this completion as you watch the ball take off into the distance. •Keep your eyes ready during the backswing, downswing, and finish. Try not to lift your head when you hit the ball to see where it's going; this will just purpose you to mis-hit the ball. Keep your eyes ready until you've completed your finish. 5. Try not to attempt to pulverize the ball energetically — simple does it! Similarly as you shouldn't attempt to choke your golf club in your grasp, you shouldn't attempt to pound the golf ball energetically. The main factor in accomplishing distance and heading is structure, and acceptable structure is typically forfeited when you attempt to go mountain man on the golf ball. Section 4 Correcting Common Problems
1. Right the cut. On the off chance that your ball is bending during departure from left to appropriate (for a right-gave golf player), attempt to keep your knees twisted and flexed during the backswing.It's common to need to fix your back knee during the backswing however attempt to evade the motivation. Try not to allow your knee to travel in reverse either; keep it flexed in position and under the hip. 2. Right the snare. A snare is a ball that goes marginally to one side (for a right- gave golf player) and afterward significantly to one side. This happens when the ball has a counterclockwise turn, implying that it's being hit from option to left rather than from back to front. Visit here Driver •Try taking a gander at your hold. In case you're a right-gave golf player and multiple knuckles on your left hand are noticeable when you hold the club, go to a "more vulnerable" grasp and ensure just two knuckles are obvious. •Make sure your position isn't pointing excessively far to one side. You can attempt to overcompensate a little to one side, yet this can likewise exacerbate the snaring on the off chance that you overcompensate excessively. Spot a golf club down on the ground to ensure you're pointing directly at your objective. 3. Right swings that don't hit the ball "unequivocally." Sometimes your swing is "fat," others it's "slim," and your drive doesn't get as much distance as you'd like. The most widely recognized solution for this issue is holding your head down and your eye ready all through the backswing. •When you move your head back in the backswing, you're really expanding the distance between the base of the neck and the lower part of the ball. This makes it
a lot harder to hit the ball directly right up your alley. Watch out for the ball and you ought to be driving longer and all the more reliably. Click this Driver