Download
1 / 8
450 likes | 2.13k Vues
Blood collection. The two sources of blood for examination in the laboratory are:

E N D
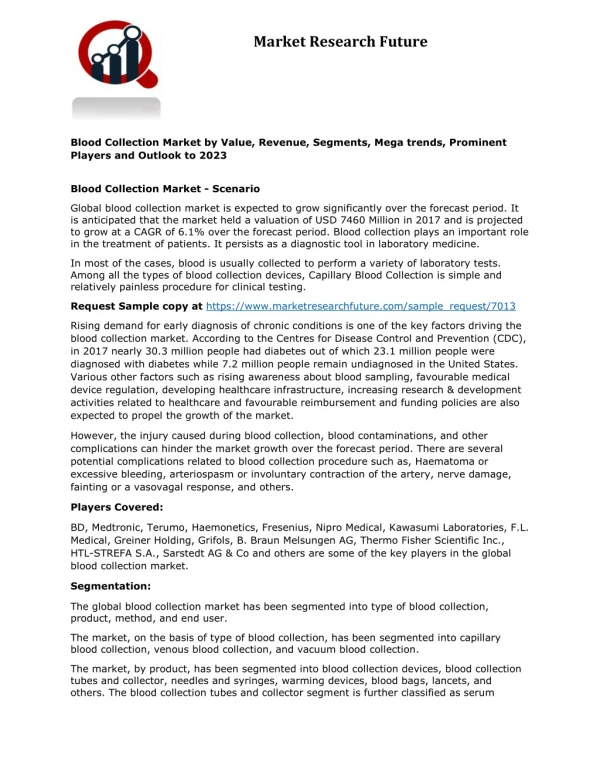
Blood collection The two sources of blood for examination in the laboratory are: Venous Blood Collection (Phlebotomy): this is obtained by venipuncture, preferably in the antecubital fossa. It is preferred for most hematological examinations and drains a large volume of blood. Its color is dark red. Capillary blood: this is usually obtained by skin puncturing of the pulp of the finger, earlobe, or the heel (in infants). It recover a small volume of blood Note: arterial blood may be needed for blood gas analysis; this procedure is not usually performed in the hematology laboratory.
Differences between Capillary and Venous Blood 1. Blood from a skin puncture is a mixture of blood from arterioles, veins and capillaries, and it contains some interstitial and intracellular fluid. 2. The packed cell volume (PCV), red cell count (RBC) and haemoglobin concentration (Hb) of capillary blood are slightly greater than in venous blood. 3. The total leucocyte, neutrophil, and monocyte counts are higher in capillary blood 4. Conversely, the platelet count appears to be higher in venous than in capillary blood this may be due to adhesion of platelets to the site of the skin puncture.
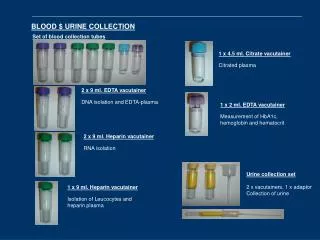
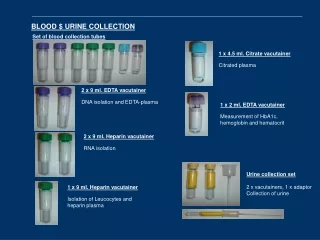
A. VENOUS BLOOD COLLECTION (PHLEBOTOMY) Equipment 1. Blood container with and/or without anticoagulants 2. Tourniquet: it is used to locate the patient vein by blocking venous, but not arterial, blood flow. Blood pressure cuff at 40 mm Hg can also be used as a tourniquet. 3. Disposable Plastic Syringes and Disposable Needles The needles gauge refers to the diameter of the needle, the lower the number, the larger the needle is ; those of 19 or 21G are suitable for most adults. 23G are suitable for children. Large needles (low gauge number) allow blood to flow quickly but may result in post puncture bleeding and hematomas. Small needles (high gauge number ex. 23-25 gauge) are suitable for children but allow the blood to flow slowly and microclots may form additionally they may result in hemolysis.
Types of syringes used for venipunctureVacutainer system is composed of a multi-sample vacuum collection needle and a disposable tube holder. syringewith a syringe needle is used to collect blood from patients with difficult, small or fragile veins. Collecting with a syringe and needle is especially useful when the phlebotomist needs to control the amount of vacuum being applied to prevent or reduce the chance of the vein collapsing. Butterfly (Winged Collection Set) needles are used to draw blood from patients with small or fragile veins. 3. Alcohol (70%) and gauze square or alcohol wipes and gloves 8. Adhesive plastic strips.
General guidelines for drawing blood- Syringe Technique: • The needle to be used should be a sterile needle. It should be of a suitable gauge in order to facilitate rapid flow into and out of the syringe and thus minimize hemolysis. • Apply tourniquet around arm 3-4 inches above venipuncture site. Do not leave tourniquet on the arm for more than 1-2 minutes. • Cleanse venipuncture site with an appropriate antiseptic, usually betadine , 70% isopropyl alcohol or iodine, using circular motion towards the periphery. Allow area to dry before proceeding for two-fold benefit: it prevents the burning sensation for patient when venipuncture is performed and it prevents hemolysis of the blood. • Grasp patient's arm firmly, placing the thumb 1-2 inches below the chosen site to draw skin taut. This will anchor the vein. If possible, make sure the patient's arm is in a downward position. This will help ensure that no back-flow from the tube will go into the patient's arm • Perform venipuncture entering the vein keeping bevel side of needle up.
6. Grasp barrel of syringe firmly and pull firmly on plunger until required amount of blood is in the syringe. 7. Ask patient to open fist and remove tourniquet as soon as the blood begins to flow into the syringe or evacuated tube. 8. Lightly place gauze or cotton pad upon venipuncture site. 9. At the completion of the venipuncture, immediately after the needle is removed from the vein apply direct pressure to puncture site. 10. Ask patient keep arm fully extended, elevate arm and with the other hand apply pressure over puncture site for a few minutes. Check site for bleeding. If site is still bleeding, continue direct pressure. Do not bandage until bleeding has completely stopped. Once bleeding has stopped, apply bandage over the gauze pad at site. Advise patient to leave bandage on for 15 minutes. 11. Using a syringe to collect blood dictates the need for transferring the collected blood to a test tube before it clots.Never forcefully eject the collected blood from the syringe into the vacuum tube.
Inappropriate Sites for Venipuncture: • Scars from burns or surgery or obvious scarring from excessive needle use. • Haematoma or bruised areas. These are painful and yield erroneous test results. • The side of a mastectomy. The restriction of the tourniquet on tissue and the possible introduction of bacteria through the needle may cause lymphoedema. • Oedematous extremities will also alter test results due to the increased fluid accumulation. • The arm receiving IV infusion.
Patient care after venipuncture • Check the patient’s arm for signs of bleeding or bruising. • If the patient is on anticoagulant therapy, allow extra time to ensure the site will not start bleeding again. • Never wipe the puncture site with a gauze swab as this will take the clot from the surface and bleeding will recur. • Cover the puncture site with a small plaster or micropore. Extra gauze under the plaster may be necessary if the patient is on anticoagulants. • Now the patient is requested to minimise arm movement for a few minutes in case the clotting process has not totally completed. • Watch for any signs of pallor or dizziness – blood tests will often affect patients. • If the patient feels unwell do not encourage him/her to leave on their own until you are satisfied.