Week 2.1
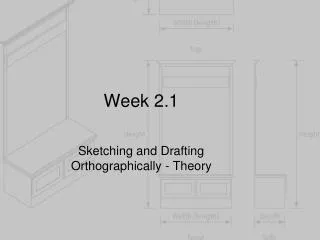
Week 2.1. Sketching and Drafting Orthographically - Theory. Objective. This chapter discusses how to sketch and draft orthographic views of furniture pieces. Introduction. An orthographic drawing is one that shows two of an object’s three dimensions

Week 2.1
E N D
Presentation Transcript
Week 2.1 Sketching and Drafting Orthographically - Theory
Objective • This chapter discusses how to sketch and draft orthographic views of furniture pieces
Introduction • An orthographic drawing is one that shows two of an object’s three dimensions • Interior designers frequently draw orthographic views of rooms and furniture • Drawings are created via orthographic projection
Why Orthographic Drawings are Used for Construction Purposes • Produces drawings that document space and objects in a way that is measurable and proportionately accurate
How Many Drawings are Required? • Depends on the project • The number needed is the number that completely describes the project
Sketching • Freehand drawing used to think a problem through and solve it • Sketched lines should be neat, long, and continuous, not short and overlapped • Tip the pencil in the direction of movement • Keep your eye on the point where the line ends to help draw lines straight
Orthographic Sketching • Visualize a cube with its sides unglued, lying flat on a table, each plane containing a view of the object • Lines that are parallel to the picture plane show up true length • Lines that are skewed to the picture plane show up shorter than actual length • Lines that are perpendicular to the picture plane show up as points
Square Table Figure 4-4 3-D (perspective) drawing of a square table
Square Table (cont’d.) Figure 4- 5 Top and front orthographic views of the square table from Figure 4-4. All lines are parallel to the picture planes they are in, making the views true in shape and size
Round Table Figure 4-6 3-D (perspective) drawing of a round table
Round Table (cont’d.) Figure 4-7 Top and front orthographic views of the round table from Figure 4-6. The shelves in the front view are foreshortened, because they are not parallel to the frontal picture plane
Orthographic Drafting • From an isometric drawing of a cabinet • Top • Drawn from a birds-eye view, looking straight down • Front • Drawn standing on the floor, looking directly at it • Side • Drawn standing on the floor, facing one side of the cabinet and looking directly at it
Chest of Drawers Figure 4-10 Perspective drawing of a chest of drawer
Chest of Drawers (cont’d.) Figure 4-13 Side view of the chest of drawers from Figure 4-10 projected from the side view
Drawing a Third View • A third view of any object can be created by measuring the width and depth in the available views with a scale or dividers • Draw lines that delineate the picture planes • Project lines straight up from the front view to the top • Information from the side view must now be transferred to the top using the quadrant directly above the side view
Drawing a Third View (cont’d.) • Project lines from the side view up to the angle and, where they intersect, project lines horizontally to the top view • All the lines needed to draw the top view now exist • Darken the perimeter of the object
Corner Cabinet Figure 4-18 3-D (oblique) view of a corner cabinet
Corner Cabinet (cont’d.) Figure 4-19 Top and front orthographic views of the cabinet from Figure 4-18. The angled sides are foreshortened. The middle section has the thickest line weights because it is closest to the viewer
Summary • Orthographic drawing is the method by which architectural drawings are created • Views are created by projecting points and lines from one plane to another • In theory these drawings are called top, front, and side views • Architecturally, these drawings are floor plans, interior elevations, and sections • Originals are measurable and accurate portrayals of what the item looks like

