Adding Photo to Agent Profile
50 likes | 66 Vues
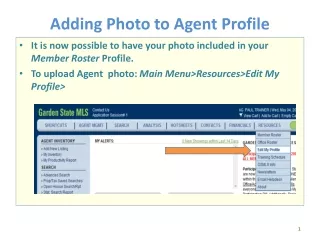
"It is now possible to have your photo included in your Member Roster Profile. Follow these steps to upload your agent photo and verify it on your profile page."

Adding Photo to Agent Profile
E N D
Presentation Transcript
Adding Photo to Agent Profile • It is now possible to have your photo included in your Member Roster Profile. • To upload Agent photo: Main Menu>Resources>Edit My Profile>
Edit Image Resource Screen • Select the Manage My Banner tab. • Click on Edit in the Toolbar. • The Edit Banner screen will display. Click on the Browse button. 2 1
Selecting and Uploading Photo • A Browse window will open. Browse to the appropriate directory (1) and photo file (2), select the photo file, and click on Open (3). • Your photo will appear: 1 2 3
Save and Verify Photo • Be sure to click on Save in the Toolbar to save your photo to your Roster Profile. • Then click on Close. • To verify your photo: Main Menu >Resources >Member Roster>enter your Last Name >Search. 2 1
Verify Photo • Find your name on the list and click on your Agent ID number. • Your new profile page will display, with the photo: