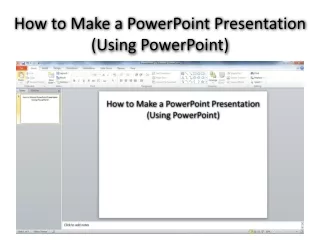
How to make a simple powerpoint show
How to make a simple powerpoint show It’s easy easy easy! Making a simple ppt - tutorial View Insert 1 Format Background colour Setting background colour and pictures Tools Slide show Custom animation Insert 2 Insert Picture Movies and sounds Tables Charts Draw menu Picture menu

How to make a simple powerpoint show
E N D
Presentation Transcript
How to make a simple powerpoint show It’s easy easy easy!
Making a simple ppt - tutorial View Insert 1 Format Background colour Setting background colour and pictures Tools Slide show Custom animation Insert 2 Insert Picture Movies and sounds Tables Charts Draw menu Picture menu Right click Action settings Animating text /images Storyboard – planning Saving the ppt as a powerpoint show Index
Tutorial 1 • Set background colour for all slides. Format – background. • Set font and font colour for text boxes. View – Master- Slide Master • Set toolbars for powerpoint. View – toolbars – tick Draw and Picture • Return to Normal view (Click on Close Master view) • Select slide layout. Slide show – custom animation. Ctrl+M to insert a new slide. This will bring up the menu for layout on the right of the screen. • Click on Title and type in slide title, or click on edge of title box and back-space to remove it. • Enter information into text box. • Change the colour of the text box background – Click on edge of text box then click on paint icon’s arrow. Pull down menu to select a different colour.
Sample slide 1 • Background • Font and font colour set • Slide title set • Text and content layout chosen • Information in text box • Text box background colour changed
Tutorial 1.2 • Animate the title. Right click on the title to bring up the menu. Select Custom Animation. • Choose Add Effect – Entrance, and then an entrance effect. • At Start, choose With Previous. The title will enter at start of show, or with music backing if you put that in. (See Tutorial 2) • Animate text box. Repeat actions above except, this time at Start, choose, After Previous. Note that the text box animation info is second in the time-line. • (To change its position in the sequence of events, use the Re-order button at the bottom of the custom animation window. You will have to change the Start command as well.)
Sample slide 2 • Title animated • Text box animated by selecting outside line around box
Tutorial 1.3 • Insert a picture Insert – Picture – From file / Click on icon • Resize picture to fit. • Insert a text box under picture and type in a caption. Insert – Textbox /Click on icon • Right click on picture and select Action Settings. • Tick Play Sound. • Scroll through list to Other Sound and click on this. • Browse to Powerpoint tutorial folder and select a sound file.
Sample slide 3 • Picture inserted and resized. • Text box and caption • Sound assigned to picture through Action Settings Alberta was a gentle soul.
Tutorial 1.4 • Draw a shape using Autoshapes or a shape tool from bottom of screen. • Colour it using the paint tool. • Select the shape by clicking on it. • Add a 3D or shadow effect to it from the tools menu. • Select the shape and in the Custom Animation window choose Add Effect – Motion path. Choose a path. • Change the path so it fits on the stage properly. Click on the path and position the green arrow to the point you want the action to commence at and the red arrow where you want it to end. Turn the rotation handle if necessary to alter the angle of the path.
Sample slide 3 • Shape drawn and coloured. • 3D effect added to shape. • Motion path added to shape. Alberta was a gentle soul.
Tutorial 1.4 • Insert a new slide – Insert – New Slide / CTRL M • Insert a movie. Re-size it using re-sizing handles. – Insert Movies and Sounds – Movie from file – browse to Powerpoint Tutorial folder • Select When clicked to start. • Insert an Action Button –Auto shapes – Action buttons • Action settings – Hyperlink to first slide. • Insert text box from Draw toolbar at bottom of screen. • Add text. • Change background colour of text box and of text using tools from Draw toolbar.
Sample slide 4 Movie inserted and resized. Action button inserted and linked to first slide. Text box inserted, coloured and text colour changed.
Tutorial 1.5 • Set up a quiz. • Insert a new slide. • Give it a title – e.g. a question • In the text box, write 4 possible answers to the question. • Beside each answer, draw a shape. • Use the action settings to add a negative sound to each of the wrong answers. • Use the action settings to add a positive sound (or a hyperlink to a positive message slide) to the correct answer.
Where is Djibouti? • Africa • India • China • New South Wales
The menus • View. • Master – where you can adjust the format of the text boxes. • Toolbars – where you will find the rulers and grids & drawing toolbars to open.
Menus - Insert • New slide – inserts new slide into powerpoint • Shortcut = ctrl+ m • Picture – get picture from file etc. or use drawing/picture toolbar
Menus - Format • Slide design – access to slide templates • Slide layout – access to pre-set layouts of text boxes or tables • Background – see next slide
Menus – Format - Background • Background – allows you to set your own background colours.
Setting background colour • Open colour charts. • Follow prompts. • Apply to one slide or all.
Setting background colour /picture • Open Fill Effects
Formatting fonts etc. • View – Master – Slide master – adjust fonts according to the style, colour and size you want.
Tools menu Tools – customise – toolbars Use to set up the tools that you will need for doing your ppt. This configuration will then be stored for your next ppt.
Menu – Slide show • This is where all the action stuff is. insert an icon slide transition templates – how each slide will give way to the next
Menu – Slide show – Custom animation Will bring up the custom animation menu on the right hand side of the screen. You need this to organise: the order in which things appear the movement of objects and text within the slide the amount of time between events sound effects and entrance / exit effects
Custom animation menu • Add effect. • Select an object on your stage by clicking on it or highlighting it if it is text. • Choose an effect. • Choose how it will start. • Choose its speed.
Object’s effects menu Choose how the object’s animation will start. Choose what will happen to the object after it has done its action. Choose a sound effect to accompany the action. Choose the timing of the event.
The Insert Menu useful for inserting a sound-track for entire ppt. can hyperlink to other slides in this ppt or other programs etc.
Picture menu If you have set up your toolbars for Draw and Picture, you will find all these functions at the bottom of your screen.
Movies and sounds menus Hint: gather all your resources together in one folder before starting to make the ppt. To put in a backing track, Insert – Movies and Sounds – Sound from file You can control the size of the window the movie shows in. You can record a sound or speech through the microphone on your computer to be played on a click or some other trigger.
Tables menu Insert – Tables Work out what you want in advance – although, you can change the number of columns and rows through the Tables menu (set it up with View – Toolbars – Tables) You can also resize a table as you can anything else.
Insert - Charts Inserts a chart and an Excel document that you can alter to fit your requirements. Only the chart will show later. Right click on the chart itself to bring up the chart options.
Draw menus Click on arrow selection tool. Drag over several objects to select them. Apply the Group command to lock them together. Apply the Order command to a selected object to bring it forward or put it behind another object. Apply the Align or distribute to line up objects in various ways.
Draw menus – text boxes • Text boxes are the basic tool of powerpoints. You can give them a coloured background, surround them with a coloured line, or apply three dimensional effects and shadows to them. • You can also animate them using the Custom Animation window.
Draw menu – Fill colour • Use the transparency effect on text boxes to bring the text into relief. To make it work you have to select the object first.
Picture menu Insert picture from file Crops picture Lines around the picture Format picture – to wrap text around it etc. Rotates picture Brightness controls Colour controls Contrast controls
The Right Click Menu Most commonly used functions and menus Click on an object to get this menu. Click on an unoccupied part of the stage to get this menu.
Right Click - Action Settings • Action settings allows you to assign an action to an object – i.e. turn it into a sort of button so that when it is clicked certain things happen: • hyperlink to something else • open another program (browse through C drive, Program files to locate it) • play a sound file
Action settings Select how you want to activate this action You can browse to add in sound files of your own choice.