Download
1 / 18
180 likes | 334 Vues
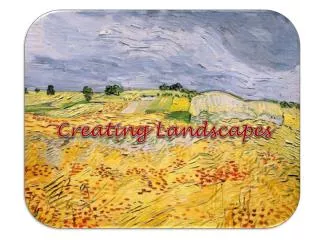
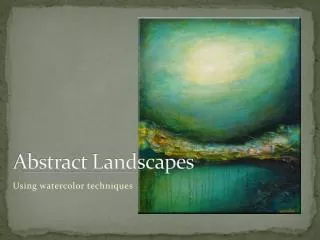
Abstract Landscapes. Watercolour painting. Water colours. Watercolours are a transparent medium meaning that the paper shows through the paint. This gives the illusion of light. This gives a luminous effect.

E N D
Abstract Landscapes Watercolour painting
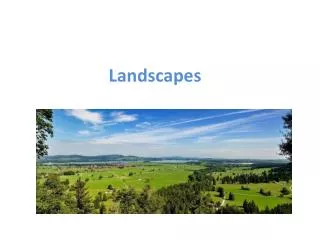
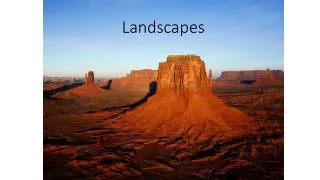
Water colours • Watercolours are a transparent medium meaning that the paper shows through the paint. This gives the illusion of light. This gives a luminous effect. • This is why watercolours are good for natural scenes – they represent light in a realistic way.
Worksheets • You will each get 3 sheets of paper to try out the following techniques. • Keep your worksheets, they may become your project.
Flat wash: Select a darker colour (it is easier to see). You want there to be a good amount of paint in your brush, about 50% paint and 50% water. Starting in the upper corner opposite your drawing hand, touch your brush to the page and gently pull it in a straight line across the top of the page. Make your second stroke by refilling your brush with paint and start the next line the same way you did the first. Make sure to over-lap the bottom edge of your previous stroke. Repeat the process until your wash is complete. This seems like it should be easy... But it is NOT. If you are unhappy with your results, try again!
Wet on Wet: Start by wetting down your square. You can just use a brush with water to do so. You don't want the paper to be soaked just dampened. If the paper is shiny it is too wet, blot it with paper towel. You can create any image with this technique, it lends itself to softer imagery - it creates a blurry representation - almost dream-like. The reason this happens is because the paint "bleeds out". Think of the paint as a train and the water as tracks, wherever there is tracks the train can go. Try it and see. As the paper continues to dry the paint will spread less and less.
Wax and masking techniques: There are several methods of masking your image. Masking means that you are preserving the whiteness of the paper even as you paint over it. Wax and Crayons - simply colour with wax or a light crayon the area you want to remain light. Then you can paint over it without worrying about it becoming coloured. Masking Tape - Masking tape can be used to keep an area completely white even when painted over. After your image is dry you can just peel of the tape. There is also such a thing as Masking Fluid, but it smells like fish and it is a little harder to use.
Graded Wash: The graded wash is done in much the same way as the flat wash. Mix your paint with 50% colour and 50% water, then mix a separate batch with about 25% colour and 75% water. The first step is exactly the same. Start with your darker mixtures in the top corner of the square and paint a line across the top. The second stroke is different because you need to dab your brush on a paper towel to remove excess paint then dip it into the lighter mixture. Then you can proceed to paint your second stroke, overlapping the previous line to make an even transition. Continue to remove more and more paint from your brush as you go. as you get to the lightest parts it is recommended to add water to the light mixture.
Dry Brush: Dry brush is the opposite of Wet on Wet. You may want to start this image off with a rough sketch done very lightly in pencil. It has to be so light because watercolour is a transparent medium - which means you can see though it. Dry brush is done on dry paper with the brush as dry as you can make it. Dry brush is often used to make an image textured. If you are trying to make a on something you have painted make sure to let your image dry otherwise your dry brush technique will not work, it will become a wet on wet!
Salt: Salt is a fun and simple watercolour technique. You simply paint what you want to paint and while it is still wet sprinkle salt on the image. Let the whole thing dry then you can gently rub it off!
So now that you have all these skills, continue to work on your 3 sheets using a combination of any of these techniques. * Think nature*
Flush Joining • Flush joining is when you cut paper and join it back together seamlessly. • We will be cutting apart ALL 3 of your pictures and swapping around the pieces to make one or more new image!
Flush Joining • To flush join your paper properly… • Stack all you sheets on top of each other. Line them up well. • Decide where and how you want to cut • 3 – 5 cuts are usually best, big pieces work better. • Using an X-Acto knife and a cutting mat, cut through all the layers at the same time. • This will mean that you can put them back together in anyway you please.
Flush Joining • Once you have all your “puzzle” pieces, assemble them in any way you please. • Using masking tape we will carefully join the pieces together.
Embellishments • Anything ‘extra’ you can think of. • Add text • Sew • Hand paint • Stickers
Assignment • Try all the techniques taught in class before you start you 3 sheets. • You are welcome to paint on the fronts and backs of your sheets. • Create a “flush joined” abstract landscape scene. • You may end up with as many as 3 landscapes! • Embellish your image.
Objectives, students will… • analyse and use a variety of image development techniques (e.g. distortion, metamorphosis, fragmentation) • demonstrate increasing complexity in art skills and techniques • practise safety associated with proper care of art materials and tools