
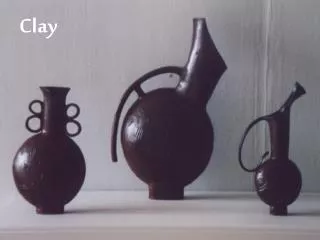
Art Clay Silver
Art Clay Silver. PREPARATION SILVER CLAY IS WATER-BASED AND DRIES NATURALLY IN THE AIR USE CLAY AS SOON AS POSSIBLE AFTER OPENING THE ORIGINAL PACKAGE ART CLAY SILVER SHRINKS DURING FIRING 10%. WET STAGE.

Art Clay Silver
E N D
Presentation Transcript
Art Clay Silver PREPARATION • SILVER CLAY IS WATER-BASED AND DRIES NATURALLY IN THE AIR • USE CLAY AS SOON AS POSSIBLE AFTER OPENING THE ORIGINAL PACKAGE • ART CLAY SILVER SHRINKS DURING FIRING 10%
WET STAGE • Cut off us much clay as you need, and put the rest in a ziploc bag, or wrap up in cling film. • Put the clay you are going to use in some cling film and knead it gently for a few seconds, just to soften it a little before you start working. • If you are using cutters or rubberstamps, oil them slightly before use to stop them sticking to the clay.
SHAPE CLAY Keep a small pot of water and a brush next to you. If you are using cutters or rubberstamps, oil them slightly before use.
DRY STAGE • Drying guideline for drying a piece up to 1mm thick, 5g: hot air dryer: 10 - 15 mins natural air drying method: more than 24hrs • If the piece is larger than this size, drying will need more time. • The dried clay will become hard like plaster, it is now ready for the process of drilling, filing and sanding.
DRYING CLAY Heat gun 10-20 min Air dry at least 24 hours
FIRING • Gas hob firing • Silver clay can be torched fired • Kiln fire at 650°C for 30 minutes.
FIRING ON GAS HOB After firing for 5 minutes, turn off the burner and let the piece cool on the net for about 15 minutes.
FINISHING • The surface of the fired piece will be white. Close the surface of the fired clay (burnish it) to bring out the silver shine. • Do this with a stainless steel brush . If you want a higher shine, follow up with a metal burnisher. • Polish with polishing pads or metal polish and a lint free cloth.
FINISHING CLAY Polish with stainless brush, burnisher, polishing pads
ART CLAY RING MAKING • As Art Clay shrinks when fired, you need to make rings slightly larger than wanted. • Art Clay shrinks by volume - this means that a thicker and larger piece will shrink more than a small thin piece, as it contains more clay.
Wet clay • Wrap wooden mandrels with ring-sizing paper, a post-it or Teflon sheet where you’re making the ring, to stop it from sticking. • When the ring starts drying, ease it up slightly on the mandrel to allow for the slight shrinkage whilst drying.
Dry clay • When dry, remove the paper from the ring by wrapping it around itself, starting from the inside. • Don’t pull it off the ring as this can break a delicate ring. If it’s sticky, leave to dry a bit more.


![[PDF READ ONLINE] Nerikomi: The Art of Colored Clay](https://cdn7.slideserve.com/12470111/slide1-dt.jpg)