Itec training
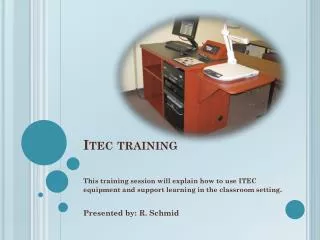
Itec training. This training session will explain how to use ITEC equipment and support learning in the classroom setting . Presented by: R. Schmid . Table of contents . The intended use of this tutorial is to help you learn how to use all of the ITEC Equipment on SJFC campus. .

Itec training
E N D
Presentation Transcript
Itec training This training session will explain how to use ITEC equipment and support learning in the classroom setting. Presented by: R. Schmid
Table of contents The intended use of this tutorial is to help you learn how to use all of the ITEC Equipment on SJFC campus. • LCD Projector • Select audio/video source • Power Screen • Volume Control • Picture Mute • DVD/VCR Control Panel • Document Camera • Laptop setup • Touch Screen Panel • OIT Help Desk
Step 1: Turn on LCD Projector • From the control panel, within the Display Section, press the ON or OFF button. • Button will flash while it is warming up or cooling down. • Flashing stops, LCD projector is ready for use—select a source to display. ** Remember to turn off the projector when finished using**
Step 3: powered projection screen • In classrooms with a powered projection screen, the screen control switch can be located on the wall behind the presenter’s station.
Step 4: Volume control • Use the volume knob on the control panel to adjust the volume of the selected device. • Troubleshooting steps….
No sound ??? • If using a PC or Laptop: • From the task bar, click on the sound icon • Ensure that Mute isn’t checked • Raise or lower the volume control bar to adjust the sound
What is Picture Mute? • To mute or “hide” what is being displayed through the projector. • Press the PIC MUTE button, located in the middle of the control panel.
DVD/ VCR Control Panel • After selecting DVD or VCR as your source, use this control panel just like you would a remote control.
Step 2: Display device through lcd projector • From the input button section, select device to be displayed. Showing a DVD to your class, press the DVD button
Choose a model • Three different models on campus, click on the picture for instructions.
Step 1 of 4: Power ON • Power on, hold down button until the red light flashes. • Ready to use when the light turns green. Back Step 2
Step 2 of 4: Select DOC CAM as source • From the control panel, press the DOC CAM button. Back Step 3
Step 3 of 4: Focus and Zoom • Press the AF button to Auto Focus • Digital Zoom press the Zoom+ or – button • Manual Zoom raise the camera neck to position the camera Back Step 4
Step 4 of 4: Power Off • Hold down the Power button until the green light flashes, light turns red when the document camera is off. Back Choose a model
Step 1 of 4: Power ON • Slide the POWER button up or down. • Ready to use when the light is on. Back Step 2
Step 2 of 4: Select DOC CAM as source • From the control panel, press the DOC CAM button. Back Step 3
Step 3 of 4: Zoom • Digital Zoom sliding your finger across the zoom wheel, you can zoom in or out. Step 4 Back
Step 4 of 4: Power Off • Slide the Power button down to turn off. Back Choose a model
Step 1 of 4: Power ON • Power on, hold down button until the red light flashes. • Ready to use when the light turns green. Step 2 Back
Step 2 of 4: Select DOC CAM as source • From the control panel, press the DOC CAM button. Back Step 3
Step 3 of 4: Zoom and Brightness • Press the Zoom+ or – button to zoom in or out. • With the arm lights on, press the Brightness+ or – button. Back Step 4
Step 4 of 4: Power Off • Hold down the Power button until the green light flashes. • The document camera is off when the light turns red. Back Choose a model
How do I connect a Laptop? • Attach the VGA and audio cables if necessary to your laptop. • Enable the Monitor Out Function on your laptop Audio VGA
Monitor out function • On your laptop use the “Monitor Out” key in conjunction with the Function Button (Fn). • The Monitor Out key is usually labeled with a “||”symbol or says CRT/LCD” and is usually the F4, F5, or F8 key
Touch Screen Panel • The projector will power on once a source is selected. All sources are located on the left of the touch screen. • Note: The projector will take about 30 seconds for the lamp to warm up. Volume Sources Help
Need Assistance – Contact help desk • Contact the OIT Help Desk • By phone: 385-8016 –please feel free to leave a message • By e-mail: helpdesk@sjfc.edu • In person: Kearney 053 (adjacent to the computer lab) • ITEC classrooms on SJFC campus- View pictures and instructions online at http://oit.sjfc.edu/Labs/lab_intro.asp