Download
1 / 36
360 likes | 535 Vues
Welcome to MXP Videoconferencing Training. What are some of the things we will accomplish today! Understand the definition and history of Videoconferencing The SBBC Goals regarding Videoconferencing Etiquette and Preparation Getting Familiar with the Remote Learn to Place a Call

E N D
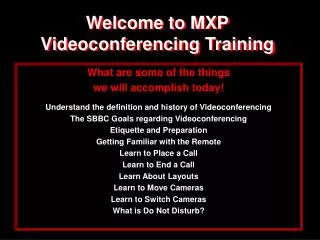
Welcome to MXPVideoconferencing Training What are some of the things we will accomplish today! Understand the definition and history of Videoconferencing The SBBC Goals regarding Videoconferencing Etiquette and Preparation Getting Familiar with the Remote Learn to Place a Call Learn to End a Call Learn About Layouts Learn to Move Cameras Learn to Switch Cameras What is Do Not Disturb?
This is the TANDBERG welcome screen… Let’s go over these icons. Make a call Directory Key Camera Keys Disconnect Presentation Key Standby Key Layout Key Tools
This is the MXP Remote. You should familiarize yourself with the keys. A color copy of this page is provided for you to keep near the unit.
Important Keys • OK/Menu • Access the menu • Choose or affirm options • Cancel Key • Back out of menus • Cancel actions, (disconnect, etc.) • Volume Key • Zoom Key • Mute Button • Presentation Key • Layout • Selfview
Keys for Calls The bottom part of the remote contains the numeric keys for dialing calls. (These keys also contain alphabetic characters which you will utilize when using the directory to look for a site, enter a new site, move quickly through a list, or even to “text chat”.) If H.320 ISDN: Local: Dial your ten digit dial-up number. If using IP/H.323: Dial the IP address or E.164 alias extension. When using an IP number, remember to use the asterisk key as the dot key.
Let’s Begin….Place a call • First… • Locate the green button on the remote • Press the green button once • What happens? • The call window opens • Here is where you type in the 10 digit dial-up number or IP address you are trying to call – If dialing an IP call, use the asterisk as the dot or period between numbers • Once you type in the number or address you want to call, press the green call key again to complete the call you have entered • Most of the time the default setting is configured correctly – in some instances you might have to add in the 99 prefix. (If you have to change a setting in the default screen, toggle to the right with your arrow keys.)
This is the window that would appear if you toggled to default settings. Using your arrow keys and the OK key, you would choose OK and continue dialing. If necessary, this is where you would change the call type, change the network or bandwidth or restrict a call. However, please remember – most of the defaults are set to automatic so you will have little to do in this screen.
How else can we place a call? • Click on the icon of the book – that is the “Directory” key. This will bring up a directory of all sites with videoconferencing numbers throughout the district. • This list is pushed out nightly through the TMS or Tandberg Management System software program.
Just as you would do on your cell phone, click the letter key on the bottom of the remote that has the first letter of the site you are trying to call. • Then toggle to the correct site with the use of the arrow keys. • Once you have located the correct site or school, press the green call key again to connect.
What is “Last Number Dialed”? • When you pressed the “Directory” key, and the list of sites appeared, you also had the option of calling the “last number dialed” • To use this feature, press the directory key, then use your right arrow key to toggle over to the last number called through the system and once it is highlighted, or selected, hit the green key again to complete the call • When the last number that was dialed is highlighted, it will appear with an orange line around it
Local Remote What’s the difference? • Point-to-Point Call – 2 sites, a local and remote site • Multi-point Call – 3 or more locations
How do we connect multiple sites? • Multiple sites are connected through the use of a “Bridge”. • The bridge is housed at ETS, in Conferencing Services. • How many sites can be connected at once? • How many is too many? • What’s considered an optimal number of sites in a call?
MXP Systems and Bridge Calls • The MXP Systems have a built in MCU or multipoint control unit allowing you to make some multipoint calls on your own • These systems can connect up to six sites at once without using the main bridge at ETS • Although you have the option of automatically choosing the screen layout, there is no need to do so since the system has ICM, (Intelligent Call Manager) built in, it will automatically configure the screen to the amount of parties in the call • As you have seen when we have placed calls, the ICM also sets call parameters automatically including type of call, default call speed (bandwidth), the type of network (ISDN or IP) to be used, and will even set whether the call has to be Restricted to a certain speed setting. (If you had to adjust any of these settings, they can be adjusted by accessing the Advanced Call Settings.)
Using the internal bridge and having multiple sites appearing on the screen at one time is called “continuous presence” • Since we use voice activation in our calls, the site that is speaking is the one who will appear in the largest segment of the screen – (If other parties are not muted and are talking, it will confuse the camera; therefore, we mute microphones at all sites except the site presenting during a multipoint call until such time as the facilitator calls on that site to participate) • The more sites in a call, the smaller the boxes or “monitor square” of each
Using the Internal MCU… • Let’s try and make a 3 party call or multi-point call • Using the remote, press the green call key • Type in the first number you wish to call • Press the green call key again to connect • As the call is connecting, you will see the speed change on the screen as lines connect • Once you are connected, place a second call in the same manner; click the green call key, type in the second phone number, and then, click the green call key a second time
Disconnecting a Multipoint Call • You have two options when disconnecting a multipoint call you have made using the internal MCU in your MXP system • You can either end all the end points in the call at one time, or disconnect one at a time or individual sites from the call • To do this, click the RED disconnect key on the remote • A window will open asking if you wish to disconnect all parties or if you wish to disconnect only one of the parties in the call; to disconnect one party in the c all, you will toggle to the number of the site you wish to disconnect and press ok • Then you will click the RED disconnect key a second time
Remember the old saying,“Don’t call us, we’ll call you!” • Well, primarily, that’s why we use the ETS bridge most of the time vs. the internal MCU in your unit. Our bridge can be preprogrammed to automatically call and connect to your site or multiple sites; in this instance we will use only the layout for local and remote site or the site that is producing audio – This is much less confusing then seeing multiple sites on the screen, especially for students in lower grades • The bridge will be set to automatically call out to the end points for the call – Your unit will be set to automatically receive the connection but will be in the “muted” mode when connected
What about timing for programs? • Our bridge will be programmed to call sites involved in a conference approximately fifteen minutesahead of time, (to insure that connections are working and allow time for technical difficulties) • The end time of a conference on the bridge is usually set to disconnect five minutes after the scheduled program time to avoid long delays between programs and unnecessary down time
What about disconnections or disruptions during programs? • If you are disconnected during a program, it is more than likely that one of our “Bridge Masters” is watching remotely and can automatically have the bridge dial you back up and have you connected within a few seconds • The Bridge Master can also tell who is speaking, who is muted, and multiple other pieces of information from his remote station at ETS Kevin Williams At the Helm Maurice Rancourt
Are you comfortable? • Making a call • Making a multipoint call with the MXP’s internal MCU? • Disconnecting a point-to-point call? • Disconnecting a multi-point call?
From time to time… If you need to find information about your system, go to the tools menu, and toggle to System Information. There it will show you the name of your location, your ISDN dial-up number, and your IP address. Try this now. Once you are in the System Information Screen, toggle through the other icons to review the information they provide. • You may want to view “Call Statistics” or “Channel Status” of your CALLS as well, • To access this information, you need to go into the tools menu, however, *You must be in a call to access “Call Status” information Let’s place a call now and access the Status Information of your call. When you are done, press the CANCEL key to exit
Now that you are comfortable making a call and disconnecting a call… To raise and lower the volume, use the Volume Key To mute or unmute the audio, use the gold Mic/Mute key • Let’s learn to move the camera, adjust audio and set presets… • To move the camera, use your directional arrows on all four sides of the OK/Menu button (up, down, left, right) • Use the ZOOM button to the right of the OK/Menu Button to zoom in or out just like you would on a movie camera The Mic off symbol will appear in the upper right corner of the monitor screen when engaged. The far side will receive “Mic Off” message whenever you mute (in a point-to-point call). Even when you are on mute, your Mic Off symbol will flash when there is audio in the room.
Storing Presets • The simplest way to set a preset is to move the camera to where you want to set a preset • Then click and hold the corresponding number button on the keypad that you want the preset to be set on; ie: number key 1 would be your first preset • The three (3) quick key presets will only function in a call • BEFORE a call, to check your presets, in the menu you would access the “Control Panel” and choose “Camera Preset”, here you can view presets already configured or add new ones without being in a call. (Go to the “Tools” icon, toggle to “Camera Preset” and then choose the first icon of the P in the orange box, click ok, toggle to each number preset on the screen with the arrow keys and click ok when on a number to view the presets when not in a call. Do not press the actual number keys on the remote.)
County Standard for Presets • The standard preferred in the county is to have the “#1” and “#3” preset keys on your systems defaulted to: #1 – A view of the entire group #3 – A view of the facilitator You can set up to ten local presets. You can also set remote presets. What is the “Tracker” and why the “Standard Presets”?
What about Far End Control? • Far end control gives you the ability to access the remote camera AND video sources. • In the MENU, toggle to the “Move Camera” icon • Select “Far End” option • Use the corresponding keys to access far-end presets • Press Presentation to access far-end video sources • Press OK when done to deactivate far-end control • Please access the menu and toggle to the “Move Camera” icon This same icon allows you to make sure you are on the near camera control. This will only work while in a point-to-point call.
Self-view and Moving PIP or POP • Self-view toggles between seeing the remote site/image in a call, to viewing your local image • Remote video will appear in a POP (picture out of picture screen layout) on the 52” Plasma screens that come with the OPUS systems. POP is the format used with widescreen monitors. Widescreen allows you to choose between side-by-side, POP, and full screen modes • On other systems with smaller monitors, it will be the traditional PIP or picture in picture on screen. Let’s toggle between the available layouts to see what layout you might want to use.
Showing Your Presentations, Using Peripherals • Automatically • When you want to show your presentation, (the last peripheral you launched), click the “BLUE” presentation button on your remote to launch the presentation IN A CALL • The video from the source you have connected will be displayed to the remote locations (The Presentation key is a toggle key.) • Manually • Press and hold the “BLUE” presentation button down; a screen will appear listing video sources you can choose from • Toggle to the peripheral listed that you wish to display • Press OK to complete the action • When presenting, remember that you must use SELF-View to toggle between the far-end and the local view to allow local camera Pan/Tilt/Zoom adjustments
Switching Between Video Sources • If you want to toggle between two peripherals you have hooked up to the unit: Choose the Presentation Icon on the menu bar, click OK. • The menu of cameras/peripherals will come up • Select the main piece of equipment you want to use, click ok, the screen will show that presentation mode • Then click OK on the icon again to choose the 2nd video source and click OK • Click the Blue Presentation Key to toggle between the two peripherals you chose • To exit this feature, bring the menu up again and go back to Main Camera and click OK • Now when you go back to self-view and hit presentation you will only toggle between self-view and the original peripheral you had chosen when you hit the presentation key REMEMBER TO GO BACK TO THE MAIN CAMERA BEFORE EXITING OUT OF THE MENU NOTE: YOUR PERIPHERALS MUST BE TURNED ON AFTER YOUR SYSTEM IS BOOTED UP
Standby and DO NOT DISTURB • Access by pressing theRED“Disconnect” button when not in a call • Standby will not activate when showing PC content while not in a call • Standby is used while not in a call to black out the monitors (VESA Monitor Power Management) • Do Not Disturb is used when you do not want any incoming calls “ringing-in” to your system. This can be used to show only local presentations uninterrupted by calls from the outside. • Do Not Disturb will prevent any calls from ringing into your system by placing it in “busy” mode, and can be cleared by pressing any key on the remote or disconnecting your Multi-Site call.) *(Delay Standby would be used if you had a company logo on the screen and you wanted it to show while not in a call.)
Something useful: USING TEXT CHAT • Use the alpha- numeric keypad to type text messages or information • To do this, access the menu, go to “Control Panel” • Select the “Text Chat” icon • Enter the text using the keypad • Press “OK” to close the window • Text will be displayed on the local and the far end side monitors!!! Be careful what you type! • Far side participants will be able to respond to your message • THIS IS AN EXCELLENT TOOL THAT CAN BE USED AS AN AID FOR THE HEARING IMPAIRED. • This feature is available in a point-to-point call.
Help! is just a click away • At any time, you can always go from the main menu to Tandberg’s User Guide and select from a variety of topics to get explanations and other “how to” descriptions right on your screen! • Access the menu, and go to “Control Panel” • Then choose “User Guide”
Bonus Info Just For You! • Cables, have we got cables! • Here are some of them and what we use them for: RJ45 – Gray we use for Ethernet (LAN) RJ45 – Orange we use for ISDN phone lines
S-Video Connection – 4 pin Mini-Din, peripherals with that connection – good quality; ie: document camera Black RCA Cable, we use for VCR Audio RCA Jacks – usually red and white for audio, yellow for video Single RCA Jack usually for video
VGA Cable to Hook up Laptop or PC to System Audio – RCA Jacks (usually red & white) RJ45 – Blue we use for Telephones RJ45 - Coaxial Cable
DVI to DVI Cable – to hook up peripherals with that connection ie: Titanium Power Book has this connection; this is a higher resolution than an SVGA connection for laptop or pc
Thanks for Joining Us We appreciate your participation in this training and hope you found it helpful. Any comments, feedback or suggestions can be directed to Maurice Rancourt, Education Technology Services, Conferencing Services (754) 321-0484 – web/cs !