Virtual PC Setup Wizard: A Comprehensive Guide
Learn how to set up your Virtual PC step by step with this detailed guide. Safely install and test applications without risking your host computer. Follow along to create a secure test environment. Explore options, settings, and installation procedures. Utilize the Virtual PC for safe software testing and experimentation.

Virtual PC Setup Wizard: A Comprehensive Guide
E N D
Presentation Transcript
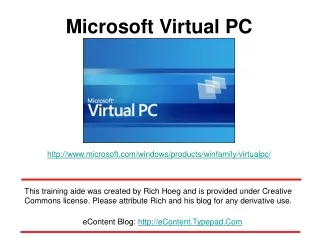
Microsoft Virtual PC This training aide was created by Rich Hoeg and is provided under Creative Commons license. Please attribute Rich and his blog for any derivative use. eContent Blog: http://eContent.Typepad.Com http://www.microsoft.com/windows/products/winfamily/virtualpc/
After you download Virtual PC, this is the first screen you see. Work your way through the wizard. For most installations the defaults work fine!
Select the first option. It does not makes sense to create a virtual PC without hard disk space allocated. After all, the whole idea is to create a “safe test zone” on your computer.
Create any name you desire. It makes no difference in terms of how the software performs.
Go with the recommendation. You can always change it later via settings.
The first time you set up Virtual PC, you obviously won’t have a virtual hard drive.
Once again, accept the default. You can change it later. Use the help files (reviewed later) to learn more about hard drive sizes.
You’re done. You now have a virtual PC … but wait … it’s not quite that simple!
We’ve been ignoring this window which was in the upper left hand corner. Now we turn our attention to the “Virtual PC Console.” Let’s first review our options.
Selecting the <File> drop down menu, we see <Options>. Let’s select that menu item.
Here are your options. These should correspond closely to what is on your physical computer. Toggle through the selections to learn your more …
Here are my virtual PC’s settings. The hardware matches my physical computer; however most items are configurable.
Here is the <Help> startup screen. I’ve found <Help> to actually be helpful! The whole idea of Virtual PC is to set up a test environment. This allows you to install and test applications without fear of harming your host computer!
Remember how I implied just running the start-up wizard was not enough. Think about it … your virtual hard drive does not have an operating system. Computers can not run without and OS. Our next task is to install an OS on your virtual PC. Thus, press <Start>
As you can see, I am now installing Windows XP on my virtual PC. You must have either a CD Rom or network access to an installable operating system. This installation is running off my physical CD Rom Drive, but being installed to my virtual PC!
I’m now working through the XP install process, selecting my preferred options.
Done! Time to reboot the Virtual PC and log in …
I’m now logged in to Windows XP on my Virtual PC. I can configure my user interface just like I would my physical PC. Let’s change the background.
To finish I click <OK>. Does this seem familiar? It should. Everything works the same way as on your physical computer.
Here you are seeing … 1. My physical PC 2. My virtual PC 3. The virtual PC console Thus, I’m browsing the web from within my virtual PC. I can visit web sites, download software, and test installations without any risk to my physical PC!
As a sample case, perhaps I would like to install Audacity from SourceForge.Net. I surf the web to the correct url, and then start the download process … to my virtual PC.
Working through the Audacity installation on my virtual PC. If this software should cause problems … it really doesn’t matter.
Let’s run Audacity for the first time on my virtual PC and test the installation.
Audacity runs fine. Now if I wanted to really be careful, I could use Audacity only on my virtual PC for a week … and only then repeat the installation on my physical PC.
Here is one area where your virtual PC differs from your physical PC. I’m now out of Audacity looking at my virtual desktop. If I want to save my new virtual PC settings one must take action (i.e. save settings). To pause one’s virtual PC, you press: <Alt> + <P> (as in pause) This will give you access to your physical PC and the virtual PC console commands.
Having pressed <Alt> + <P>, I now can access the virtual PC command menu. I want to close out and save my work.
After selecting the <Close> command, this option box appears. If you want to save your new installations, select <Save State>. If your new installation turned out to be troublesome for any reason, just select <Turn Off> and say Au Revoir!
My virtual PC now works its way through the required updates. Basically, I’m just a dummy who clicks <Continue> or <Cancel>.
A restart is required of the virtual PC to finalize everything. Windows XP works the same on either system!
Bye! I hope you found these screenshots helpful … speaking of <Help>. Let’s visit that functionality!
Here is a screenshot of the <Help> module. Perhaps you would like to know how one may share data between a real and virtual PC??
Here are the basics of sharing … visit <Help> to learn more.
Thanks! This ends the Virtual PC instructions. If you have a few minutes more time, take a look at the last slides in this Powerpoint deck … and … 1) You’ll see what it’s like to ski competitively at -16 F 2) Learn about Loppets for LingYun Hints: a. A Loppet is a marathon cross country ski race b. LingYun is a small town in the mountains of southern China, near Vietnam
The Loppets for LingYun Dynamic Duo!(Helping young children stay warm by rebuilding their dorm located in the mountains of southern China) Mora, Minnesota – February 10, 2008 Rich bundled up and ready to face the - 40 F windchill ! Just prior to the start and shedding her warm jacket, Molly inserts handwarmers into her gloves
Three intrepid skiers … standing by a bonfire trying to stay warm. In a few minutes they will take off their heavy jackets and race. Erik Hoeg Rich Hoeg Peter Enz
A thousand skiers lined up … in the cold … just prior to the start!