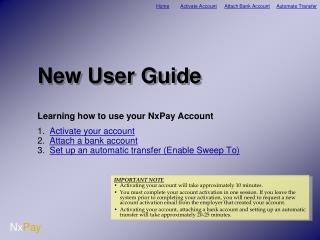
New User Guide
IMPORTANT NOTE Activating your account will take approximately 10 minutes. You must complete your account activation in one session. If you leave the system prior to completing your activation, you will need to request a new account activation email from the employer that created your account.

New User Guide
E N D
Presentation Transcript
IMPORTANT NOTE • Activating your account will take approximately 10 minutes. • You must complete your account activation in one session. If you leave the system prior to completing your activation, you will need to request a new account activation email from the employer that created your account. • Activating your account, attaching a bank account and setting up an automatic transfer will take approximately 20-25 minutes. New User Guide Learning how to use your NxPay Account Activate your account Attach a bank account Set up an automatic transfer (Enable Sweep To)
IMPORTANT NOTE • You must complete your account activation in one session. If you leave the system prior to completing your activation, you will need to request a new account activation email from the employer that created your account. Activate Your Account Follow first link in activation email to NxPay Log into the system using the activation credentials from your email Create your profile prior to using the system Time to Complete: 10 minutes Additional Items Needed to Complete Activation: Government Issued ID
IMPORTANT NOTE • The system is case sensitive, you will need to enter the information exactly as it was provided to you in your activation email. • The system does not accept copy and paste entries. You need to manually type information into the fields. Activation Email • Use the first link in your email to activate your NxPay account
IMPORTANT NOTE • Often it is difficult to tell uppercase “I”, lowercase “l” and the number 1. If one of these characters are present in your activation email, we recommend you copy your credentials into “notepad or a Word” document, using either Times New Roman or Lucida Consol font. Click here for more help. • Remember the system fields are case sensitive. Enter the information exactly as emailed to you Activate Your Account • Type the activation information you received in the email from signup@nxpay.com. The system does not accept copy & paste entries. Manually type the information into the fields. Login Name Password Authorization Code • Enter the human verification numbers from the yellow box above the field • Click the I agree box • Click Submit
IMPORTANT NOTE • Save the information you entered in a safe place. You may need it to request a password reset or reminder. • NxPay is case sensitive system. This means you must remember which letters were upper and lowercase for your password, login, email and security questions Create Your NxPay Profile • All fields on this page must be completed, before you can access your NxPay account. If you leave the system before completing this page, you will need to request a new activation email from the employer that created your account for you. • Enter valid information for the following Government ID 1. Issued from Country: choose the country that issued your ID from the drop down menu 2. Government Identification Type: choose the type from the drop down box 3. Government Identification Number: enter the complete, correct ID number Personal Information 4. Time zone: choose the from the drop down box 5. Default language: choose from the drop down box 6.Gender: select one New Login Information 7. Username 8. Password: choose a new password 9. Retype Password 10. Security Question 1 11. Answer 2 12. Security Question 2 13.Answer 2 • Click the box to agree to the privacy policy • Click Submit 1 2 3 4 5 6 7 8 9 10 11 12 13 14
Attach a Bank Account Click Bank Accounts Choose add a Bank Account Select the country your Bank is located Enter your banking information Time to Complete: 10 minutes Additional Items Needed to Attach Bank Account: Bank information: Bank Account Number Bank Account Type Routing or Bank Code Bank Address
Attach a Bank Account • Under Sources/Destinations, click Bank Accounts
Attach a Bank Account • Click “here”
Attach a Bank Account • Choose the country your bank account is located • Click Continue
IMPORTANT NOTE • Once you have submitted your bank information, you can’t edit it. You have to disable your account and add a new bank account to correct any errors or make changes to your attached bank information. Attach a Bank Account Add your bank information • Complete the fields accurately • These fields are required 1. Account Name: Account owner’s name, as it appears on the account 2. Account Number: Number associated bank uses to identify your account 3. Bank Name: Name of the financial institution 4. Routing Number: Nine digit code used to identify your bank (click here for help finding your routing number) • The following information is optional. We recommend completing all fields 5. Account Type: choose type 6. Description: Choose a phrase that briefly identifies your account (e.g. Primary Checking) 7. Bank Address 1: address of your branch 8. Bank Address 2: 9. Bank State: 10. Bank Zip: 11. Bank City: • Click Submit 1 2 3 4 5 6 7 8 9 10 11
IMPORTANT NOTE • Account verification is not necessary for transfers to your bank account. • Verify your bank account ONLY if your program allows you to transfer money from your bank AND you plan to transfer funds from your bank to your NxPay account. Attach a Bank Account • You have linked your bank account to your NxPay account. You can now transfer funds from NxPay to your bank account
Set Up Automatic Transfer (Enable Sweep-To) Choose the Account Select the account you want an automatic transfer Click on Enable Sweep-To Complete the Convert Purse to Sweep-To fields Time to Complete: 5 minutes No Additional Items Needed to Set Up
ount 2 78.50 78.50 Automated Transfer • Under My NxPay, click Accounts
Automated Transfer • Choose the bank account you want to set up an automatic transfer to Bank Ban Disable
Automated Transfer • Click on Enable Sweep-To 78.50 78.50
Automated Transfer • Complete the Convert Purse to Sweep To fields 1. Sweep to: choose Bank Account if you’re transferring your funds to a personal bank account 2. Bank Account: choose which account you’re sending your funds to 3. Accumulated Amount Prior to Sweep: Choose the balance your NxPay account must reach before automatically transfer funds to your selected account. You may set this as low as $0.00, which triggers a transfer each time you receive a deposit 4. Sweep To Time (Optional): If you receive multiple NxPay deposits per day to this account, this feature bundles all of your deposits together and transfers them at one time to your selected account. You can choose the time of day this takes place. 5. User Identifier (optional): This information shows on your receiving account transaction history. Type a short text string to remind you where the deposit is coming from (e.g. My NxPay Acct.). 6. Account Description (optional): • Click Submit 78.50 78.50 1 2 50.00 3 4 5 6
IMPORTANT NOTE • Transfers may take 24-48 hours to move from your NxPay account to your destination account. • Once a sweep has started, the amount transferred is removed from your available balance. Until the sweep has cleared your bank, the funds are included in your balance. • If you want to change your automatic transfer settings, you must click Disable Sweep-To, then enable a new automatic transfer. Automated Transfer • If you see Disable Sweep-To, you have set up your automatic transfer Disable Sweep-To Dis 78.50 23.50
Need Additional Help? If you have any additional problems activating your account, attaching a bank account or setting up a transfer, please email NxPay Customer Support support@nxsystemsinc.com.