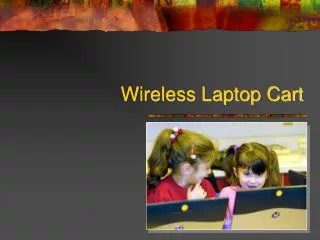
Wireless Laptop Lab User Procedures
410 likes | 541 Vues
Wireless Laptop Lab User Procedures. Created by Pamela Hopkins for SUSD January 2005. Components of the Wireless Laptop Lab. Cart locking and wheeled 30 laptops Laser printer set as default printer on all machines Projector for use with laptop. Lab Management.

Wireless Laptop Lab User Procedures
E N D
Presentation Transcript
Wireless Laptop LabUser Procedures Created by Pamela Hopkins for SUSD January 2005
Components of the Wireless Laptop Lab • Cart • locking and wheeled • 30 laptops • Laser printer • set as default printer on all machines • Projector • for use with laptop
Lab Management • Each school may want to set up utilization records • Keep track of who is using the lab • Keep track of when the lab is being used • Share your data with the IT department • Each school needs to set up a schedule • Someone needs to be responsible for monitoring the schedule • Sample schedule
Student Management • You might want to consider training a student team • To be responsible for taking the laptops out of the cart • To be responsible for putting the laptops in the cart • This will solve • The push and shove crowd around the cart • Give the teacher a chance to monitor the return of the laptops more carefully
Something you won’t have to use. . . • Fortunately, you will not use the modem on campus because you will be on a wireless network.
Connecting to the wired network . . . • If you are doing Internet work that involves a lot of intensive multimedia, you can have greater speed and stability by connecting to the wired network. • Talk to your site tech about the process.
Battery Status • The Windows power meter indicates the remaining battery charge. To check the power meter, double-click the icon on the taskbar. • If the computer is connected to an electrical outlet, icon appears.
Low Battery Warning • A pop-up window warns you when the battery charge is approximately 90 percent depleted. • To avoid losing or corrupting data, save your work immediately after a low-battery warning. • Then connect the computer to an electrical outlet. • If the battery runs completely out of power, hibernate mode begins automatically.
Charging the Battery • Power down the laptop. • Connect a power cord from the front of the cart to the laptop. • Place the laptop in the cart. • Be sure that the cart is connected to a power outlet. • The AC adapter charges a completely discharged battery in approximately 3 hours with the computer turned off. • Charge time is significantly longer if the computer is on.
When setting up the computer for work, place it on a level surface. When you disconnect a cable, pull on its connector or on its strain-relief loop, not on the cable itself. As you pull out the connector, keep it evenly aligned to avoid bending any connector pins. Before you connect a cable make sure both connectors are correctly oriented and aligned. Protect your computer, battery, and hard drive from environmental hazards such as dirt, dust, food, liquids, temperature extremes, and overexposure to sunlight. Save documents as you normally would Not on the C: drive Not in the My Documents folder Basic User Information
Wireless Network Information • AirBars icon is the signal strength. • Dark green airbars means strong signal. • Yellow bars are weak signal. • Computer icon with ))) is the wireless network indicator. Floating the cursor over it will reveal name of network, speed, strength and status. • Red X on icon means wireless is not configured or is not working properly • When network is connected, there is no dot, no x, no yellow triangle moving--just a little computer • Regular wired network icon has dual, diagonal computers. • Dual, diagonal computer icon with a red X means wired network is not connected.
Troubleshooting • If no connection, try restarting or repositioning the computer (Is a book bag blocking signal?) • After a single restart, if it continues not to work, put the computer away and notify your site tech or whoever is responsible on your site for the wireless lab. • To wake up computer, hit power button. • Going to sleep could lock computer or completely log user out. Files could be lost, so be sure to save frequently. • Power supplies should be left in the cart, but can be removed if necessary. • Be sure to plug the power supply back into the cart so that the laptop can recharge. • Difficult to connect. • Be sure that laptops are shut down completely. • These machines will slow down if trying to pull lots of graphics or multimedia over the network. • There might be an authentication message box that shows up on login. Ignore it patiently.
Printer Information • Printer is shared. • Teacher computer • must be on and • logged in • so that other computers in the wireless lab can print. • USB connection • must be disconnected before storing the computer. • must be connected before using printer. • Printer must be plugged in and turned on. • Printer can be plugged into cart and the cart plugged into the wall • or the printer can be plugged straight into the wall. • Teacher can delete print jobs from teacher computer as long as they are in the queue and as long as the jobs can be identified. • Your staff needs to decide about how the paper will be managed.
Teacher Connection • Teacher Laptop • Top left corner of cart • Must be connected and logged in for printing • Will need to be used close to cart • Will need to be connected to power • Facilitates printing and projecting • Can then be used all day long
General User Guidelines • Treat the computer with respect. • Leave toolbars, background, and icons in standard format. • Check hand hygiene before using the computer. • Keep pens, pencils, notebooks, and books off your keyboard. • Handle the screen carefully and gently. • Keep food and drinks away from the laptop. • When turning it on, do not hit keys, etc. • Let it start up on its own. Be patient.
Be considerate of fellow users. • Do not save files on the C: drive of the laptop. • Save to your H: drive, • Save to your flash key, • or as directed by your instructor. • Remember you are sharing these with other students. • Close down all applications and Internet pages. • Go start>shutdown when you are ready to put the laptop back into the cart. • Never download from the Internet on any of the laptops. • Do not install any software on the laptops.
Follow appropriate operating procedures. • Once the login is up on your screen, type in your district user name and password. • When opening applications, let the application open up completely before opening the next. • When you are finished, go to START>Shutdown to shutdown your laptop. • Close the screen only when you have a black screen.
Safely move the computers. • When walking with the laptop, always hold it with both hands. • When moving the laptop, be sure to close the screen. • When putting the laptop back into the cart, • Double check that the power plug is connected. • Be sure that the laptop is powered off.
State Technology Standards • Arizona Department of Education Website for technology standards: • http://www.ade.az.gov/standards/technology/default.asp • PDF copies • Rationale • Standard 1 • Standard 2 • Standard 3 • Standard 4 • Standard 5 • Standard 6 • Glossary
Technology and AIMS The State of Arizona has announced its intention to include technology competencies on the AIMS tests for 2005
Student Contract for use of Laptops • THE EULA for the district covers the use of the laptops • You may want to create a specific contract for the laptops at your skill. • Opportunity to instill in students • A sense of personal responsibility • Care for machinery • Management skills • Creates a critical learning process for each student and teacher as a set of behaviors, movement, expectations, and storage issues become part of the classroom experience • Sample student contract
Laptops Contributions to the Classroom • Promote collaboration among students • Less intrusive than desktop computers in the classroom • Save space • Allow better teacher supervision because desktops are not blocking view • Reduce the tangle of cables • Require less change by the teacher to classroom routine
Most Common Uses of Laptops • Research • Writing • Note taking
Laptop Activities tend to be • Cooperative Groups • Students become collaborators • Project-based • Student directed learning • Fewer lectures in the classroom • Teacher becomes facilitator
Most Common Software Used • Word • The Internet • PowerPoint • Advanced features that are commonly used • Tables • Outline • Bullets • Bookmarks • All of which help access and organize information more effectively.
Working with Laptops: The Effect on Students • Engaged in the thinking process • Able to problem solve • Support their peers • Work independently • Work in groups • Develop a high level of self sufficiency • Develop a high level of confidence
Research has found • Student Access to technology • Improves students’ writing • Encourages collaboration among students • Engages students in their schoolwork • Teachers who use laptops to teach • Tend to use a more constructivist approach to teaching • Feel more empowered
Critical Learning for Technology • Structure activities so that students develop good habits in desktop management • Folder • Files • Saving • Retrieving • Organizing • Managing
Problems Teacher may experience • Difficult to predict amount of time needed to accomplish tasks with laptops (or any computers) • Easy to focus so much on the technology that the technology becomes the content.
Three simple ways to avoid technology pitfalls • Plan on demonstrating what you want the students to do. • Give the students time to practice using the software. • Children are natural explorers so let them explore the software to learn what they need to know • Explain expectations • Rubric development • Shared with the students at the beginning of the project • Designed with student input
A Note about Wireless Networks and Security Wireless networks should NOT be used for work that requires a high level of security (like credit card information)
Documents • Calendar Schedule • Laptop Assignment Sheet • Sample User Contract