Download
1 / 19
240 likes | 667 Vues
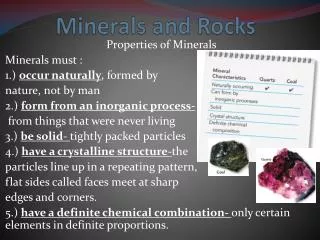
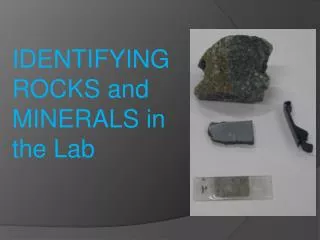
IDENTIFYING ROCKS and MINERALS in the Lab. Identifying minerals in rocks. Three different techniques used Hand samples - Small Pieces of rock Naked eye Hand lens Microscopy – T hin Sections Chemical Analysis – thin sections or grains Electron Microscopy Electron Microprobe analysis.

E N D
Identifying minerals in rocks • Three different techniques used • Hand samples - Small Pieces of rock • Naked eye • Hand lens • Microscopy – Thin Sections • Chemical Analysis – thin sections or grains • Electron Microscopy • Electron Microprobe analysis
The use of the Petrological Microscope The use of the microscope allows us to examine rocks in much more detail. For example, it lets us • examine fine-grained rocks • examine textures of rocks • distinguish between minerals that are otherwise difficult to identify in hand-specimen (e.g. the feldspars)
The Petrological Microscope The petrological microscope differs from an ordinary microscope in two ways: • it uses polarised light • and the stage rotates There are two sheets of polaroid: • The polariser (above stage) • Analyser (below stage) Light source is below the sample. May have 1 or 2 eyepieces (monocular or binocular)
Preparing thin sections Rock specimens are collected in the field, then cut into small thin slabs. These are glued on to glass slides and ground down to 0.03 mm thickness (30 µm). At this thickness all rocks become transparent. Only a few minerals, mainly ore minerals, remain opaque, i.e. stay black under PPL. If the sections are too thick, the polarisation colours are affected. Quartz is used to check thickness for this reason – see the next slide
Michel-Lévy Chart amphibole pyroxene muscovite feldspar biotite olivine quartz The colours appear in a series of repeated rainbows across the chart and a mineral may show any colour up to a maximum, reading from the left. Read along diagonal to top for mineral name calcite Read along 0.03mm line to the highest order colour seen in the mineral
Identifying MINERALS in thin section Slides can be examined in two methods: • Plane polarised light (PPL) • polars aligned • analyser out • ALWAYS 1st step • Cross polarised light (XPL) • Polars at 90º to each other • Analyser in • 2nd step
Mineral properties under PPL • colour (natural colour) • transparency (clear, cloudy or opaque) • relief (high or low) • crystal or fragment shape • cleavage • fracture • pleochroism(colour change when stage is rotated)
RELIEF PPL How much a mineral stands out compared to adjacent minerals. Note how the olivine with its high relief stands out from the surrounding low relief plagioclase plagioclase olivine
PPL 1st set run parallel to line Two sets of cleavage are seen in this amphibole crystal; note the 120o angle between the cleavages CLEAVAGE amphibole 2nd set of cleavage
PPL FRACTURE The olivine here shows uneven fractures which appear dark grey in the crystal olivine
PPL COLOUR amphibole The biotite shows its distinct brown shades under PPL against the clear colourless quartz and feldspar biotite
PLEOCHROISM Two views under PPL showing colour change in biotite on rotating the stage. Pleochroism in Orthopyroxene biotite PPL rotated 90o
Mineral properties under XPL • Isotropy/Anisotropy • Interference Colours • Also known as birefringence • Extinction Angle • Twinning
Isotropy/Anisotropy • Isotropic minerals • Same properties in all crystal orientations • Stay black at all orientations under XPL • Garnet and glass are common examples • Anisotropic minerals • Varying properties due to crystal orientation • Display birefringence and extinction • Most minerals
Interference colours quartz amphibole calcite white/grey/black in quartz, microcline and plagioclase muchbrightercolours of ferro-magnesian minerals including amphibole, pyroxene, olivine pearly grey shades of calcite Birefringence
Extinction Angle • Only occurs in Anisotropic Minerals • Goes extinct (black) every 90º as the stage rotates • If cleavage is present angle between cleavage and extinction can be measured • Parallel – 0º or 90º to cleavage • Inclined – not parallel Extinction Video
Twinning • Variation in orientation within a crystal • Extinction changes across a plane • Most prominent in XPL, but can be seen in PPL • Can occur more than once in a crystal Plagioclase Twinning
More Resources • LOT’s of PRACTICE • Mineral ID Guide – Wattle (Andy Christie) • Youtube clips • Pvermees’s channel • OpticalMineral channel • Petrography/Minerals Books • Deer, Howie & Zussman - An Introduction to the Rock Forming Minerals • Many others