Download
1 / 57
640 likes | 1.05k Vues
Shop Safety . Getting Started in the Shop. OBJECTIVES. After studying Chapter 1, the reader will be able to: Identify situations where hearing protection should be worn. 2. Discuss how to safely handle tools and shop equipment. Describe how to properly use a fire extinguisher.

E N D
Shop Safety Getting Started in the Shop
OBJECTIVES After studying Chapter 1, the reader will be able to: • Identify situations where hearing protection should be worn. • 2. Discuss how to safely handle tools and shop equipment. • Describe how to properly use a fire extinguisher. • Discuss shop safety procedures.
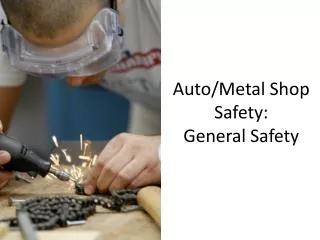
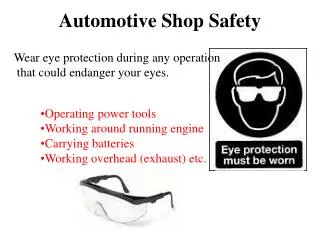
PERSONAL PROTECTIVE EQUIPMENTSafety Glasses • The most important personal protective equipment (PPE) a technician should wear all the time are safety glasses, which meet standard ANSI Z87.1. • Safety glasses should be worn at all times when working on or around any vehicle or servicing any component.
PERSONAL PROTECTIVE EQUIPMENTSafety Glasses • When using a grinder or similar equipment, a full face shield or goggles may be a better choice.
Steel-toed shoes are a worthwhile investment to help prevent foot injury due to falling objects. Even these well-worn shoes can protect the feet of this service technician. PERSONAL PROTECTIVE EQUIPMENTSteel-Toed Shoes
PERSONAL PROTECTIVE EQUIPMENTGloves • Wear gloves to protect your hands from rough or sharp surfaces and chemical exposure. • Some chemicals are absorbed directly into the skin. • Types of Gloves • Latex surgical gloves. • Vinyl gloves. • Polyurethane gloves. • Nitrile gloves. • Mechanic’s gloves.
PERSONAL PROTECTIVE EQUIPMENTGloves • Mechanic’s gloves protect against bruises and abrasion • Nitrile gloves protect against chemical exposure. • More resistant to solvents and fuels than latex gloves
PERSONAL PROTECTIVE EQUIPMENTGloves • CAUTION: Some vehicle manufacturers specify that rubber insulated lineman’s gloves be used whenever working around the high-voltage circuits to prevent the danger of electrical shock. • Hybrid or plug-in electrical cars may have voltages of more than 400VDC.
PERSONAL PROTECTIVE EQUIPMENTBump Cap • Service technicians working under a vehicle should wear a bump cap to protect the head against under-vehicle objects and the pads of the lift. FIGURE 1-4 One version of a bump cap is this padded plastic insert that is worn inside a regular cloth cap.
PERSONAL PROTECTIVE EQUIPMENTHands, Jewelry, and Clothing • Remove jewelry that may get caught on something or act as a conductor to an exposed electrical circuit.
Ear Protection • Hearing damage happens over time. • You cannot recover from the damage done. • Wear hearing protection when needed.
HEARING PROTECTION • There are many forms of hearing protection. • USE AT LEAST ONE OF THEM!
SAFETY TIPS FOR TECHNICIANS • When lifting any object, get a secure grip with solid footing. • Do not twist your body when carrying a load. • Ask for help when moving or lifting heavy objects. • Push a heavy object rather than pull it.
SAFETY TIPS FOR TECHNICIANS • Always connect an exhaust hose to the tailpipe of any running vehicle to help prevent the buildup of carbon monoxide inside a closed garage space.
SAFETY TIPS FOR TECHNICIANS • When standing, keep objects, parts, and tools with which you are working between chest height and waist height.
Always be sure the hood is securely held open. Left Figure: A crude but effective method is to use locking pliers on the chrome-plated shaft of a hood strut. Locking pliers should only be used on defective struts because the jaws of the pliers can damage the strut shaft. Right Figure: A commercially available hood clamp. This tool uses a bright orange tag to help remind the technician to remove the clamp before attempting to close the hood. The hood could be bent if force is used to close the hood with the clamp in place. SAFETY TIPS FOR TECHNICIANS
CLEANING METHODS AND PROCESSES • There are four basic types of cleaning methods and processes used in vehicle service, including: • Power Washing • Chemical/Microbe Cleaning • Abrasive Cleaning
Be careful to avoid spraying electrical connections. It is possible to damage components if you’re not careful! Power Washing
Chemical/Microbe Cleaning • Gunk, Simple Green and other Chemical Cleaners. • Be Sure to use a face shield and/or barrier gloves when using strong or caustic solutions.
Abrasive Cleaning • Includes: • Walnut Shell • Glass Bead • Sand • Carborundum • While this is most often done in a special blasting booth, special safety precautions will need to be taken if done in the open • Protective clothing • Face shield or mask • Breathing protection • Long sleeves and pants • Gloves
All oily shop cloths should be stored in a metal container equipped with a lid to help prevent spontaneous combustion. SHOP CLOTH DISPOSAL
Electrical Shock • Most shop equipment operates on 110 or 220 volts. • Turn off tools before unplugging.
ELECTRICAL CORD SAFETY • Use correctly grounded three-prong sockets and extension cords to operate power tools. • Make sure electrical cords are in good condition.
JUMP-STARTING AND BATTERY SAFETY • To jump-start another vehicle with a dead battery, connect good-quality copper jumper cables or use a jump box. • The gound is the last connection, and it should be away from the battery (ie. engine block or frame)
Battery Safety • Avoid sparks around batteries, as they contain explosive hydrogen gas. • Remove the battery ground cable first and connect it last.
Hydraulic Floor Jacks • Be careful to lift at manufacturer’s recommended locations only. • The jack must be able to roll as the vehicle rises, or the jack pad may slip! • Always use jack stands to support the vehicle after lifting.
JACKS AND SAFETY STANDS • Floor jacks properly rated for the weight of the vehicle being raised are a common vehicle lifting tool. • The weight of the vehicle should never be kept on the hydraulic floor jack, because a failure of the jack could cause the vehicle to fall.
Whenever a vehicle is raised off of the ground, a safety stand should be placed under the frame, axle, or body to support the weight of the vehicle. B
DRIVE-ON RAMPS • Ramps are an inexpensive way to raise the front or rear of a vehicle. • CAUTION: Professional repair shops do not use ramps because they are dangerous to use. Use only with extreme care.
Vehicle Lifts Electric or hydraulic • Frame contact
Vehicle Lifts • Wheel contact
Lifting a Vehicle Safely • Follow vehicle manufacturer’s recommended lift points. • Use lift manufacturer’s precautions for use. • Have the instructor check the position of the rack pads.
Lifting a Vehicle Safely (continued) • Shake the vehicle as soon as the wheels leave the floor. Make sure the vehicle is stable. • After the vehicle is raised, lower to engage a safety stop. • Be aware of the vehicle’s center of gravity
CG-ME-RWD CG-FWD CG-FE-FWD
SAFETY IN LIFTING (HOISTING) A VEHICLE • All automobile and light-truck service manuals include recommended locations to be used when hoisting (lifting) a vehicle. Newer vehicles have a triangle decal on the driver's door indicating the recommended lift points. The recommended standards for the lift points and lifting procedures are found in SAE Standard JRP-2184.
Positioning Lift Arms • Boxed areas of the body are the best places to position the pads on a vehicle without a frame. Be careful to note whether the arms of the lift might come into contact with other parts of the vehicle before the pad touches the intended location. • Commonly damaged areas include the following: • Rocker panel moldings • Exhaust system including the catalytic converter.
This vehicle fell from the hoist because the pads were not set correctly. No one was hurt, but the vehicle was a total loss.
Tall safety stands can be used to provide additional support for a vehicle while on a hoist. A block of wood should be used to avoid the possibility of doing damage to components supported by the stand. A
Air Compressors • Make sure a pressure relief valve is installed on the compressor. • Inspect air hoses and fittings before use.
Compressed Air Safety • Never direct compressed air at yourself or others. • Compressed air entering the bloodstream can be FATAL. • Wear eye protection.
COMPRESSED AIR SAFETY • When using compressed air for drying/blowing, pressure must be reduced to less than 30 PSI (206 kPa).
Fire Hazards and Prevention • Make sure to have the proper fire extinguisher available and ready. • Know the proper technique to fight a fire.
FIRE EXTINGUISHERS • There are four classes of fire extinguishers. Each class should be used on specific fires only: • Class A is designed for use on general combustibles, such as cloth, paper, and wood. • Class B is designed for use on flammable liquids and greases, including gasoline, oil, thinners, and solvents. • Class C is used only on electrical fires. • Class D is effective only on combustible metals such as powdered aluminum, sodium, or magnesium. • The class rating is clearly marked on the side of every fire extinguisher. Many extinguishers, such as ABC units, are good for multiple types of fires.
When using a fire extinguisher, remember the word “PASS.” • P = Pull the safety pin. • A = Aim the nozzle of the extinguisher at the base of the fire. • S = Squeeze the lever to actuate the extinguisher. • S = Sweep the nozzle from side-to-side.