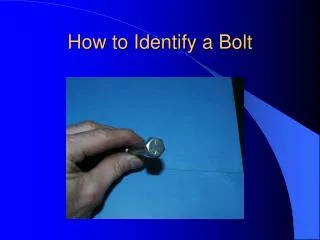
Three Ways to Draw a Threaded Bolt
380 likes | 599 Vues
Learn three different methods to draw a threaded bolt with detailed instructions and tips. From a simplified version to a detailed schematic, follow step-by-step guides to create accurate representations. Master the art of drawing bolts efficiently with call-out information for precision and clarity.

Three Ways to Draw a Threaded Bolt
E N D
Presentation Transcript
Three Ways to Draw a Threaded Bolt Even though they look different, they all mean the exact same thing. It is the CALL-OUT information that is critical.
Let’s draw a simplified bolt first… Draw two parallel lines that are the distance of the major diameter and then draw two more lines that are the length of the bolt.
Draw the inside diameter lines And then put in the center line Change the inside diameter lines to hidden lines
Tip of the bolt Draw a line on the end of the bolt equal to the width of one thread (this is the pitch) Draw diagonals from the edge of the major diameter to the tip Trim up the lines, clean up the drawing, and you done! Be sure and label cleanly with the call-out
Schematic Starts off like the simple. Draw two lines for the major diameter and the length of the bolt. Draw in the two minor diameter lines.
Threads Now, draw in where the threads will be from the outside diameters. This example is a 3/8 – 16 UNC – 2A bolt The pitch is 1/16 We will draw a line every 1/16 of an inch for the threads in the major diameter.
Threads Continued Now, draw in a line between the two lines of the minor diameter. These lines will be ½ between the 1/16 lines so these would be 1/32 from each line. There are several different ways to do this. Some commands are array, offset, copy and paste, and just plan draw them in every instance.
Final Step Go in and delete the minor diameter construction lines, complete the tip like in the simplified version and you are done. One to the challenge….
Detailed Do everything through a complete schematic drawing. Then, draw a line from the top of one of the lines on the major diameter to the top of one of the lines of the minor diameter. Then, go back up, forming a V. Continue across the top until finished at the end of the bolt.
Here’s the tricky part… Do the exact opposite on the bottom. If you are copying it, you want to be sure the inside of the tooth on the bottom lines up with the outside of the tooth on the top. The example shown has a few done that are then copied and pasted. Then, the copies are moved into position on the bottom.
Cleaning up The lines in the middle between the major and minor diameter are now deleted or erased.
Last Steps for threaded part Draw a line that connects the outer points on the top with the outer points on the bottom and do the same for the inner points. This makes the lines slant and appear to be threaded. Continue until length of the bolt is covered.
After all this, the head part is easy Draw a circle that matches the major diameter. Place the polygon that matches the bolt type inside the circle. Draw lines over the polygon and circle to the bolt head. Offset the rectangle where the head is on the bolt. Draw an arc in that middle. Copy and paste on the two sides. Trim and clean it up.