Download

1 / 27
270 likes | 367 Vues
Step-by-step guide on using mobile devices for photography, uploading to Picasa, blogging, and sharing Google Docs. Achieve NETS standards in tech operations, communication, and creativity. Quizzes provided for reinforcement.

E N D
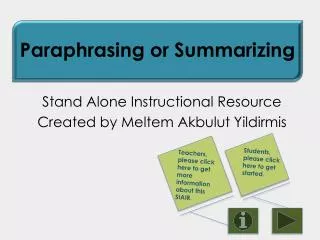
Stand Alone Instructional Resourceby Andrew Hahn
How To Use A Mobile Device With Web 2.0 Applications The following is presented in a step by step fashion to help you understand mobile phones – such as taking pictures, texting, browsing and blogging
Educational Objectives and Reasons Learners will learn from this resource: Technology Operations and Concepts (NETS 6) Communication and Collaboration (NETS 2) Creativity and Innovation (NETS 1) You will be quizzed after each section
Part I How to take pictures with your mobile device Power on your mobile device Locate the camera button on the side of your camera (as shown below)
Part I How to take pictures with your mobile device 3. Hold down camera button to activate camera 4. Once your mobile phone screen turns into a digital camera screen, locate an item you wish to photograph and press the camera button again 5. You now have successfully taken a picture. Repeat the process until your satisfied with the result
Quiz Question 1 What action is required to activate the camera on your mobile phone? A). Press the camera button quickly and then camera mode will appear B). Hold down the camera button until camera mode appears C). Double press the camera button and then the camera mode will appear D). Triple press the camera button and then the camera mode will appear
Quiz Question 1 INCORRECT. Please Review This Slide For Clues
Quiz Question 1 CORRECT! Move on to Question 2
PartII How to upload pictures to your Picasa account Power on your mobile device Locate the image on your phone that you’d like uploaded Once you bring the image up on your screen, hit the menu button on your phone
PartII How to upload pictures to your Picasa account 4. Choose the “Share” option that appears and select Picasa 5. Add a Caption to your photo, enter in your account number (such as name@gmail.com) and select the album you wish to upload it to. 6. Once completed, click upload. Your photo is now uploaded
PartII How to upload pictures to your Picasa account
Quiz Question 2 What is the name of the option that is needed to upload photos to picasa? A). Share B). Collaborate C). Upload D). Publish
Quiz Question 2 INCORRECT. Please Review This Slide For Clues
Quiz Question 2 CORRECT! Move on to Question 3
Part III How to post pictures on your blog Power on your mobile device Find the Blogger app on your mobile device and touch it Make sure your Google account is the account used when accessing Blogger.
Part III How to post pictures on your blog 4. Locate the picture you took from Part 1 and tap the picture icon on your opened blog post. 5. Choose “Gallery” and select the picture you choose to blog about. Tap “Post Title” for your blog title and tap “Post Content” for posting your content 6. Once your done describing the picture, tap “Publish”.
Part III How to post pictures on your blog
Quiz Question 3 When you are finished describing your photo and blogging in Blogger, what button do you need to tap to finalize your post? A). Final B). Finish C). Publish D). Public
Quiz Question 3 INCORRECT. Please Review This Slide For Clues
Quiz Question 3 CORRECT! Move on to Question 4
Part IV How to Share Google Docs Power on your mobile device Find the Google Docs app on your mobile device and touch it 3. Make sure your Google account is the account used when accessing Google Docs.
Part IV How to Share Google Docs 4. Tap on the down arrow by your desired document and tap “Share”. 5. On the bottom of the share screen you’ll see “Add from Contacts”. Touch the e-mail address contact or person you’d like to share with and the document will be shared with that address. Alternatively, you can add a new e-mail address.
Part IV How to Share Google Docs
Quiz Question 4 True or False – you can add a contact manually to share documents with in Google Docs? A). True B). False
Quiz Question 4 INCORRECT. Please Review This Slide For Clues
Quiz Question 4 CORRECT!
Good Job! You have successfully shown that you can take a picture, upload a picture, blog, and share documents all from a mobile device. End