
CS-Studio Display Builder Tutorial
E N D
Presentation Transcript
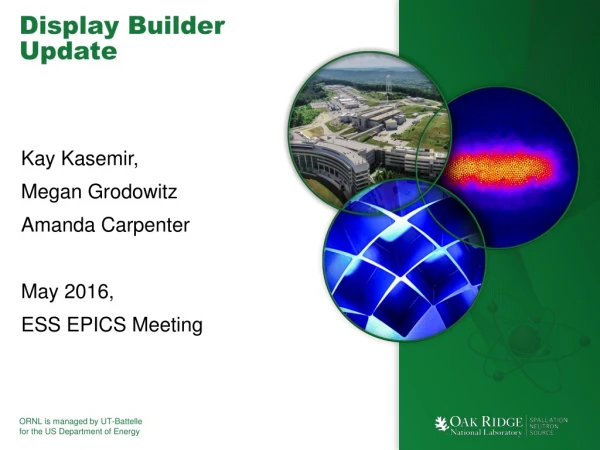
Display Builder Tutorial Jan. 2019 Kay Kasemir, kasemirk@ornl.gov
Display Builder • Operator Interface Editor and Runtime • Builds on ideas from EPICS edd/dm, medm, edm, .. • Very compatible with CS-Studio ‘BOY’ • Started ~2015 in CS-Studio/Eclipse, now in CS-Studio/Phoebus
Examples: SNS Accelerator CS-Studio ‘BOY’ *.opi files
Browse the Examples • Start CSS/Phoebus • Your setup might have a menu entry • File, Top Resources, Examples • If not, or if you’d like to inspect and edit the examples • Applications, Display, Examples, Install Example Displays Main Application ToolbarMenu Window, Show Toolbar TabHover mouse,open Context Menu, Close Display Runtime ToolbarContext Menu Window,Show / Hide Toolbar Navigate back/forwardalso via Alt-Left, Alt-Right cursor keysZoomto view large control room displays on office computer Example DisplayPush any of the buttons Context MenuDetails change with widgeton which menu was invoked
Send PV to other Tools Context menu opens other tool with PV
Open Existing Display In Editor • Context menu can open any display in Editor • Downloads remote files
Create New Display Property PanelEdit properties of selected widgets Menu Applications, Display, New Display • Enter a name with .bob file extension Save & Execute the Display Main Editor Area Select WidgetsMove, resize widgetsCtrl-C, V, X to copy, paste, delete (⌘ on Mac)
Widget PaletteDrag widget into editor - or - 1) Select Widget Type 2) Draw rectangular area in display Editing a Display Selecting Widgets a) Click single widget b) Ctrl-click to add widget (⌘ on Mac) c) Drag ‘rubberband’ around widgets d) Click or Ctrl/ ⌘ click in widget list Quick Edit Double-click widget to a) Edit text of Label b) Edit PV of widgets that use a PV
Suggested Setup for Editing • Pick a top directory, for example where you installed the example files • Open Applications, Utility, File Browser • Set it to your top directory • On file browser tab, open context menu, “Split Horizontally”, then “Lock Pane” • Menu Window,Save Layout As.. • “Editing” • Menu Applications,Display, New Display • Create new filein your top directory File BrowserSet to your “top” directory. Locked. Edit vs. Runa) Double-click to run. b) Right-click, Open With.., Editor
Keep It Simple • Add a Widget • Enter Label’s Text or Widget’s PV Name • Done At Runtime, widget will • Show PV’s value, formatted, with units • Indicate alarm, disconnect • Show tool-tip with PV name and value • Combo options read from Enum PV, slider range from numeric PV • Disabled when ‘control’ widget has no PV write access
Extend the First Display • Drag a “Text Update” from the palette • Enter PV name “sim://ramp(1, 10, 1)”.Note PV name auto-completion popup. • Add “Boolean Button” • PV name “loc://test” • Add “LED” • PV name “loc://test”.Note name in PV History. • Execute the display • Toolbar Button or Context Menu
PV Names • ca://some_pv_name • EPICS Channel Access PV • some_pv_name • Typically same, since “ca://” is the default • sim://sine • Simulated PV. See auto-completion hints • loc://x(4) • Local PV. See auto-completion hints • pva://x • EPICS pvAccess
Widget Palette • Shows all available widgets • Enter name for ”Search” • Hover mouse for description • Drag -or- Select & Rubberband • Categories • Graphics show static label, picture, .. • Monitors update based on reading a PV • Controls read a PV and can write to the PV • Plots tend to read from one or more (waveform) PVs • Structures group widgets, embed sub-displays
Create Widgets via Drag/Drop from other Apps Email with list of PVs? • Drag that text intoDisplay Editor • Select widget type Supported: Text Label Text PV Widget Image File Picture Widget *.bob File Embedded Display Widget
Show Coordinates Manipulating Widgets Order Front/Back Snap to Grid .. Other Widgets Size Align Widget ListSelect widgets Rename Widgets View/change their order. Distribute Selected Widgets TrackerMove or resize selected widgets
Display Properties Click on display background to select no widget for editing overall display properties • Name • Shown in Tab • Macros • Used by all widgets in this display • Grid size • Can aid with placing widgets
Widget Properties Select one (or more) widgets to edit their (common) properties • Search • To find desired property • PV Name • Most important property for most widgets Details depend on the widget type
Common Widget Properties Defaults tend to be reasonable: • Format with precision set by PV • Show units provided by PV • Alarm-sensitive Border • Fetch Items (Combo, …) from PV Instead of changing them,maybe the PV needs to be updated? Still, can be adjusted as needed for the display.
Predefined “Named” Colors and Fonts Use wheneverpossible!
Configuring Named Colors, Fonts Ideally set at start of project
Widget Notes • Text Entry, Text Update: • Set Format = String for “long string” waveforms. Default will show array. • LED, Boolean Button, Checkbox • Boolean PV • Numeric PV 0 or not 0 (when ”Bit” set to default of -1) • Bit in a numeric PV (when ”Bit” set to 0, 1, 2, …) • Multi-State LED • Enumerated or numeric PVs • Defaults to using state values 0, 1, 2, 3, ..
Widget Notes • Combo Box, Radio Button: • Best for enumerated PV: Enter PV name, done • Alternatively, un-check “Items from PV” and enter items
Action Button • Add ActionButton • Configure “Actions” property, add “Open Display” • Run: Clicking button opens the “other” display. In principle, any widget can have ‘Actions’.They appear in the widget’s runtime context menu.But it’s not obvious to end users that for example a Label will have actions.
Screen Navigation • Replace • Suggested default. • Allows back/forward navigation as in web browser • Minimizes number of open screens • New Tab • Opens in new tab • Allows specific Pane name • New Window • Opens in new window • With “Replace”, can still use • Context menu • Control (⌘ on Mac) for tab • Shift-Control for window
Screen Navigation: Tabs Tabs Each tab is in-memory, same *.bob • Appears immediately when selected • Uses CPU and memory when hidden Navigation Tabs Tab is loaded from separate *.bobwhen selected • May need a little time to load • No CPU and memory when hidden
Macros • Macros are passed into displays from • Enclosing Group or Tab Widget • Display • Embedded widget container or Action that loaded the display • Phoebus preferences • To use: $(NameOfMacro) • Examples: PV Name: $(PV) with PV=TheFullPVName PV Name: Motor$(N) with N=1, 2, 3, … Width: $(WID) with WID=200 Visible: $(SHOW) with SHOW=true .. or ${NameOfMacro}. EPICS *.db files use $(xx),SNL and shell use ${xx}, so we support both conventions.
sub.bob “Motor $(N)” Macro Example top.bob N=1 sub.bob “Motor 1” • Create display “sub.bob” • Label with text “Motor $(N)” • TextUpdate with PV “loc://pos$(N)(10)” • ActionButton with PV Name “loc://pos$(N)(10)”and Action to “Write PV” value 20 • Copy that button, update to set PV to 30 • Create display “top.bob” • ActionButton with Action to open sub.bob with N=1 • Copy/paste the button, update to N=2 • Execute top.bob, press buttons N=2 sub.bob “Motor 2”
Macros • Default values: $(MACRO=default) Allows standalone testingwithout passing values intodisplay • To enter macro for Boolean Press the “$” macro button Select valid optionfrom drop-down … .. or enter a macro
Macro Fallbacks When macro is not defined, falls back to • Widget Properties • Uses the internal property name shown in tool-tip of Properties view • Note how tooltip is usually preset to “$(pv_name)\n$(pv_value)” • Action Button has PV Name property.It’s not used directly as in other widgets with PV name,but in “Write PV” the PV name is preset to $(pv_name) • Action Button text is preset to “$(actions)” • Java Properties • $(os.name) • Environment Variables • $(HOME), $(USER)
Predefined Macros $(DID): Unique display identifier, useful for per-display PVs loc://x$(DID)(10) $(DNAME): Display Name
Group Widget Contains other widgets Visual Effect: • Border, Name Practical Effect: • Group can define macros for contained widgets • Group can be moved, copied/pasted as one unit in editor
Group Widget 1) Add Group Widget 2) Move other widgets inside the Group Active Group is highlighted
Group Properties • Name:Shown in border • Style:“Group Box” for named border • Macros:Passed to contained widgets
Group Editing Shortcuts • Select Widgets • Context menu “Create ..” • Select Group • Context Menu “Remove..”
Embedded Display Hosts a complete *.bob file within a widget Allows composing higher-level displays from smaller displays: • Per-device *.bob • Show multiple devices in one display
Embedded Display Example • Create display “sub.bob” (or use the one created earlier) • Label with text “Motor $(N)” • TextUpdate with PV “loc://pos$(N)(10)” • Create display “main.bob” • Embedded Display, File sub.bob, Macros N=1 • Copy/paste the Embedded Display, update to N=2 • Execute main.bob sub.bob “Motor $(N)” main.bob N=1 N=2 sub.bob “Motor 1” sub.bob “Motor 1”
Embedded Display Sizes • Embedded Display Size • Size of the widget that will host the *.bob • Defined by the widget Width and Height properties • Content Size • Size of the *.bob • Defined by that Display Width and Height properties What if those sizes differ?
Embedded Display Resize Options Size content to fit widget Size widget to fit content No Resize • No Resize usually best. Scrollbars appear as needed. • Resizing results in odd font sizes or widgets that outgrow their initial space.
Top Resources See Help, Preference Settings Start phoebus with “-settings /path/to/my_settings.ini”: org.phoebus.ui/top_resources=/home/controls/displays/main.bob, Start Page | http://controls.my.site/displays/main.bob, Start Page • File system: Use NFS or ‘git pull’ to distribute files • http: All users always see the same set of files
Many Widgets and Properties Compared to earlier EPICS display tools, • Group Widget instead of Lines • LED instead of Circle-with-changing-color • Tab/Navigation Tabs instead of buttons, local PVs, conditional visibility,.. Display describes Meaning: • Group of related widgets • LED for binary PV, not circle that happens to change color Files with meaning are easier to translate into the next tool
Widget Classes • Instead of creating a Label with large font, define a “TITLE” class for the Label • Instead of creating an LED with Orange color, define a “WARNING” LED class
Editing *.bcf Widget Class Files Name Defines a widget Class: ‘WARNING’ LED,‘TITLE’ Label,… Slightly different editor behavior Checked Property: Value becomes part of class definition
Using Widget Classes Select Widget Class Class Indicator:Property is handled by class Disabled: Cannot change the class-based property Context Menu:Re-load classes in case *.bcf is changed while editing display
Rules • Ideally, use widgets’ built-in functionality • Value of PV displayed in TextUpdate, LED, .. • Alarm indicated via Border • Sometimes useful to for example hide a widget, i.e. change visibility based on a PV • Rules can accomplish this • .. But functionality may not be obvious to the next person who needs to maintain a display
Adding a Rule • Add TextUpdate widget • Set PV to sim://ramp(0, 10, 1) • Open Widget’s Rules • Add Rule, name it “Hide” • Select “visible” property • Add PV sim://ramp(0, 10, 1) • Add BooleanExpression“pv0>8” • Un-check value • Run
Rules Detail • Triggered by at least one PV • May use additional non-trigger PVs • Expressions use pv0, pv1, .., pvStr0, pvStr1, .. to access PVs’ values • Rule internally converted to Jython • Use preview to debug • “else: ..” sets property to original value
Scripts • One Script Executor per *.bob file,Runs in background thread • Slow scripts do not block the UI • One script per display at a time • Many short-duration scripts • One that never quits • Scripts are attached to a widget • Triggered by at least one PV • May use additional non-trigger PVs • Invoked with • pvs[] – Array of requested PVs • widget – The widget • Script can • Read & write the received PVs • Set widget properties • Locate other widgets in the display • Invoke any Java code in the product • Be very powerful • Result in an unmaintainable mess