Download
1 / 13
130 likes | 151 Vues
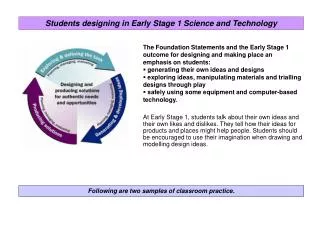
Student designing in Stage 2 Science and Technology. The Foundation Statements and the Stage 2 outcome for designing and making place an emphasis on students: · developing design ideas that recognise the needs of users and audiences

E N D
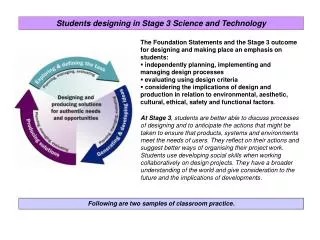
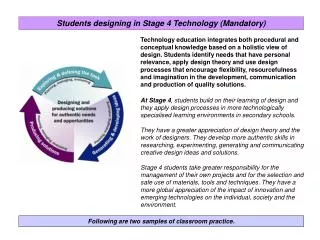
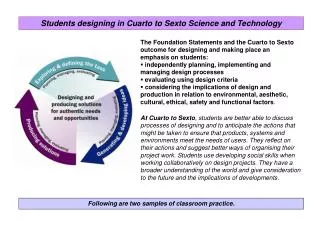
Student designing in Stage 2 Science and Technology The Foundation Statements and the Stage 2 outcome for designing and making place an emphasis on students: ·developing design ideas that recognise the needs of users and audiences ·implementing a design process using drawings, models and prototypes • evaluating design solutions. At Stage 2, students are better able to talk about the processes of design. They describe how they will go about a task and suggest better ways of proceeding. Students see the importance of planning and they willingly create drawings, plans and other documents to communicate ideas to others. At Stage 2, students start to appreciate the importance of seeing a design task from the point of view of a user or audience. Following are two samples of classroom practice.
Sample Task A: Design and publish a cooking book for a favourite food
Stage 2 Task A: Design and publish a cooking book for a favourite food Teacher: This SciTech design and publish task worked seamlessly with a HSIE country study unit. background learning exploring ideas considering criteria Students brought cookbooks from home and discussed the features that make them interesting, useful and attractive. They also discussed the purpose of their cookbook and the audience.
Stage 2 Task A: Design and publish a cooking book for a favourite food (cont.) planning generating ideas Teacher: “After deciding on the audience for their cookbook, students selected features they wanted to include. This was based on the list developed from earlier investigation.” Students worked in production teams. Each page had two students dedicated to word processing and two students dedicated to graphic design and production. All students worked in both a text team and a graphics team. Students developed proposed layouts for the cookbook cover and their own production team pages.
Stage 2 Task A: Design and publish a cooking book for a favourite food (cont.) Just prior to publication students from each production group brought together their work and laid it in the order of its development. Top row – final pages ready for publication. Middle row – final edits of layout. Bottom row – original page layout designs. evaluating process process learning Teacher: “In most cases the finished product bore little resemblance to the initial design. However, the process was valuable as students’ comments indicated a new found awareness of spending more time on design in order to save time during production. They saw the importance of communicating ideas to other team members.”
Sample Task B : Design and model ideas for better school grounds
Stage 2 Task B: Design and model ideas for better school grounds (cont.) Students from Years 3/4 created a mind map to identify what they thought was a built environment. defining a brief They went for a walk around the school to identify built environments that needed improving. They recorded all the sites they found and then discussed why each might need improving. From the identified needs they developed a design brief.
Stage 2 Task B: Design and model ideas for better school grounds (cont.) • We had to identify the groups that would use the site and what these people would need. • Students use the bus area to catch the bus in the morning and at home time. • Students, parents and teachers can use the bike racks to store their bikes while at school. • We surveyed the school to see how many people would: • 1. use the bus area to wait for the bus. • 2. ride bikes to school. This is where students wait for the bus. If it rains they get wet!!!! clarifying the brief This is where we currently keep our bikes. They are not locked and we have had trouble with people stealing our bikes. We created a Plus and Minus Chart to find out the facts about building a bus and bike shelter.
Stage 2 Task B: Design and model ideas for better school grounds (cont.) We then got a school map and walked around the area looking for good places to put the bus and bike shelter. We also had to contact the council and find out where the boundaries for the school ground were. We formed teams to work in and each group identified a place to put the bus and bike shelter. There was lots of discussion and negotiating. As a whole class we needed a set of rules (design criteria) for everyone to follow. 1. The bus and bike shelter needed to be close together so our Principal could supervise the area. 2. The bike shelter needed to be enclosed. 3. Both shelters needed to have a roof to stop people and bikes from getting wet and protect them from the sun. 4. The bike shelter needed to fit up to 15–20 bikes. establishing criteria for success
Stage 2 Task B: Design and model ideas for better school grounds (cont.) using experts to assist Once we started to think about building a shelter we had lots and lots of questions. In our class we had parents that could help us with our questions about designing and building. Mick is a carpenter he told us about building a structure. Ian is a surveyor he talked to us about planning and designing our structures. He was very impressed by our designs. using experts to assist • Some questions were: • Who do we have to get permission from to build our shelters ? • How do we put poles into the ground?
Stage 2 Task B: Design and model ideas for better school grounds (cont.) communicating Each group presented their plan to the class explaining where and why they put the shelter in a particular place. We had to sketch a top view (birds eye view) side view and front view of the area to show where each group would put the bus and bike shelter. generating ideas After drawing our plans we then set about building our models of the school area, bus and bike shelters.
Stage 2 Task B: Design and model ideas for better school grounds (cont.) First of all we used paper mache to model the ground area of our school. We had to show the grassed areas, the concrete area, the built up areas and the gardens. producing models We had to continually go back to our plan while we were building to check that things were in the right spot. producing models Each group then started using the recycled materials to build their shelters and other buildings that were in the area. Some groups found that the things they used didn’t work or weren’t stable enough so they had to rethink the materials they were using!! evaluating materials producing models
Stage 2 Task B: Design and model ideas for better school grounds (cont.) presenting proposals Once we had our built structures on our model we had to paint them so they looked like the real thing. producing models • We would like to: • share our models with the whole school (students, teachers and parents) and ask them to vote on the design they think will best suit our school. • talk to the P & C and our Principal and propose that we build our structures • share our presentation at a school assembly. Each group found the building process was great fun but hard work. It took longer than we thought and you had to work slowly. We had 7 models created by our groups with each one being very different. In groups we learnt that it was important to talk about the ideas we had, work together and share things. presenting proposals