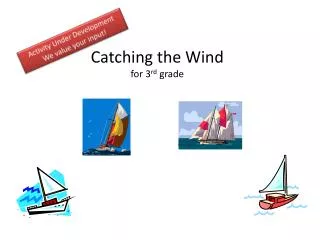
Catching the Wind: Engaging 3rd Grade Sail Design Activity Guide
260 likes | 404 Vues
This comprehensive activity guide aims to enhance 3rd grade students' understanding of sail design and aerodynamics through hands-on experiences. Students will discuss the challenge, brainstorm ideas, and explore the properties of different sail materials. The activity includes designing and testing sails with pontoon boats, enabling students to experiment with various shapes and materials. With guidance on setup and teaching tips, this guide promotes teamwork, creativity, and scientific inquiry as students learn what makes sailboats sail effectively.

Catching the Wind: Engaging 3rd Grade Sail Design Activity Guide
E N D
Presentation Transcript
Activity Under Development We value your input! Catching the Windfor 3rd grade
Activity Guide • Challenge: Discuss the challenge (5-10 minutes) • Generate Ideas and Multiple Perspectives (instructor choice) • Research and Revise (and Test Your Mettle) • Activity 1 - Discuss sails and how they work. (10 minutes) • Talk about the physical properties of materials, specifically those available to create a sail. • Use the rolled up chart of sail materials (stuck to the wall on the right side of station 1) to discuss properties with students. • Complete the chart as the students discuss it. • Activity 2: - Designing and Testing Sails (25-30 minutes) • Demonstrate the pontoon boat set up. • Encourage students to create sails. • Test student sails • Go Public: Revisit the challenge (5-10 minutes) • Discuss the challenge and how to conduct the test.
Teacher Tips • This activity requires setting up one or two fishing line “tracks” upon which “sailboats” can travel to test sails that your students create. • You will set up one track on each side of the STEMmobile for a total of two tracks. • You will set up a fan at one end of each of the tracks to make the sailboats sail. Fans are stored in the back of the equipment room. • You may want to practice setting up the track and using the fans with a boat to see how it works. • One of the six sail materials is set up at each table so that each group of 3-4 students at the same table will be using the same material. • They can make their sails different shapes, though. • They can compare performance of sail materials at each of the tables to determine which they think works the best.
Teacher preparation • Assemble materials – place them in each of 6 bins. You will have one bin at each table. Each bin will contain only one type of sail material. • 4 pieces of 1 type of sail material • 4 pairs of scissors • 1 “Testing Sail Designs” handout • 3-4 pencils • 1 ruler • Place 1 chart of “Properties of Materials” at teacher station. • Assemble pontoon boat tracks on each side of STEMmobile. See directions on following slides. • Note that the slides contain slide notes in presentation mode if needed to clarify materials or answer questions.
Begin to assemble pontoon boat tracks on each side of STEMobile • Slide metal brackets into metal channels. • You will have 4 metal brackets with 2 eye hooks on one side. • You need 2 metal brackets to make each test station. • Use the channels at the ends of tables: • 1b and 3a • 6a and 4b
Add sailboat and tracks to brackets • Unroll the fishing line from around the boats. • Each end of the fishing line has a metal ring tied on it. • Hook the metal rings from one end of the boat onto the turn buckles on one bracket. • Hook the metal rings from the opposite end of the boat onto the turn buckles directly opposite the others. • Place 1 stopwatch near the end of each track. • Place 1 anemometer near the end of each track. Make sure the boat is upright – the mast is on the top and the fishing line tracks are NOT crossed.
Make sure the boat floats on top of the line and stays upright. You will need to tighten the turn buckles to make the track TIGHT.
Attach a pre-made sail (one the teacher made - any shape any material) to the boat. • Use masking tape to attach the sail to the mast of the boat. If needed for support, attach another popsicle stick perpendicular to the mast near the top.
Demonstrate how the boat sails • Set a fan at one end of the boat track. • Move the sailboat to that end. • Turn on the fan and watch the boat move down the track. (Speed 2 works well.) • Use the stopwatch to show how long the sail took to sail down the track. • Use the anemometer to determine wind speed of the fan. Conversion Chart / Tablemeter per second to feet per second1.0 meters/second = 39.4 inches/second2.0 meters/second = 78.7 inches/second3.0 meters/second = 118.1 inches/second4.0 meters/second = 157.5 inches/second6.0 meters/second = 236.2 inches/second7.0 meters/second = 275.6 inches/second1 meter per second (m/s) = 39.4 inches/sec
Materials for building a sail • Sail material: (# of each depends upon class size – one table uses felt, one table tissue paper, etc.) • 4 pieces of felt • 4 pieces of tissue paper • 4 pieces of copy paper • 4 pieces of card stock • 4 Styrofoam coffee cups • 4 pieces of waxed paper 12” x 12” • 24 pairs of scissors • 24 copies of “Materials and Their Properties” • 24 copies of “Testing Sail Designs” (lower left filing drawer in mechanical room) • 1 giant chart of sail materials (stuck to the wall at the right side of station 1) • 1 box of dry erase markers • For sailing stations: • 2 measuring tapes • 2 rolls of masking tape • Extra popsicle sticks (may be necessary to help attach sail to the mast on the boat) • 2 box fans • 4 turn buckles • 2 pontoon boats wrapped with fishing line that has a metal ring at each end. • 4 metal brackets with hooks attached • 1 pre-made sail (teacher makes this from any of the sail materials listed above.) • 2 timers
Location of Each Material • Drawer contents 1b1: • Wooden craft sticks • 2 metal tape measures (manual reel) • 28 mechanical pencils • 1 roll of 30 lb test fishing line • 4 dry erase markers • 8 turnbuckles • 2 stopwatches • 2 anemometers • 10 rulers • Drawer contents 1b3: • 30 pair children’s scissors • 8 rolls of ¾” masking tape • 2 plastic pontoon boats with fishing line and rings attached (12-feet of fishing line between each ring) • Several Styrofoam coffee cups • Drawer contents 1b4: • Folders of: • Tissue paper • Copy paper • Cardstock • Wax paper • Felt • 4 metal brackets with “eye” bolts attached • The worksheets are stored in the equipment room in a file drawer to the lower left. • Fans are stored in mechanical room – on the left in the very back 1b1
Challenge • The Coast Guard has asked your class to test different sizes of square and rectangular sails to determine which size makes the sail boat travel the furthest and fastest. • Your class can select the material that you will use to make each sail that you test. • The Coast Guard has asked you to report: • Perimeter of each sail tested • Area of each sail tested • Shape of each sail tested • How long did it take each sail to move down the track? • How far did each sail move down the track?
Guiding question • What does the term physical properties mean? • Give some examples of physical properties? • Describe the physical properties and list examples of each. (For example, color is a physical property – examples of color would be white, green, blue, …) • What is a sailboat? • Describe a sail. • What makes it move? • How do you measure wind speed? • What is a mast?
Activity 1: Physical Properties of Materials (10 minutes) • Look at the “Chart of Sail Materials” that your teacher has. • As a class, discuss physical properties of these materials: • Color • How thick or thin? • Shiny or dull? • Bumpy, smooth, other? • Heavy? Light? • Others… • Your teacher will use the dry erase markers to fill in the “Chart of Sail Materials.”
What makes a sail work well? • What is a sail? • What does it do? • How does it work? • What shapes can of sails have you seen? • What is a mast? • If you build a sail, what material would you use and what shape would it be? • What is the instrument that measures the wind speed?
Activity 2: Designing and Testing Sails(25-30 minutes) • Divide into groups to make your sails • Students, in groups of 3 - 5, will move to a station to construct a sail of their own design. • Each station has one type of material: • Felt - Card stock • Wax paper - Coffee cup • Copy paper - Tissue paper
Draw and cut out your sail. • Think about the types of sails that you have seen. • What shape were they? • How big were they compared to the boat? • Draw your design in “Testing Sail Designs” Chart. • Make sure that the sail is no larger than 10-inches x 10-inches. • Once you have drawn your sail: • Measure each side. Record in your “Testing Sail Designs” chart. • Calculate the perimeter.* • Calculate the area. * • Cut your sail from the material on your table.
Test your sail • Teacher and assistant will attach the sail to one of two sailboats on their tracks. • Teacher and assistant will turn on fans. • Teachers will use stopwatches to determine how long it took the sail to reach the end of the track. • Teachers will also measure “wind” speed with an anemometer.
How did the sail work? • Use measuring tape to determine how far the sail boat traveled. Record in your chart. • How long did it take to get to the end of the track? Record in your chart. • Was the sailing smooth? • Record results in “Testing Sail Designs” • Which shape seemed to work better?
Record results of each of the sails made from the same material in “Testing Sail Designs” • Each student should have 4 test results in his/her “Testing Sail Designs.” The results of each of the sails made from the same materials are recorded in one chart. • Which sail material caused the boat to sail the greatest distance? • Which sail material traveled the least distance? • Draw a bar graph showing the distances that sailboats in your group traveled. Use the back of your “Testing Sail Designs” Chart to construct your graph.
Discuss results • How did each of the sail materials work? • How far did they make the sailboat sail? • Was the sailing smooth? • How fast did it go?
Which sail materials would you use? Why? • After talking about sail designs and which seemed to work the best, draw the sail that you think would work best. • Write which materials you would use. • Why would you design it this way?
Go Public – Revisit the Challenge (5-10 minutes) • The Coast Guard has asked your class to test different sizes of square and rectangular sails to determine which size makes the sail boat travel the furthest and fastest. • Your class can select the material that you will use to make each sail that you test. • The Coast Guard has asked you to report: • Perimeter of each sail tested • Area of each sail tested • Shape of each sail tested • How long did it take each sail to move down the track? • How far did each sail move down the track?
Vocabulary • Properties – the qualities of an object • Physical properties – the qualities that you can see or test without altering the object • Boat – an object that floats on the surface of water • Float – to stay partially above the top of the water • Sailboat – a boat that moves through the water when wind presses/blows against the sail • Sail – a large, flat piece of material attached to a mast on a boat that allows the boat to move when the wind presses/blows against it • Mast – a pole that stands up in a boat, usually in the center, that holds the sail in place • Material – the stuff an object is made from • Anemometer – an object used to measure wind speed