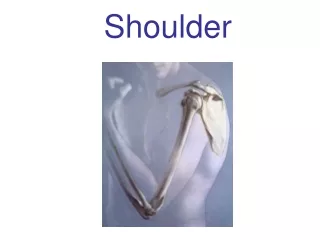
Shoulder Evaluation
Part 4. Shoulder Evaluation. Special Tests (13). Biceps tendon tests (6) Impingement tests (3) Thoracic outlet tests (4). Yeargason Test (LH biceps) :. Examiner begins by positioning the standing pt into 90 degrees of elbow flexion with the arm at the side

Shoulder Evaluation
E N D
Presentation Transcript
Part 4 Shoulder Evaluation
Special Tests (13) • Biceps tendon tests (6) • Impingement tests (3) • Thoracic outlet tests (4)
Yeargason Test (LH biceps): • Examiner begins by positioning the standing pt into 90 degrees of elbow flexion with the arm at the side • Examiner uses one hand to palpate the long head of the biceps and the other at the distal arm to provide resistance • Examiner then instructs pt to attempt to first externally then internally rotate the shoulder as the examiner resists the movement • Test is positive for biceps tendon subluxation (and subsequent tenosynovitis) if pt experiences pain or the examiner notes palpable crepitus.
Gilcrest Test (LH biceps): • Pt begins by grasping a 5-pound dumbbell in each hand • Pt is then instructed to externally rotate the shoulder, supinate the wrist, and raise both arms over head • Pain or crepitus at or around the superior glenoid fossa is a positive test that is indicative of tenosynovitis of the long head of the biceps • Pain or crepitus at or around the coracoid process is a positive test that is indicative of tendinitis of the short head of the biceps • Important distinction between long head tenosynovitis and short head tendinitis lies in the fact that only the long head is protected by a tendon sheath
Speed’s Sign (LH biceps): • Examiner first palpates the tendon of the long head of the biceps (deep in the anterior deltoid) • Examiner then instructs pt to flex the elbow as the examiner resists • Pain indicates a positive sign for bicepital tenosynovitis
Lippman’s Test (LH biceps): • Pt begins with the elbow flexed to 90 degrees and the humerus resting at the side • Examiner palpates the long head of the biceps and moves 3 inches distally • Examiner then rolls the biceps tendon against the humerus • Pain indicates a positive test for long head biceps tendon subluxation
Booth & Marvel (Transv. Hum. Lig.) Test (LH biceps): • Examiner passively abducts pt’s arm to 90 degrees and then passively internally and externally rotates pt’s shoulder • At the same time, the examiner maintains pressure on pt’s bicepital groove • Pain or a popping sound or sensation is indicative of a positive test for long head biceps tendon subluxation
Ludington’s Test (LH biceps): • Examiner instructs pt to clasp the hands overhead and contract the biceps isometrically • Test is positive for long head biceps tendon subluxation if pt experiences sharp pain on contraction
Neer Impingement Test (impingement): • Examiner passively flexes pt’s arm into complete flexion • Pain indicates a positive test for subacromial impingement syndrome
Hawkins-Kennedy Test (impingement): • Examiner passively positions pt’s shoulder in 90 degrees of flexion, 90 degrees of elbow flexion, and end-range shoulder internal rotation • Apprehension or sensations of pain are considered a positive test for subacromial impingement syndrome
Jam Test (impingement): • Examiner first abducts the standing pt’s arm to 90 degrees and flexes the elbow to 90 degrees • Examiner then internally rotates pt’s arm so that pt’s hand points toward the floor • Next, examiner rapidly and sharply pushes the pt’s elbow with one hand to effectively drive the greater tuberosity under the coracoacromial ligament • Examiner’s other hand should be used to stabilize the shoulder • Test is positive for subacromial impingement syndrome if pt experiences pain
Adson Test (thoracic outlet syndrome): • Examiner begins by palpating pt’s radial pulse • Pt’s arm is then abducted, extended, and externally rotated while the examiner continues to palpate the pulse • Pt is then instructed to take a deep breath and turn the head toward the arm being tested • A disappearance of the radial pulse is a positive test that indicates a compression of the subclavian artery by the medial scalene muscle
Allen Test (thoracic outlet syndrome): • Pt begins from a standing position • Examiner passively flexes pt’s elbow to 90 degrees, then abducts and externally rotates pt’s shoulder • Examiner then palpates pt’s radial pulse and instructs pt to look away from the side being tested • A disappearance of the radial pulse indicates a positive test for thoracic outlet syndrome
Halstead Maneuver (thoracic outlet syndrome): • The examiner first palpates pt’s radial pulse and applies a downward traction on the pt’s arm being tested • Examiner then instructs pt to rotate the head to the opposite side and then extend the neck and look at the ceiling • A disappearance of the radial pulse indicates a positive test for thoracic outlet syndrome
Provocative Elevation (Roos) Test (thoracic outlet syndrome): • Examiner instructs pt to raise both hands overhead and rapidly pump the hands 15-30 times • Test is positive for vascular insufficiency indicating thoracic outlet syndrome if the pt experiences numbness, cramping, or tingling