Squad Tactics- Ambush
Squad Tactics- Ambush. Lesson Objectives. Compare and contrast the two categories of ambush – hasty and deliberate Compare and contrast the two types of ambush – point and area Compare and contrast the two formations of ambush – linear and L-shaped

Squad Tactics- Ambush
E N D
Presentation Transcript
Lesson Objectives • Compare and contrast the two categories of ambush – hasty and deliberate • Compare and contrast the two types of ambush – point and area • Compare and contrast the two formations of ambush – linear and L-shaped • List key planning considerations for a squad ambush • List common elements and teams that squad leaders consider when organizing a squad ambush • Plan a point or area ambush using a linear or L-shaped formation
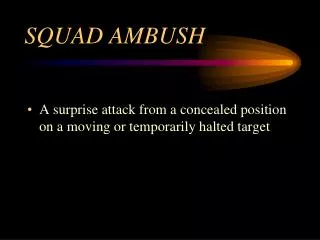
Slide 3 of 30 Ambush An ambush is a surprise attack from a concealed position on a moving or temporarily halted target. Anti-armor ambushes are established when the mission is to destroy enemy armored or mechanized forces.
Slide 4 of 30 Elements of an Ambush The three basic elements are: • Security • Support • Assault
Slide 5 of 30 Ambush Classifications • Category • Hasty • Deliberate • Type • Point • Area • Formation • Linear • L- shape
Slide 6 of 30 Ambush Stages • Planning • Occupying • Executing • Withdrawing
Slide 7 of 30 Considerations for Planning an Ambush • Route • ORP • Leader’s recon of objectives • Indirect fires and obstacles • Occupation of ambush site • Initiate ambush • Actions on Objective • Withdrawal
Slide 8 of 30 Identify OBJ
Slide 9 of 30 Route • From patrol base to ORP • From ORP to objective • From objective to ORP • From ORP to patrol base
Slide 10 of 30 Objective Rally Point (ORP) • Select location based on map recon and OAKOC analysis • Occupy ORP by force or by deliberate occupation • Establish ORP • Sectors of fire • Priorities of work • Local security
Slide 11 of 30 Select ORP
Slide 12 of 30 Leader’s Recon of Objective • Issue five point contingency plan • Plan the kill zone • Identify Objective • Identify kill zone / center of the kill zone • Special Teams Locations • LOA • Fires • Collection Points • Release Point
Slide 13 of 30 Leader’s Recon of Objective (2)
Slide 14 of 30 Leader’s Recon of Objective (3) • Establish special teams location and sectors of fire • Security • Support • Assault • Surveillance • Determine limit of advance (LOA) • Determine release point (RP)
Slide 15 of 30 Leader’s Recon of Objective (4) • Plan indirect fires • Determine collections point • Enemy prisoners of war (EPW) • Casualty collection point (CCP) • Demolition (demo) • Complete plan • Issue OPORD
Slide 16 of 30 Indirect Fires and Obstacles • Plan indirect fires to destroy enemy in kill zone • Cover dead space • Isolate objective from escape or reinforcement (left, right, and far side) • Screen movement off objective
Slide 17 of 30 Indirect Fires and Obstacles (2) • Tie in kill zone with impassable terrain (OAKOC) • Place mines to cover dead space or likely escape and counterattack routes
Slide 18 of 30 Select Location for Key Components
Slide 19 of 30 Occupation of Ambush Site • Travel from ORP to RP • Security halt at RP • Emplace left and right flank security • Emplace support team • Emplace assault team • Emplace mines and obstacles • PL must have visual center of kill zone • PL positions for direct control of most casualty producing weapon • If no claymores, PL must co-locate machine gun with PL in order for PL to give MG order to fire
Slide 20 of 30 Initiate Ambush • Left and Right Flank Security Give Early Warning to PL (SALUTE) • Number of enemy and traveling technique • Movement formation and speed • Location of key leaders • Distance from front to rear of enemy formation • Location of most casualty producing weapons
Slide 21 of 30 Initiate Ambush • PL can not delegate task of initiating ambush • PL initiates ambush with the most casualty producing weapon • Goal is to initiate when the majority of the enemy is in the center of the kill zone • PL Initiates preplanned indirect fires • Shift and lift fires signal to assault through kill zone • Assault team assaults through kill zone to LOA
Slide 22 of 30 Actions on Objective • Assault element reports LOA to PL • Consolidate and reorganize to establish a hasty 180 degree defense to prevent counterattacks • Team leaders request LACE report and submit LACE report to PL • PL reports LACE, and SALUTE to higher command
Slide 23 of 30 Actions on Objective (2) • PL Calls for Special Teams • EPW Team • Aid and Litter Team • Demo Team
Slide 24 of 30 Withdrawal • Demo is prepared • PL signals for assault elements to withdraw • PL signals for support team to withdraw • PL gives “fire in the hole” signal • Demo team ignites charges & departs with PL
Slide 25 of 30 Withdrawal (2) • The APL is at the RP counting squad members through the RP. Once to the RP, squad members form a hasty perimeter with EPWs and casualties in the center. They await PL’s order to move back to ORP. • While en route to ORP, PL calls for preplanned indirect fires to cover his withdrawal. PL moves patrol to ORP. • Patrol remains in ORP only long enough to collect and disseminate CCIR among all patrol members. • The PL goal should be to depart from the ORP within three or four minutes. While en route to Patrol Base, PL sends required reports to higher (SALUTE and LACE and CCIR).
Slide 26 of 30 Platoon Area Ambush
Slide 27 of 30 Squad Ambush Technique 1
Slide 28 of 30 Squad Ambush Technique 2
Slide 29 of 30 Platoon Linear Point Ambush
Slide 30 of 30 Platoon L-Shaped Area Ambush
Slide 31 of 30 Limitations to Squad Ambush • 9-Soldier squad limits ambush techniques and options • Squad size limits ability to deploy 2-Soldier security teams out on flanks and to rear (leaves 3 Soldiers to conduct ambush) • Number of organic squad radios limits ability to displace support and security elements • Number of Soldiers and radios limits ability to conduct effective L-shaped ambush • Two techniques exist to assist squad leaders to plan and conduct squad ambush
Slide 32 of 30 Closing • Summary • Review Objectives • Questions???