Download
1 / 25
260 likes | 393 Vues
Digital Camera Picture Transfer. One Example of Moving Files from a Camera to the Computer’s Hard Drive. By Bob Fiske. Transferring Pics – Hard?. Can be difficult Many small steps to learn No s tandardization Many brands of cameras And smart phones The challenge:

E N D
Digital Camera Picture Transfer One Example of Moving Files from a Camera to the Computer’s Hard Drive By Bob Fiske
Transferring Pics – Hard? • Can be difficult • Many small steps to learn • No standardization • Many brands of cameras • And smart phones • The challenge: • Learn the procedure for your camera
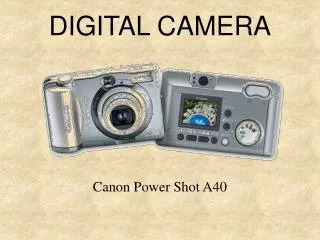
Step 1: USB Cable Here is my Canon PowerShot Camera There’s a little flip door Got it! And I plug in the mini-USB plug
Step 1: USB Cable (cont’d) The other end is a regular USB plug Well, that part is done
Comment on Step 1 • No USB cable? • Memory card • Many cameras use a memory card to store pics • Some computers have a slot to load these cards • This will probably make Step 2 less work
Step 2: The Camera Picture Folder • If my camera is connected to the computer… • Then I want to view the picture folder on the camera • That’s a big IF • The first time I opened My Computer, I goofed I thought this was my camera. Then I realized this is the laptop’s built-in camera.
Step 2: The Camera Picture Folder (cont’d) • Oh. I’m supposed to turn the camera on. • Then Windows connects to it That green light means the power is on This says, “Camera connected”
Step 2: The Camera Picture Folder (cont’d) I almost always cancel this little window Back to the My Computer window. Now I can open a window for the camera. • NOTES: • My Computer? Yes, if your computer runs Windows XP. Newer versions of Windows (Vista, Win7, Win8) call it “Computer”. • Why are Bob’s pictures so crummy in this presentation? • ‘Cause he is shooting with his old cell phone camera • Oh, and ‘cause he’s a pretty bad photographer
Step 2: The Camera Picture Folder (cont’d) • The camera’s picture folder • Finally! • By the way, what is DCIM? • Digital Camera Image Management • Some cameras and phones store pictures in a folder called “DCIM”
Step 3: Make a Folder on the Hard Drive • Time to transfer picture files • You need a folder on the hard drive • This is a combination of navigation and creating new folders • Starting point • In older versions of Windows, you might start with My Documents and go to My Pictures • After Windows 7 start with the “profile” folder, then to to My Pictures
Step 3: Make a Folder on the Hard Drive • Sub-folders • I made a folder “Digital Cameras” under My Pictures • Under this folder I made a sub-folder “Canon PowerShot”
Step 4: Park the Two Windows • Parking a window • This is putting a window in corner of the screen • Note: Not maximized! (Instead, restore it down) • Do this for the camera window and with the window of the folder you made on the hard drive My “Canon PowerShot” window parked in upper left corner Strange: Bob has his Task Bar stuck on the left side! Camera window parked in lower right corner
Step 5: Drag Files from One Window to the Other • Select files in the camera window • I do a Select All command • I’m moving all my pictures • This command is in the Edit menu of the camera window • Or use Ctrl-A Yes, that’s the Edit menu and the Select All command. So embarrassing!
Step 5: Drag Files from One Window to the Other (cont’d) • Click-and-drag any one of the selected files • Drag it into the white space of the hard drive window • All the selected files will be moved • See the next slide…
Step 5: Drag Files from One Window to the Other (cont’d) All these picture files in the camera window have been selected. - See the blue lines around the thumbnails? This arrow cursor with the “+” means “Copy these files to this folder”
Step 5: Drag Files from One Window to the Other (cont’d) • Be patient! • If you have a lot of files • Or they are LARGE picture files • Or your computer is slow
Step 5: Drag Files from One Window to the Other (cont’d) • While I waited I took produce pictures
Step 5: Drag Files from One Window to the Other (cont’d) • Patience is its own reward
What is the Best Pixel Resolution? • Done. • Now, a digression: file size • Many people innocently set their cameras to shoot at the maximum resolution • They think more pixels are better • If you are a serious photographer, this is true • If you are not, then a medium resolution is just as good as high resolution • And your files won’t be gigantic
What is the Best Pixel Resolution? I just transferred 619 picture files These files take up only 196 MB
What is the Best Pixel Resolution? These pictures I shot with my Canon PowerShot - at medium pixel resolution
Step 6: Disconnect Your Camera • Do you need to “Safely Remove” your hardware? • If Windows sees your camera as a flash drive, then you need to inactivate the data connection Check the notification area for the “Safely Remove Hardware” icon
Step 6: Disconnect Your Camera • In my case, I don’t need to safely remove hardware • The icon is not present • I just turn off the camera and unplug it No more green light
Step 6: Disconnect Your Camera • And the camera no longer appears in the My Computer window