Chapter 13
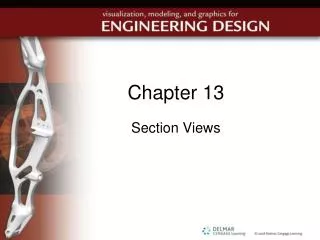
Chapter 13. Section Views. Objectives. Use cutaway, or section, views as a method for showing the features of a part that are normally hidden when presented on a multiview drawing Decide when a section view is necessary. Objectives (cont’d.).

Chapter 13
E N D
Presentation Transcript
Chapter 13 Section Views
Objectives • Use cutaway, or section, views as a method for showing the features of a part that are normally hidden when presented on a multiview drawing • Decide when a section view is necessary
Objectives (cont’d.) • Decide what category of section view should be used for particular circumstances • Create a desired section view such that it adheres to accepted engineering drawing practices
Introduction • Multiview drawings may not be adequate to define all features in many types of parts • Some may be obscured • Too many hidden lines cause confusion • Section views reveal interior detail
A Look Inside FIGURE 13.01. Two views of an object (a coffee mug) with interior detail.
A Look Inside (cont’d.) FIGURE 13.04. A multiview drawing of the coffee mug using hidden lines to show interior detail. FIGURE 13.03. Orthographic views of the coffee mug fail to define interior detail.
A Look Inside (cont’d.) FIGURE 13.05. Hypothetical cutting of the object to reveal interior detail. FIGURE 13.06. A multiview drawing of the coffee mug using section views to show interior detail.
Full Sections • Object is cut completely by cutting plane perpendicular to a standard viewing plane • Associated viewing direction • Section views do not have to remain aligned with adjacent orthogonal views • Section view can have different magnification than the view in which it was created
Full Sections (cont’d.) FIGURE 13.07. Creating a full section. An object is projected onto a viewing plane in (a). A cutting plane orthogonal to the viewing plane slices the object in (b). The piece to be viewed remains, while the other piece is removed in (c). The projection of the sliced object is made on the cutting plane in (d). The cutting plane and image are rotated about the section line in (e). The section view is coplanar with the viewing plane in (e).
Full Sections (cont’d.) FIGURE 13.12. Multiple sections with nonaligned section views and different scales.
What Happens to the Hidden Lines? FIGURE 13.14. The need for many hidden lines in the original drawing (a) is reduced by the use of a section view (b).
The Finer Points of Section Lines FIGURE 13.15. Examples of proper and poor cross-hatching techniques.
Offset Sections • Modifications of full sections • Allows multiple features, requiring multiple section views, to be seen in a single view • Cutting surface is not flat, but stepped • Viewing direction indicated by arrows
Offset Sections (cont’d.) FIGURE 13.17. Creating an offset section. An object is projected onto a viewing plane in (a). A stepped cutting plane orthogonal to the viewing plane slices the object in (b). The piece to be viewed remains, while the other piece is removed in (c). The projection of the sliced part is made on the outermost segment of the stepped cutting plane in (d). The cutting plane and image are rotated about the section line in (e). The section view is coplanar with the viewing plane in (f ).
Half Sections FIGURE 13.19. Creating a half section. An object is projected onto a viewing plane in (a). A stepped cutting plane slices through the object to the plane of symmetry in (b). The piece to be viewed remains, while the other piece is removed in (c). The image of the sliced object is projected onto an orthogonal viewing plane in (d). The viewing plane and image are rotated about the intersection line in (e). The section view is coplanar with the original viewing plane in (f).
Procedures for the Creation of Section Views • Deciding when to use section views • If the answer to any of the following questions is yes if only hidden lines will be used: • Are any hidden lines composed of multiple segments? • Do any hidden lines of a feature intrude into the area occupied by another hidden feature? • Do any hidden lines of a feature share or come close to sharing any hidden lines with another feature unless the lines are exactly common?
Creating a Full Section View FIGURE 13.22. Construct a full section view of this part. It is desired to reveal the indicated features (step 1). FIGURE 13.23. Step 2: Draw the cutting plane and the desired viewing direction.
Creating a Full Section View (cont’d.) FIGURE 13.24. Step 3: Outline the sectioned part based on the adjacent view. FIGURE 13.25. Step 4: Identify the intersection points with the cutting plane and see what is happening on the adjacent view.
Creating a Full Section View (cont’d.) FIGURE 13.27. Continue and outline the next internal feature associated with the intersection points on the cutting plane. FIGURE 13.26. Step 5: Outline the internal features associated with the intersection points on the cutting plane.
Creating a Full Section View (cont’d.) FIGURE 13.28. Continue and outline the last internal feature associated with the intersection points on the cutting plane. FIGURE 13.29. Step 6: Find the boundaries of air and solid and cross-hatch the solid areas.
Creating a Full Section View (cont’d.) FIGURE 13.30. Step 7: Add any new edges that are revealed. Label the view. Note that the former front view may be removed since it adds no additional information.
Creating a Half Section • Identical to steps for creating full section except only half of interior revealed FIGURE 13.32. Presentation as a half section view.
Multiple Section Views • For complex objects, multiple section views used FIGURE 13.33. A complex object requiring multiple sections. It is desired to reveal the interior of the indicated features (step 1).
Creating an Offset Section • Step 1: Identify features to be revealed and desired viewing direction • Step 2: Draw stepped cutting plane line to reveal desired features • Step 3: Outline modified part in adjacent orthogonal view
Creating an Offset Section (cont’d.) • Step 4: Identify intersection points of exterior and interior edges with each segment of cutting plane • Step 5: Outline internal features associated with intersection points on cutting plane
Creating an Offset Section (cont’d.) • Step 6: Find boundaries between solid and empty space and fill solid areas with section lines • Step 7: Add or remove background edges in space and remove edges in solid areas
Creating an Offset Section (cont’d.) FIGURE 13.44. Step 2: Draw the cutting plane and select the desired viewing direction.
Creating a Sectioned Pictorial FIGURE 13.51. For ease of visualization, turn the former section view into the bottom view by removing cross-hatching and adding a section step line. Add a left view. FIGURE 13.50. To visualize the sectioned part, remove the portion that is not seen from the existing orthogonal views.
Creating a Sectioned Pictorial (cont’d.) FIGURE 13.52. Create the pictorial using the sectioned part instead of the whole part.
Removed Sections FIGURE 13.53. Creating a removed section. An object is projected into a viewing plane in (a). The cutting plane slices the object in (b). The image of the intersection is removed from the object in (c). The removed image is initially perpendicular to the viewing plane in (d) but is then rotated to be parallel to the viewing plane in (e). The removed image is finally projected onto the viewing plane in (f).
Revolved Sections FIGURE 13.56. Creating a revolved section. An object is projected onto a viewing plane in (a). The cutting plane slices the object in (b). An image of the intersection is removed in (c). The intersection image is initially perpendicular to the viewing plane in (d) and then rotated to be parallel to the viewing plane in (e). The image is projected onto the viewing plane in (f ).
Broken-Out Sections FIGURE 13.59. Creating a broken-out section. The object is projected onto a viewing plane on (a). A cutting plane slices through the feature of interest (but not the entire part) in (b). The portion in front of the cutting is broken out and removed in (c). The interior details of the feature are shown in (d). The image of these features is projected forward in (e) and placed directly on the part image in (f).
Sections of Assemblies FIGURE 13.62. The method for showing the assembly of many parts.
A Few Shortcuts to Simplify Your Life • Small cutouts on curved surfaces FIGURE 13.63. A permitted shortcut for small holes and slots in curved surfaces.
Threaded Parts FIGURE 13.64. A section of a threaded part.
Thin Features FIGURE 13.65. The conventional section (a) and recommended variation for a thin feature (b).
Vanes, Fins, Spokes, and the Like FIGURE 13.67. Two examples of the recommended presentation of spoke, vanes, and fins.
Symmetry FIGURE 13.68. The preferred presentation of symmetrical features.
Considerations for 3-D Modeling • Section views can be created quickly and accurately with software • Selection of where to section object still up to person making drawing • Disadvantages • Sometimes shortcuts not available • May not allow adequate development of spatial reasoning and mental imaging skills
Summary • Discussed section views as a method of looking at internal details of objects • Discussed cutting planes and cutting plane lines • Described several types of section views that can be used and the rules that must be followed when making them