
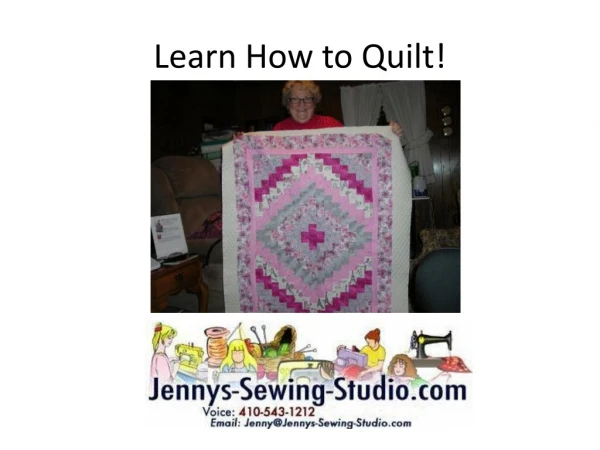
Learn How to Quilt!
Learn How to Quilt!. Quilting is fun and easy ! All you need to know is how to use the straight stitch on your machine!. Quilting is the act of putting three layers of fabric together. A top, batting and bottom layer make up the quilt.

Learn How to Quilt!
E N D
Presentation Transcript
Quilting is fun and easy !All you need to know is how to use the straight stitch on your machine!
Quilting is the act of putting three layers of fabric together. A top, batting and bottom layer make up the quilt.
I like to use my sewing machine to quilt. Some like the craft of hand sewing the 3 layers. Some use a frame to hold the quilt layers as the quilting is done. I use safety pins to hold the 3 layers together and then I use my machine to quilt.
Here are suggested tools that will be helpful when quilting! Get a sewing machine you can be creative with. I suggest an electronic sewing machine with electronic foot controller so you can easily control the feed of the fabric and the speed of the machine. It helps to be precise with the seams. Machines are priced from $299.
Look for a machine with a bed extension and a front drop in bobbin. This machine is a basic and easy to use.
Spend a little more and get a wider arm extension. You can then fit a bigger quilt under the machine. You may also look for a machine that writes sewn letters. That way you can personalize.
I believe you should always look at electronic sewing machines because the ease of operation. Electronic machines preset the stitch length and width to make the optimum stitch. When you turn on the machine it is ready to sew. You do not need the instruction manual to do the most basic sewing. Threading should be easy to follow. Most machines now number the steps or draw them on the machine.
Features you will need to look at include: -Smooth and variable speed control, an electronic controller is best -Built in threader -Variable stitch length and stitch width. -One step buttonholer, many machine will measure the size of a button and sew a buttonhole to match. -A variety of utility and decorative stitches. Include blind hem, mending, and over edge stitches. -Front drop in bobbin. -Easy threading -Bed extension -Easy service and instruction
Once you buy your machine here are some accessories that can really help you be creative. I like the circular stitcher and the spiral stitcher to add a decorative effect with little effort..
If you are considering a new machine make sure to add a few built in decorative stitch functions. Here is a quilt I did using a heart applique’ and many combinations of decorative stitching. The quilt will give you an idea of how useful the stitches can be in the embellishment process. It was so much fun to be creative. These blocks were made by myself and several of my previous employees.
A serger can also be a wonderful piecing tool for quilters. The ¾ thread overcast stitch is a perfect ¼” seam. When you piece with a serger the quilt top is finished on the back, so it will not ravel. One of the “Quilt in a Day” strip quilts is a perfect project for the serger. I can teach you how to thread and use a serger in a “one on one” class.
I used a serger stitch called flat lock with decorative thread to make this Seminole pieced fabric. The strips were pieced side by side and pressed. I then recut the pieced fabric into new strips and rearranged them to form the “Seminole Patchwork” strip. Once the fabric strip was made, I cut out my stocking and completed the construction with a serger.
Here is a list of other supplies you will need. I will cover how you will use them as we talk about technique. • Good sharp scissors and trimmers • Seam gauge • Thimble • Seam ripper • Safety pins • Steam iron and pressing mat • Thread in a neutral shade
Fabric markers like a wash away pen • Clover chalk in white for dark colors • Seam presser • Good see thru rulers and squares
Walking Foot • ¼” foot • Free motion foot • Quilter’s gloves • Hand sewing needles assorted • Hand quilting needles – start with size 7 between • Template plastic and permanent marker • highlighters • Layout area
The ¼” foot is a great guide foot to get accurate ¼” seams. ¼” is the standard use to piece patchwork. There are many styles of ¼” feet and they all offer a guide for you to sew a perfect ¼”. Here is how it works. When doing any type of patchwork or strip piecing you will need a guide to help you.
12” and 6” and 6 ½” plastic see through rulers come in handy. Most rulers are marked every 1”, ½” and ¼”. Ruler also have a 45 and 60 degree angle markings for triangles. 24” x 6” rulers are perfect for the rotary cutter. You will need a 24” X 18” mat if you want to learn strip piecing.
You will need a 24” X 18” mat if you want to learn strip piecing.
Fabric I use 100% cotton for quilting. You can use blends but they do not piece as well, press as well or have the vivid color as 100% cotton. If you question the colorfastness of the fabric , prewash the material before use. Otherwise I use most fabric right from the bolt. Most quilting fabrics are 45” wide. Since this is a standard measurement it will help you calculate yardage. Straight of grain lines follows the selvedge.
Buying quilting fabric is an adventure, especially “on line”. When I had my store I used to help customers coordinate quilts. I have noticed some sites like www.fabric.com has a planning space to save your collection before purchase. Find a favorite fabric that tells a color story you want in your space or home. I suggest a fabric with multiple colors and the print should be medium to large in size. Here are florals but it can be a animal print or a check or a theme fabric. You can even use solids or muslin.
Next take your favorite statement print and try matching it up to various prints of different sizes, try solids too. Making some quilts takes as many as 6 coordinating prints. A traditional sampler Lap Quilt can use 4 prints in the block and have a contrast or matching border. The prints should compliment each other. Pick your palette, blend and eliminate anything that you do not like.
Watch out for directional prints. You have to use them carefully!
I owned my own quilt shop and bought quilt fabrics every season. I needed to look at a story the fabric told. I will tell you each quilt shop is different because the owners tend to like either bright or old fashion or regional prints. Here is another fabric story. You can see I like brights.
Since there are not as many fabric shops available locally you may need to do shopping with the copy paste method on-line. Every on-line merchant has the fabric photos. Make a folder and call it quilt fabric. Right click on your fabric choices for a quilt and save them in the folder. Try pasting the pictures into a blank page in Microsoft word and you can combine, edit, move and delete the pictures. Fabric.com, and Amazon are good places to start shopping.
Always look for blenders and batiks that make good backgrounds. These are fabric you buy to put in your stash because they can be used many ways. I always have muslin and black fabric on hand. My favorite solid fabric brand is Kona Bay. I use Roc-Lon muslin 403 as a brand of unbleached muslin. ( Roc-Lon was founded in 1832 in Baltimore, MD.)
There are so many designers and brands of quilting fabrics they are hard to list. Here are a few of my favorites. Cranston Prints- Jinny Beyer Amy Butler Kaffe Fassett Fabric Quilt Moda Kona Bay
Fat quarters are sold on line as collections and blended. A fat quarter is a ½ yard cut on the fold. It measures approximately 18” X 22”. A ¼ of a yard is 45” X 9” so a fat quarter can sometimes be beneficial because of the width.
Here are some batting types. For machine and hand quilting I like light weight polyester and fusible batting. If you are going to use batting made sure it is bonded so it does not clump. Cotton batting is popular but it is heavy, so I like polyester better because I do machine quilting and the lighter weight does not tire me as fast.
Here is a special batting for pot holders with heat resistance.
To quilt a whole piece quilt top I use double faced prequilted fabric. It makes assembly and sewing of the 3 layers a lot easier and cheaper than using a backing, batting and top layer. I have even suggested buying a comforter to use as 2 of the 3 layers when cost is a factor. Shop around. The best advise is the try the 3 layers together as one and feel the thickness and flexibility of the fabric layers before you decide what will make a good backing and batting. Try to avoid seams and extra loft battings when machine quilting.
Learn to do free motion quilting. It is like drawing with your machine. Use the free motion foot for best results. I suggest making a practice square you can warm up on before you begin your good project.
Side to side motions and up and down motions are best. Try to run your sewing machine at a good even and medium sewing speed. I use quilting gloves for a good grip on the fabric. Here is a demonstration on how the technique works using this foot. The video was created by Singer.
Once you learn to free motion quilt you can even make fancy quilting designs on solid fabrics.
Here is an example of quilting the print in the fabric using free motion. I loved these butterflies and made some placemats using free motion.
You can free motion quilt a “white on white” quilt block by block. Once you have all the blocks quilted you can assemble the quilt with a “quilt as you go” technique involving border strips. In this quilt the border strips are a “rose” print. Another method you can use is the “Lap Quilt” method.
This quilt pattern was only a ¼ of the block so I printed 4 and taped the ¼’s together to make one block stencil. I laid the muslin 16” square over the pattern and traced the outline for quilting. I offer a class to learn free motion quilting.
Cut your border strips from a border stripe print. Press ¼” under on each side of the strip. Next sew the quilted blocks together, first in rows and then assemble the rows to make the quilt. The seams on this quilt are on the front side.
Top stitch the seam to one side using a walking foot to help feed the quilt through the machine. Next pin the border strips so the border is centered over the seam. Top stitch in place.
The walking foot helps feed all the layers of the quilt You will need a walking foot for the quilt edges, straight line stitching, stitch in the ditch and binding. If you do not use a walking foot I guarantee a lot of puckering.
Quilting can be done to finish clothing, purses, pillows, wall hangings, bedspreads and more. I like to start learning on something small so I can finish and see the result of my time investment. The more I practice the skill of quilting, the better I become and the bigger the project I will try. Consider these easy projects as you develop your quilting skills.
A great beginner project is a digital fabric print to practice free motion quilting


