Download
1 / 38
380 likes | 552 Vues
New Staff Technology Introduction. 2009-2010. Your Computer. Technology Agreement Taking care of your computer Storage of your computer Logging into your computer The purpose of synching your computer. Desktop Overview de. Menu Bar.

E N D
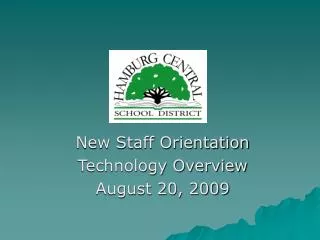
New Staff Technology Introduction • 2009-2010
Your Computer • Technology Agreement • Taking care of your computer • Storage of your computer • Logging into your computer • The purpose of synching your computer
Desktop Overviewde Menu Bar • The Desktop consists of the Menu Bar, the Dock and the Macintosh HD. Clicking here opens the ‘Finder’ The Dock Shortcuts to Applications are located in the ‘Dock’. Finder
Changing your Dock • Your Dock can be modified to suit your needs simply by clicking and dragging an application from the application folder to the Dock. To remove an item from the Dock, click and drag the item off of the dock. • By clicking on System Preferences and then ‘Dock’, it is possible to move your Dock to either side of your desktop and to hide the Dock.
Setting your ‘Location’ At Madeira • Your computer will work with any open wireless connection, however you will have to select your Location. When you are somewhere besides Madeira, your Location will have to be set to Automatic. Beforereturning to school, the location should be switched back to Madeira Schools. Elsewhere
Anatomy of the Finder Search View Options • The Finder is used to access Applications, Folders and Documents. The Finder includes a Sidebar which will help you navigate through the contents of your computer. There are several views from which you can choose: Icon, List, Column and Cover Flow. • This is also where your Network Folder and Documents are located. Network Folder
Accessing the Staff and Student Shared Folders To get to the Staff Shared Folders: 1. From the finder menu select Go then Connect To Server. 2. Enter the server you want to connect to. Staff = 10.56.0.7 MS Students = 10.56.0.9 HS Students = 10.56.0.10 ES Students = 10.56.0.8 3. Enter your Network Password (computer log in pw) 4. Select MCS2 then select OK which will open another finder window showing the folders available. • Saving files in the Staff and Student Shared Folders allows you to share files with your students or other staff members. It also allows students or other staff members to share files with you.
From here you can add the folder to your Sidebar allowing you quick access to the Staff Shared Folder in the future. Make sure Staff_Shared_Folders is highlighted, then select File, Add to Sidebar. The Staff Shared Folder will appear under Places in your Sidebar ***This same process can be done for the HandOut folder and DropBox folder***
Connecting to the Internet • There are several Applications that will allow you to connect to the internet. The two you will use the most are Safari and Firefox. A picture of their icons is shown below. These are located under the Applications folder in the Finder or in your Dock (remember you can drag the Application to your Dock if it is not there). Firefox Safari Both Firefox and Safari will connect you to the internet, and it is your choice on which one you want to use, however Special Ed IEPs can only be done in Safari.
Setting your internet Home Page • The easiest way to set up your homepage in Firefox and Safari is to first get to the page you want set as the home page. If you want Madeira’s home page to be set, then type www.madeiracityschools.org in the address field. Firefox Safari
Next, select Firefox or Safari from the Menu bar then select Preferences. When the next window opens select Use Current Page for Firefox or Set to Current Page for Safari. Firefox Safari Once your home page is set, it should open to that page when the browser is open.
Navigating Madeira’s Web Page • There are several areas you need to be familiar with regarding Madeira’s web page. These areas will be accessed by you on a regular basis. 1. Individual School Links 2. Email 3. Staff Intranet 4. ProgressBook 2 1 3 4
MadeiraEmail • When you click on the Email link from the Madeira web page, it brings you to our email provider CommuniGate. Here you will log in using your email ID and Password. This will be different than your Network or Computer log in. The Layout should be set to Classic.
Indicates Total Number of Messages Indicates Number of New Messages • Once you have logged in you will see the screen shown below. Here is where you will find your basic information and can select which folder you want. When you select INBOX you will see a list of your messages. Unread Messages will have a closed envelope under the Status column and show who it is from, the subject, size and when it was received.
Select Email to Delete then Delete • To Delete an email from your INBOX when you’re not viewing the actual email, simply select the empty box on the left side and click delete at the bottom of the screen. If you are viewing the email, simply select delete. **NOTE** Once you select delete it will move the email into your Trash folder. You will then have to delete your trash if you want to permanently delete the email. Located at bottom of window When viewing the body of the email select Delete
Saving email into Documents Folder 1. Highlight Documents in your Finder Window 2. Click File, New Folder, Name the folder. 3. Open the email you want to save and then click File, Save Page As (Firefox) or Save As...(Safari) • In order to save an email into your Documents Folder, you first have to create an email folder in you Documents Folder.
Additional Notes About Email • To set up a Contact List, click Contact and fill out form. • To set up a Group, click Group and fill out form. • If your not sure of someone’s email address, you can use the Filter. Just type in a person’s first or last name and it will show you the results. This only works with people in our Network. • Your mailbox is not a storage area for your emails. Each teacher has a limited amount of space for storage. All Folders and emails in your account take up this space. This includes the Trash and Sent Items folders. In order to free up space Emails can be saved in your Documents folder.
Staff Intranet • The Staff Intranet is accessible by clicking on Intranet on the Madeira Web page. The Intranet is only available to staff members and does require a password to enter.
There are three main features on the staff intranet you should be familiar with. The first is the ‘Forms’ link, the second is the ‘Links’ link and the third is ‘Staff Directory’. These three links will provide many different resources for you to take advantage of.
TheForms Link • Click the Forms link (in blue) to access most of the forms you may need throughout the school year. Simply click on the form you need and it will allow you do download the PDF form of the document.
TheLinksLink • The Links link is also fairly easy to understand. There are a couple of links that we would like to point out. The Technology Department, Facilities Management, Progress Book, AESOP, and DASL. ff ff
Staff Directory • Use the Staff Directory to locate any staff member.
Submitting a Technology Request • Throughout the school year, you may come across a problem that will require assistance from the Technology Department. We are happy to help, but we require that a Technology Ticket be submitted. This ensures that we get to your issue in a timely manner but also provides a way for us to prioritize the requests. To submit a technology ticket select the ‘Submit a Technology Work Order’ link on the Staff Intranet Links page.
You will then see the Public School Works login screen. Enter your username and password and then Submit. Once your ID and PW have been entered, select the school where you are located, then select Submit a Service Request. Select School Submit Request
Here is where you enter your request. First, enter a Work Description. This is what you would like help with or your request. Next, enter where in the building you are located. Click submit and your request will be sent to the Technology Department.
Once you hit submit you will receive an IT number. This is your ticket number and if you ever need to refer to the request again, it will help to have the ticket number. This number will also be emailed to you along with any updates we make to the ticket, or if we close the ticket.
how to add and delete a printer To add a printer using System Preferences first click on the System Preferences icon in the Dock. Next, select Print & Fax, which will open the Print & Fax window. From here click the + (plus) to add a printer or the - (minus) to delete a printer. Click to Add a printer Click to Delete a printer
Once you click on the plus sign to add a printer, a new window will open. This is called the printer browser and is where you will search to find the printer you want to add. Printers are listed by printer name. Scroll through the printer list until you find the printer you want, then select Add. The Location is how you can tell exactly what printer you’re selecting.
Classroom Technology • Every classroom has a projector and a DVD/VCR. Each classroom also has cable television available for use. The projector will project any video being played by the DVD/VCR. It can also project images from your computer. *** Please make sure that when you are done using the projector that you turn the projector off. Bulbs for the projector cost $300, and even if the projector looks like it is off, it could be in sleep mode which still uses up the bulb life. Also, if a message appears to clean the filter, please submit a ticket to the Technology Department so it may be cleaned as soon as possible. ***
The Projector and Controller • Your projector is mounted to the ceiling and will need to be controlled by your remote control. A diagram of your remote is shown. Power Button Search Button (used for finding the correct video input) Menu Button Projector DVD/VCR
DVD/VCR VCR Power • Your DVD/VCR will be used for playing VHS tapes, DVDs and can also play music CDs. Your cable television is controlled through the DVD/VCR as well. TV/VCR DVD Setup/Menu Right Arrow The buttons you will use the most are labeled.
Setting your Cable Channels • You may need to program your DVD/VCR to accept all the cable channels that are offered. If there is ever a power outage, you will have to reset the cable channels. First, select the Setup/Menu button on the remote control. This will open the programming menu. Hit the down arrow until Tuning is highlighted and press the OK button. OK/Enter Setup/Menu
Next, hit the down arrow so that Tuning Band is highlighted. Hit the right arrow until CATV is shown. Now hit the up arrow to highlight Auto Channel Set. Hit the right arrow to start the process. Your screen will look like this. Don’t exit the screen until the channel set is complete. When it is complete, the screen will automatically exit the menu and you should see whatever is on TV.
Connecting the Computer to the Projector • In order to project your computer image through the projector, you have to attach the Video adaptor. This adapter is pictured below and was provided with your computer.
To attach the video adaptor, you need to first locate the VGA cable in your room. The white video adaptor plugs into the black VGA cable then plugs into the VGA slot on your computer. VGA Cable VGA Adaptor VGA Slot *****Please note that the VGA adaptor is fragile and should not be dropped after unplugging from computer*****
If you would also like the sound from your computer to flow through the classroom speakers, you will have to plug the audio cable into your computer. Audio Cable Audio Jack
Phones and Voicemail • Please see instruction handout called New Telephone and New Voicemail. You can also get the instructions from the Staff Intranet Links area.
Contact Information • Becky Reisert - Technology Administrator - breisert@madeiracityschools.org Extension 2207 • Gerry Archer - Technology Technician - garcher@madeiracityschools.org Extension - 2406 • Renita Heideman - Technology Consultant HCESC - rheideman@madeiracityschools.org