Download
1 / 27
270 likes | 333 Vues
E-advising simplifies course planning by creating online worksheets for the next terms. Easily share and search courses, degree audits, and advisor approvals. Print reports, add courses, and register seamlessly.

E N D
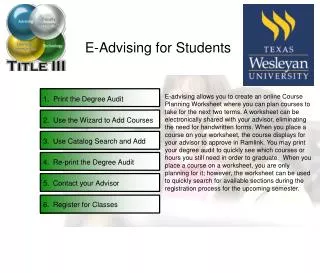
E-Advising for Students E-advising allows you to create an online Course Planning Worksheet where you can plan courses to take for the next two terms. A worksheet can be electronically shared with your advisor, eliminating the need for handwritten forms. When you place a course on your worksheet, the course displays for your advisor to approve in Ramlink. You may print your degree audit to quickly see which courses or hours you still need in order to graduate. When you place a course on a worksheet, you are only planning for it; however, the worksheet can be used to quickly search for available sections during the registration process for the upcoming semester. 1. Print the Degree Audit 2. Use the Wizard to Add Courses 3. Use Catalog Search and Add 4. Re-print the Degree Audit 5. Contact your Advisor 6. Register for Classes
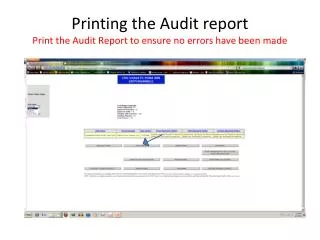
1. Print the Degree Audit 2. Use the Wizard to Add Courses 3. Use Catalog Search and Add 4. Re-Print the Degree Audit 5. Contact Your Advisor 6. Register for Classes Degree Audit Report To find your degree audit report: 1. Go to the Students menu 2. Select Degree Audit from the Academic Planning/E-Advising section
1. Print the Degree Audit 2. Use the Wizard to Add Courses 3. Use Catalog Search and Add 4. Re-Print the Degree Audit 5. Contact Your Advisor Degree Audit Report 6. Register for Classes ·Check the box next to your current major. ·If you are considering changing your major, you can see which of your current courses apply to the new major by selecting in from the drop down next to What if I changed my program of study? ·Make sure that All (includes planned) is included in the report ·Click Submit
1. Print the Degree Audit 2. Use the Wizard to Add Courses 3. Use Catalog Search and Add 4. Re-Print the Degree Audit 5. Contact Your Advisor Degree Audit Report 6. Register for Classes The Degree Audit report contains several sections outlining the degree requirements for your program as well as your current progress towards fulfilling those requirements. The program status section displays current credits earned as well as credits anticipated through the planning process. After planning all of your courses be sure to verify you have enough credits for graduation.
1. Print the Degree Audit 2. Use the Wizard to Add Courses 3. Use Catalog Search and Add NOTES *INC Incomplete grade *IP In Progress *PL Planned - not yet registered. *PLD Planned under a different requirement, but evaluation applied it here. Not yet registered. *PLR Planned under this requirement - not yet registered. *RA Replacement attempt - this course is a repeat attempt 4. Re-Print the Degree Audit 5. Contact Your Advisor Degree Audit Report 6. Register for Classes Check each section of the degree plan to ensure all requirements have been met or planned. Horizontal lines will appear next to requirements that have not been met or planned. The Notes section includes a legend for each of the status notes next the courses. Be sure to print and bring a copy of your degree audit when you meet with your advisor.
1. Print the Degree Audit 2. Use the Wizard to Add Courses 3. Use Catalog Search and Add 4. Re-Print the Degree Audit 5. Contact Your Advisor Read the FAQs 6. Register for Classes To start planning courses choose Plan Courses from the Academic Planning/E-Advising section on the Students menu. The Plan Courses screen includes an FAQ on how to use the Course planning tools. You can also click the Help button on any screen to access a help file that provides guidance for that particular screen.
1. Print the Degree Audit 2. Use the Wizard to Add Courses 3. Use Catalog Search and Add 4. Re-Print the Degree Audit 5. Contact Your Advisor Start a New Worksheet 6. Register for Classes Click Course Planning Wizard to step through the planning process. If this is the first time you have accessed the e-Advising tools, then the wizard will create a new worksheet before stepping you through your General Education and Major Requirements.
1. Print the Degree Audit 2. Use the Wizard to Add Courses 3. Use Catalog Search and Add 4. Re-Print the Degree Audit 5. Contact Your Advisor Confirm Your Major and Catalog year 6. Register for Classes Verify your major and catalog year, then click Submit. If you have more than one major, then select No and you may select your desired major from a list.
1. Print the Degree Audit 2. Use the Wizard to Add Courses 3. Use Catalog Search and Add 4. Re-Print the Degree Audit 5. Contact Your Advisor Choose ONE requirement to plan 6. Register for Classes You can only plan one requirement at a time so select one and click Submit. The Status column indicates the progress made in planning or registering for courses that meet this requirement. If you still need to plan courses for this requirement then Yes is displayed in the Need to Plan column. Otherwise it is blank.
1. Print the Degree Audit 2. Use the Wizard to Add Courses 3. Use Catalog Search and Add 4. Re-Print the Degree Audit 5. Contact Your Advisor Choose a subrequirement (optional) 6. Register for Classes Some requirements have subrequirements and/or groups to choose from before you get to the list of courses. You can only plan one subrequirement at a time, so select one and click Submit.
1. Print the Degree Audit 2. Use the Wizard to Add Courses 3. Use Catalog Search and Add 4. Re-Print the Degree Audit 5. Contact Your Advisor Choose a course 6. Register for Classes To choose a course for this requirement/subrequirement/component, click the Select box in front of the course you want. To plan a term in which to take the course, use the drop-down list in the Planned Term column. If you want to view additional information about a course and any requisites, click the Course Name. If you’re not sure which courses to add, click What is Required/Applied for more information on this requirement.
1. Print the Degree Audit 2. Use the Wizard to Add Courses 3. Use Catalog Search and Add 4. Re-Print the Degree Audit 5. Contact Your Advisor Review Your Worksheet • After adding each course you can view the Course Planning Worksheet. • From here you can: • Go through the Course Planning Wizard again to add more courses. • Use the Catalog Search and Add feature to add more courses. • Modify this worksheet. • Register from your worksheet after meeting with your advisor. • E-Mail Advisor(s) so they can review your worksheet. 6. Register for Classes
1. Print the Degree Audit 2. Use the Wizard to Add Courses 3. Use Catalog Search and Add 4. Re-Print the Degree Audit 5. Contact Your Advisor Modify Your Worksheet 6. Register for Classes • If you need to make changes to your worksheet click the Modify link at the top of the screen. From here you can: • Remove courses from your plan • Change the planned term of your courses • Add private notes that your advisor CANNOT see and public notes that your advisor CAN see to your worksheet
1. Print the Degree Audit 2. Use the Wizard to Add Courses 3. Use Catalog Search and Add 4. Re-Print the Degree Audit 5. Contact Your Advisor Catalog Search and Add 6. Register for Classes Another way to add courses to your plan is the Catalog Search and Add feature. If you already know which courses are required for your degree, then you can use this tool to quickly add several courses to your plan. You may also use your degree audit to help you determine your degree requirements. To begin, click the Create/Add to Worksheet link on the Plan Courses screen.
1. Print the Degree Audit 2. Use the Wizard to Add Courses 3. Use Catalog Search and Add 4. Re-Print the Degree Audit 5. Contact Your Advisor Confirm Your Major and Catalog year 6. Register for Classes Verify your major and catalog year, then click Submit. If you have more than one major, then select No and you may select your desired major from a list.
1. Print the Degree Audit 2. Use the Wizard to Add Courses 3. Use Catalog Search and Add 4. Re-Print the Degree Audit 5. Contact Your Advisor 6. Register for Classes Catalog Search and Add • The Catalog Search and Add page includes several fields to narrow your search and find your required course: • Subject: Select the subject from the drop-down list. • Course Level: Select the course level from the drop-down list. • Course Number: Enter the course number for a specific course. • Location: Select the location where the course is offered. • Instructional Method: Select the instructional method. • You may use as few or as many criteria to help narrow your search. However, filling out too many criteria can result in no sections being found. When you click Submit, courses are displayed that meet all of the criteria you entered.
1. Print the Degree Audit 2. Use the Wizard to Add Courses 3. Use Catalog Search and Add 4. Re-Print the Degree Audit Catalog Search and Add • The Catalog Search Results screen displays the courses that met your search criteria. • Click on the Course Name and Title of the course to display more information about it. • Select one or more courses by clicking the Select checkbox in front of each desired course. • You may select a Planned Term or leave it blank. • Click Submit to add the selected courses to your worksheet. • Check the Narrow my search box and click Submit if you like the criteria you already entered, but received too many results. The Catalog Search and Add form will redisplay so you may enter additional criteria to further reduce your results. 5. Contact Your Advisor 6. Register for Classes
1. Print the Degree Audit 2. Use the Wizard to Add Courses 3. Use Catalog Search and Add 4. Re-Print the Degree Audit 5. Contact Your Advisor E-Mail Advisor 6. Register for Classes To contact your advisor after you have completed your Course Planning Worksheet, go into Plan Courses and choose E-Mail Advisor(s).
1. Print the Degree Audit 2. Use the Wizard to Add Courses 3. Use Catalog Search and Add 4. Re-Print the Degree Audit 5. Contact Your Advisor 6. Register for Classes E-Mail Advisor Select an advisor to receive your e-mail by clicking the checkbox beside the advisor's name in the Send To column. Enter the full e-mail address in the Additional 'Send To' E-mail Addresses column to send the e-mail to additional recipients. Enter your message in the Subject and E-mail Text fields. Click Submit to send your message. Note: Your preferred name and Colleague ID are also included in the e-mail to identify you as the sender.
1. Print the Degree Audit 2. Use the Wizard to Add Courses 3. Use Catalog Search and Add 4. Re-Print the Degree Audit 5. Contact Your Advisor E-Mail Advisor A confirmation screen appears to let you know that your e-mail has been sent. 6. Register for Classes
1. Print the Degree Audit 2. Use the Wizard to Add Courses 3. Use Catalog Search and Add 4. Re-Print the Degree Audit 5. Contact Your Advisor Register You can use your Course Planning Worksheet as a guide when you are ready to register for classes. Click the Register link to begin. 6. Register for Classes
1. Print the Degree Audit 2. Use the Wizard to Add Courses 3. Use Catalog Search and Add 4. Re-Print the Degree Audit 5. Contact Your Advisor Confirm Your Major and Catalog year 6. Register for Classes Verify your major and catalog year, then click Submit. If you have more than one major, then select No and you may select your desired major from a list. Double majors must register from each of their major’s Course Planning Worksheets separately.
1. Print the Degree Audit 2. Use the Wizard to Add Courses 3. Use Catalog Search and Add 4. Re-Print the Degree Audit 5. Contact Your Advisor Register from the Worksheet 6. Register for Classes Select as many courses as you want by clicking the Find Sections checkbox in front of the course(s) and click Submit. If you planned a term for a course, only sections in that term display. Otherwise, you see only sections whose meeting dates are scheduled. NOTE: After you complete registration for a course on your plan, regardless of how you registered for it, the planned course is no longer displayed on your worksheet.
1. Print the Degree Audit 2. Use the Wizard to Add Courses 3. Use Catalog Search and Add 4. Re-Print the Degree Audit 5. Contact Your Advisor Choose a section 6. Register for Classes The Section Selection Results screen displays the sections that meet your search criteria. If any of these sections has a corequisite section, the corequisite section also displays. Click on a Section Name and Title to view details about that class. Select a section and click Submit to add a section to your preferred sections list.
1. Print the Degree Audit 2. Use the Wizard to Add Courses 3. Use Catalog Search and Add 4. Re-Print the Degree Audit 5. Contact Your Advisor Register for the Section 6. Register for Classes This screen displays all of the preferred sections that have previously chosen. You register for all sections on your Preferred Sections list by choosing RG Register from the Action for ALL Pref. Sections drop down list. Alternatively, you may choose individual actions for each preferred section from each of Action drop down lists. Click Submit to complete the selected actions. Once a course has been successfully registered, it cannot be changed through Ramlink. After the registration deadline, contact the Registrar's office for information on how to drop or add a course.
Registration Errors 1. Print the Degree Audit If there is a problem with the sections you are trying to register for then you will see an error message in red at the top of your screen. 2. Use the Wizard to Add Courses 3. Use Catalog Search and Add 4. Re-Print the Degree Audit 5. Contact Your Advisor 6. Register for Classes
Finding Help If you need help reviewing your degree audit report or with the degree plan of your chosen major, contact your advisor through the Email Your Advisor(s) link in the Communications section of Ramlink. If you have trouble logging on to Ramlink or experience any other technical difficulty contact the Helpdesk at (817) 531-4428 ext. 2. Also check the self help information that is available online at: http://www.txwes.edu/it