Download
1 / 8
80 likes | 404 Vues
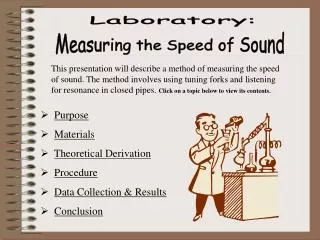
Laboratory:. Measuring the Speed of Sound. This presentation will describe a method of measuring the speed of sound. The method involves using tuning forks and listening for resonance in closed pipes. Click on a topic below to view its contents. Purpose Materials Theoretical Derivation

E N D
Laboratory: Measuring the Speed of Sound This presentation will describe a method of measuring the speed of sound. The method involves using tuning forks and listening for resonance in closed pipes. Click on a topic below to view its contents. • Purpose • Materials • Theoretical Derivation • Procedure • Data Collection & Results • Conclusion
Purpose The purpose of this laboratory experiment is to measure the speed of sound in air. Sonar, echo location, medical ultrasound all take advantage of the “Doppler Effect” to produce useful results. The Doppler effect is the perceived change in frequency of sound from its source depending on the relative motion between the source and observer (listener). The Doppler effect exists because the speed of sound is finite. Knowing of the speed of sound is critical in understanding the Doppler effect and applications of sound!
Materials The following materials are needed to complete this lab: • 2000 ml Graduated cylinder • Meter stick • ½ inch diameter PVC pipe • Tuning Forks – 256Hz, 426Hz, 512Hz, 1024Hz • Water Supply • Paper towels • Paper, pencil, calculator & patience
Theoretical Derivation The pipe above is closed at its bottom end. Resonance occurs when standing waves form in the pipe. In this case a node is at the closed end and an anti-node at the open end. The first four simplest resonant waves are shown. The simplest one is called the fundamental. The subsequent waves are called harmonics. Notice the pattern between the resonant wavelengths and the fixed length of the closed pipe. Only odd harmonics fit. If we let n = 1, 3, 5, 7, … we can write a general expression for the resonant, standing, harmonic wavelengths as:
Theoretical Derivation - Continued Algebraically substituting the general expression of the “resonant wave” into the basic “wave equation” results in: Substituted into ; n = 1, 3, 5, 7, … (odd harmonics) Do the algebra ! This reveals an expression for the speed of sound in terms of the resonant length of a closed pipe, the frequency of the sound source, and the nth harmonic.
Procedure • Fill the graduated cylinder 7/8 full of water. • Insert the PVC pipe into the water filled cylinder. • Activate the tuning fork and hold it ¼ inch above the PVC pipe. • Slowly lift the PVC pipe & the tuning fork out of the water filled cylinder. • Listen for resonance and stop.
Procedure - Continued • Measure the effective pipe length from the water level to bottom of tuning fork. • Record: • Frequency of tuning fork • Harmonic number • Effective pipe length • Repeat for next harmonic (some frequencies only have one harmonic because the pipe is too short). • Change tuning fork frequency and repeat procedure.
Data Collection & Results Example Make a data table to record your measurements. Be sure to include proper units of measure and to be organized.