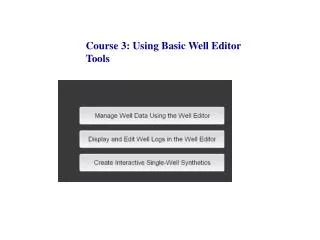
Introduction to UnrealEd: Creating Levels in UDK with Bruce R. Maxim
UnrealEd is a powerful level editing tool used by designers to create immersive environments in the Unreal Engine. It pioneered the subtractive method of level creation, allowing designers to carve out spaces and add details more efficiently. Key features include rebuilding geometry to update levels, generating light maps for realistic illumination, and recalibrating navigation paths for AI. This guide covers basic actor placement, texture application, and level functionality ensuring your levels are visually appealing and interactive.

Introduction to UnrealEd: Creating Levels in UDK with Bruce R. Maxim
E N D
Presentation Transcript
Using UDK Editor CIS 488/588 Bruce R. Maxim UM-Dearborn
What is UnrealEd? • Primary application used by level designers to create Unreal level • First level editor to provide 3D views and allow real-time playability testing • Introduced the subtractive method of level creation (you carve levels out of solid mass and then add details after the fact) • Terrain is also added back in after adding or subtracting an enormous box or cylinder
Rebuilding • The purpose of rebuilding is to update changes made to the level’s base geometry • Compiles all level assets to form a playable level • Generates the necessary light maps to provide realistic areas of light and shadow • Recalculates the navigation paths built for the bots in the level • You can selectively rebuild each of the aspects of the level
Actors • Actors are any objects placed in the level after the base-level geometry is established • Placeable actors (start positions, lights, movers) are always visible once manually placed in the level • Non-placeable actors (projectiles, game type, mutators) are spawned during game and are not visible in UnrealEd
Scale • UT3 Level sizes are limited to 524,288 units in each direction (216 cubic miles) • In general 16 unreal units = 1 foot • For actors to move in a level it’s a good idea to allow for 2 * dimension + 5 units (or 10%) • Jump height = 64 units • Double jump = 132 units • Dodge distance = 320 units • Dodge-jump distance = 720 units
Using the Grid • It is a good idea to leave grid snapping turned on while placing actors (esp. BSP brushes) to avoid hall of mirrors (HOM) effects • You can control the size of the grid (from 2 to 4096 units) to help place things more precisely
Brushes • Builder brush is displayed as a red wire frame and use as a shape template for the other brushes • Subtractive • Additive • Intersection • Deintersection • It is possible to move the builder brush way from the evolving map (not visible in perspective view)
Navigation • Perspective viewport • LMB (use to drive camera like car) • RMB (rotate camera like turning you head) • LMB+RMB (camera panning L, R, up, down) • Orthographic viewport • LMB (similar to viewport) • RMB (similar to viewport) • LMB+RMB (zoom in and out)
Actor Movement • Largely Ctrl, click, and drag in any of the perspective viewports • In the orthographic viewport • Ctrl+LMB move along x-axis • Ctrl+RMB move along y-axis • Ctrl+LMB+RMB move along z-axis
Creating a Simple Room • Choose New from the File menu • Right click the Cube control on the left-hand menu • Enter cube dimensions (384, 636, 1024) in the dialog box, check hollow, then click the Build button • Use the Add button to create the room with a default texture • You should save the room to be safe
Adding Texture • Open the Texture browser (use the top menu bar icon if needed) • Choose content browser and search for wall • Select a wall texture and apply it to the 4 walls • Apply a floor and a ceiling texture
Fitting Textures • Select the 4 room walls and click the Surface Properties button from top menu bar • Use the Alignment item, select Planar alignment • Use the Properties item to get the dialog box up and adjust values for UTile and Vtile • Select the walls you wish to adjust and then use the Pan/Rotate/Scale tab • Use PanV to move the panels down • Use PanU to move the panels left
Make the Level Functional • Add a light in center of the ceiling using RMB and selecting the Add Light Here • Select the light and either select the Actor Properties button on the main menu bar or use the RMB to open the properties dialog • Set LightBrightness property to 128 close the dialog box • Use the RMB to add a Player Start to the floor • Rebuild the level and save it
Testing Levels • To test a level after it is rebuilt (and saved if this is serious work) use the Play item on the main menu bar • You need to have your textures package Content folder (to avoid loading errors) • To return to the editor use Esc and use the menus or press ~ to open the command line interface and type exit
Expanding a Level – 1 • To add a window to your room, begin by creating a (256, 16, 1024) Cube Builder brush • Set Drag Grid Size to 2 and position the builder brush in the Top viewport • Before subtracting the Window select Base1 texture from the Texture browser • After you subtract, rebuild the level • Move the brush out of the way and fine tune the placement using the 3 perspective viewports
Expanding a Level – 2 • To add a bigger room next to your room, begin by creating a (1152, 2048, 3072) Cube Builder brush • Position the “hanger” so the the “control room” looks over it (using the 3 perspective views) • Change the texture to one of the wall textures using the Texture browser • Subtract the room, rebuild and save the level as myHanger
Duplicating Lighting • Place a light in the middle of the floor to ceiling space in the large “hanger” room • Select the light, Duplicate it twice from the context menu and position them one at a time in a line of three lights using the Top viewport • Select the 3 lights using Ctrl-LMB • Duplicate them using Ctrl-W and use the mouse to move the new lights as a unit • Do this again, rebuild and save
Using Static Meshes – 1 • Open the static mesh browser and use it to open a package • Change the group to select a static mesh • Right-click in one of the level views somewhere near the control room opening and add the window • Use the mouse to fine tune its position, rebuild and save the map as myHanger.ut2
Using Static Meshes – 2 • You can add static meshes to make things look more realistic (and more accessible by the player avatar) • You will need to rebuild the level and save it • If you include all the tutorials from Chapter 2 you can end up with OK game (you need the interactive items from later chapters to have an interesting game)
Other BSP Brushes • These brushes that can usually be overlooked if you have access to Maya or 3DMax • Additive Brush – puts material back in the hollowed out space • Intersection Brush – creates solid shapes from the overlap • Deintersection Brush – solid shapes from the part of the brush that does not overlap with solid geometry