Download
1 / 75
750 likes | 918 Vues
The Writing Process: Instruction & Assessment Revised for LITR 3130, Fall 2012. Tonja L. Root, Ed. D. Early Childhood & Special Education Valdosta State University Valdosta, GA 31698 troot@valdosta.edu http://www.valdosta.edu/~troot/eced4300/writing_process.htm. Writing Process: Overview.

E N D
The Writing Process:Instruction & AssessmentRevised for LITR 3130, Fall 2012 Tonja L. Root, Ed. D. Early Childhood & Special Education Valdosta State University Valdosta, GA 31698 troot@valdosta.edu http://www.valdosta.edu/~troot/eced4300/writing_process.htm
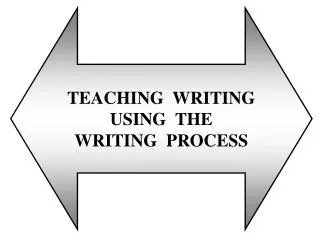
Writing Process: Overview • a process • not linear • recursive • use names of the stages to communicate the process Link to Writing Process Chart Root, T. (2012). Writing process. Retrieved from http://www.valdosta.edu/~troot/eced4300/writing_process.htm
Stages of the Writing Process: Overview • prewriting • drafting • revising • editing • publishing Root, T. (2012). Writing process. Retrieved from http://www.valdosta.edu/~troot/eced4300/writing_process.htm
Stage 1: Prewriting – Teacher Info. • Read pieces in the same form to develop an intuitive sense of structure. • Show pieces written in that form. • Explain and discuss the structure of the written form: narrative, expository, persuasive, poetry, biography, correspondence, etc. Root, T. (2012). Writing process. Retrieved from http://www.valdosta.edu/~troot/eced4300/writing_process.htm
Stage 1: Prewriting – Teacher Info. • Talk about the author’s point of view: Read text as an author – not just a reader. • Provide experiences and/or information to use during writing. Root, T. (2012). Writing process. Retrieved from http://www.valdosta.edu/~troot/eced4300/writing_process.htm
Stage 1: Prewriting: Orientation/Engagement/Motivation • Spark interest. • Give learning objective. • Explain importance: lives & learning. • Make connections: Prior knowledge &/or subject areas & personal experiences. Root, T. (2012). Writing process. Retrieved from http://www.valdosta.edu/~troot/eced4300/writing_process.htm
Stage 1: Prewriting:Presentation/Explicit Instruction • Explain importance: about 70% of writing time needs to be spent in prewriting. • Explain: getting-ready to write stage; everything before writing sentences. Root, T. (2012). Writing process. Retrieved from http://www.valdosta.edu/~troot/eced4300/writing_process.htm
ELA CCGPS Forms & Links • narrative • informational • persuasive • https://www.georgiastandards.org/Common-Core/Documents/CCGPS_ELA_K-12_EducatorResourceDocument.pdf • http://www.valdosta.edu/~troot/eced4300/assignment_rubrics.htm • http://educationnorthwest.org/resource/464 Root, T. (2012). Writing process. Retrieved from http://www.valdosta.edu/~troot/eced4300/writing_process.htm
Stage 1: Prewriting: Purposes Explain purposes for writing: • to satisfy personal needs & get things done (instrumental) • to control other’s behavior (regulatory) • to tell about themselves (personal) • to get along with others (interactional) • to learn & find out (heuristic) • to pretend & make believe (imaginative) • to communicate information to others (informative) Root, T. (2012). Writing process. Retrieved from http://www.valdosta.edu/~troot/eced4300/writing_process.htm
Stage 1 : Prewriting: Topic & Audience • Topic: the focus of your writing; what you choose to write about. • Audience: to whom you are writing; people who will read your piece of writing. Root, T. (2012). Writing process. Retrieved from http://www.valdosta.edu/~troot/eced4300/writing_process.htm
Stage 1: Graphic Organizes: Types Show & explain a blank graphic organizer students will be using: • story maps • poetic graphic organizers • correspondence graphic organizers • auto/biographic graphic organizers • compare & contrast organizers • persuasive graphic organizers • informational graphic organizers Link to Graphic Organizers Root, T. (2011). Writing process. Retrieved from http://www.valdosta.edu/~troot/eced4300/writing_process.htm
Stage 1: Prewriting: Specific Topic Explain Topic Selection: • Students take responsibility for choosing their own topics for writing. • Teachers should not supply topics for students -- "writing welfare" (Graves, 1976). • Teacher may specify writing genre/form & purpose (i.e., share what you have learned about ...), but have students choose their own specific topic/content. Root, T. (2012). Writing process. Retrieved from http://www.valdosta.edu/~troot/eced4300/writing_process.htm
Stage 1: Prewriting: Specific Genre & Form Explain the genre & form of writing(briefly) for this piece of writing: • narrative • informational • persuasive Connect genre/form of writing to reading selections of the same form Root, T. (2012). Writing process. Retrieved from http://www.valdosta.edu/~troot/eced4300/writing_process.htm
Stage 1: Prewriting: Specific Purpose Make / share decision about specific purpose for writing for this piece of writing. (See previous slide for purposes.) Root, T. (2012). Writing process. Retrieved from http://www.valdosta.edu/~troot/eced4300/writing_process.htm
Stage 1: Prewriting: Specific Audience Explain Importance of Audience: • Student authors may write for themselves or for others. • Students must have real audiences. • Writing for others requires the author to adapt their writing to fit their audience. • Writing for others requires the author to use perspective-taking skills. • Teacher may specify audience: specific or general (family member) Root, T. (2012). Writing process. Retrieved from http://www.valdosta.edu/~troot/eced4300/writing_process.htm
Stage 1: Prewriting: Generating & Organizing Ideas Provide a variety of idea-gathering activities (rehearsal & background): • Integrating Drawing & Writing (optional)- to do before graphic organizer • Graphic Organizer (required) Graphic Organizers: Purposes Root, T. (2012). Writing process. Retrieved from http://www.valdosta.edu/~troot/eced4300/writing_process.htm
Stage 1: Drawing for Generating Ideas: All Begin with a Drawing For a class writing on a specific topic: • S. individually draw detailed pictures about the same topic. • S. individually make lists of words related to their pictures. • Class compiles a list of all of the Ss. words. • S. individually write stories relating to their own pictures & using any words. Root, T. (2012). Writing process. Retrieved from http://www.valdosta.edu/~troot/eced4300/writing_process.htm
Stage 1: Drawing for Generating Ideas: I Can’t Think of a Story • S. divides paper into sections. • S. draws a picture in each section. • T. asks S. questions about picture. • S. writes paragraph about each picture. • S. adds ideas and details to pictures & writing. Root, T. (2012). Writing process. Retrieved from http://www.valdosta.edu/~troot/eced4300/writing_process.htm
Stage 1: Drawing for Generating Ideas: Character &/or Setting Development • S. divide paper into half. • S. draw picture of person, animal, or place to become part of a story. • T. tells S. to list words that come to mind on other half of paper (while writing). • S. write about that person/animal, or setting drawn. • S. add details & ideas to drawing & writing. Root, T. (2012). Writing process. Retrieved from http://www.valdosta.edu/~troot/eced4300/writing_process.htm
Stage 1: Drawing for Generating Ideas: Observation Books • T. supplies sketch books called, “Observation Books.” • T. assigns 2-4 drawings/week to be done in sketch books with list of words at edge of drawings. • S. complete assignment using pictures & words as a reference for writing. Root, T. (2012). Writing process. Retrieved from http://www.valdosta.edu/~troot/eced4300/writing_process.htm
Stage 1: Drawing for Generating Ideas: Definitions • S. draw a picture of the definition of the word. • S. write a sentence using the word. Root, T. (2012). Writing process. Retrieved from http://www.valdosta.edu/~troot/eced4300/writing_process.htm
Stage 1: Drawing for Generating Ideas: Drawing Picture Together For S. lacking confidence in drawing & writing, S. draw & write together. • T. draws simple face on the paper. • T. asks Ss., “Who could this be?” • S. draw the rest of the person. • T. asks Ss. questions: Where is --? Is -- alone? What is -- doing? How old is --? What time of year is it? • S. finish picture with details. • S. translate picture into a written story. Root, T. (2012). Writing process. Retrieved from http://www.valdosta.edu/~troot/eced4300/writing_process.htm
Stage 1: Graphic Organizers: Purposes Teach students to use graphic organizers to plan and organize their ideas: • to plan writing using words and/or phrases – not complete sentences • to plan writing in sequenced steps and/or address specific structural needs of that form of writing on the organizer • to see the content of writing as a whole Root, T. (2012). Writing process. Retrieved from http://www.valdosta.edu/~troot/eced4300/writing_process.htm
Stage 1: Graphic Organizers: Purposes • to see interrelationships among the parts of the structural form • to determine where additional planning is needed • to comprehend the structure of written form Root, T. (2012). Writing process. Retrieved from http://www.valdosta.edu/~troot/eced4300/writing_process.htm
Stage 1: Prewriting: Modeling • Show your own finished graphic organizer. • Explain how parts of your graphic organizer conform to your explanation for their graphic organizer. • Explain the purpose of the parts of the graphic organizer. • Tell students not to use complete sentences, only words & clauses. Root, T. (2012). Writing process. Retrieved from http://www.valdosta.edu/~troot/eced4300/writing_process.htm
Stage 1: Prewriting: Structured Practice/Exploration and/or Guided Practice/Feedback Develop the class collaboration graphic organizer: • Take S. dictation to record / practice the prewriting graphic organizer that you want S. to use when they do their own prewriting. • Show S. comparisons & contrasts with your graphic organizer. Root, T. (2012). Writing process. Retrieved from http://www.valdosta.edu/~troot/eced4300/writing_process.htm
Stage 1: Prewriting: Independent Practice/Application • Have students complete their graphic organizer. • Remind students of: topic, genre/form, purpose, audience, requirements of graphic organizer. • Remind them NOT to write using complete sentences. • Tell them your exact expectations. Root, T. (2012). Writing process. Retrieved from http://www.valdosta.edu/~troot/eced4300/writing_process.htm
Your turn to plan prewriting & complete graphic organizer • Specify a grade level. • Specify a topic in CCGPS or GPS. • Specify a genre of writing. • Specify a form of writing. • Determine purpose. • Choose an audience: Grade level of practicum. • Develop your model of the graphic organizer. • Do not use complete sentences. Root, T. (2012). Writing process. Retrieved from http://www.valdosta.edu/~troot/eced4300/writing_process.htm
Stage 3: Drafting: Orientation/Engagement/Motivation • Spark interest. • Give learning objective. • Explain importance: lives & learning. • Make connections: Prior knowledge &/or subject areas & personal experiences. • Review prewriting stage Root, T. (2012). Writing process. Retrieved from http://www.valdosta.edu/~troot/eced4300/writing_process.htm
Stage 2: Drafting:Presentation/Explicit Instruction • Label drafts Draft, Rough Draft, or Sloppy Copy to prevent students from thinking they can make this the final copy. • Place X on every other line to remember to skip lines (right of margin line). Skip every other line to leave space for making revisions. • Form ideas from graphic organizer into complete sentences. Root, T. (2012). Writing process. Retrieved from http://www.valdosta.edu/~troot/eced4300/writing_process.htm
Stage 2: Drafting • Teach/review writing trait (ideas). • Emphasize getting down the content of writing. • Do not emphasize correct spelling & neatness. • Teacher will provide support, encouragement, & feedback for ideas and problems. Root, T. (2012). Writing process. Retrieved from http://www.valdosta.edu/~troot/eced4300/writing_process.htm
Stage 2: Drafting: Specific Form • Share drafting specifics and concerns related to the specific form of writing: • Parts of graphic organizer (g.o.) related to paragraph formation • Narrative: Beginning & ending will be improved / revised later. • Expository: More information will be gathered as needed. Make sure content is accurate. Root, T. (2012). Writing process. Retrieved from http://www.valdosta.edu/~troot/eced4300/writing_process.htm
Stage 2: Drafting: Modeling Teacher models drafting for students. • [Remember to plan for & to include the types of revising and editing errors you will want to do, so you will make those types of errors in your draft.] • Show your prewriting graphic organizer while showing your completed draft. • Show your draft (label Draft; skip lines with x). • Explain how you converted ideas into sentences. • Explain ways your model fits your expectations for their draft – including writing trait (ideas). • Do not emphasize spelling or mechanics in your draft. Root, T. (2012). Writing process. Retrieved from http://www.valdosta.edu/~troot/eced4300/writing_process.htm
Stage 2: Drafting: Structured Practice/Exploration and/or Guided Practice/Feedback Work on class collaboration composition. • Post the class collaboration graphic organizer completed during prewriting. • Transcribe (take) the students’ dictation using the ideas from the graphic organizer. • Explain specifically how to begin the draft. Beginnings are always difficult. • Make errors to anticipate revising & editing. Root, T. (2012). Writing process. Retrieved from http://www.valdosta.edu/~troot/eced4300/writing_process.htm
Stage 2: Drafting: Independent Practice/Application • Have students draft using their graphic organizers. • Remind them to skip lines, write x, etc. • Conference with students: • “Tell me what you are writing about. That is interesting. Have you included that? Where could you add it to your writing?” • Show students how to add this to their drafts without rewriting.(This is really part of revision.) Root, T. (2012). Writing process. Retrieved from http://www.valdosta.edu/~troot/eced4300/writing_process.htm
Your turn to draft • Plan for the types of revising and editing you will want to do (based on proofreaders’ marks chart and CCGPS). • Make those types of errors in your draft. • Develop a draft from your graphic organizer. • Write “X” on blank line to indicate skipping lines when writing. • Double space your handwriting. • Label draft, Draft. Root, T. (2012). Writing process. Retrieved from http://www.valdosta.edu/~troot/eced4300/writing_process.htm
Stage 3: Revising: Orientation/Engagement/Motivation • Spark interest. • Give learning objective. • Explain importance: lives & learning. • Make connections: Prior knowledge &/or subject areas & personal experiences. • Review prewriting & drafting stages. Root, T. (2012). Writing process. Retrieved from http://www.valdosta.edu/~troot/eced4300/writing_process.htm
Stage 3: Revising: Presentation/Explicit Instruction • Refine ideas and content. • Anticipate/meet the needs of readers through changing, adding, deleting, & rearrangingcontent and writing traits (organization, voice, word choice, sentence fluency. • Reread the draft after 1-2 days. • Read word by word (point to words). • Make notes, questions, & changes. • Use proofreaders’ marks to add, delete, change, rearrange. Root, T. (2012). Writing process. Retrieved from http://www.valdosta.edu/~troot/eced4300/writing_process.htm
Stage 3: Revising: Specific Form • Share revising specifics and concerns related to the specific form of writing: • Narrative: Beginning & ending; descriptions of characters & setting, adding dialogue, sentence structure • Informational: Adding more information as needed. Revising sentence structure and beginning of paragraphs. Root, T. (2012). Writing process. Retrieved from http://www.valdosta.edu/~troot/eced4300/writing_process.htm
Stage 3: Revising: Modeling • Modelrevising stage by showing your own completed revised draft. • Explain your revisions, reason for making them, & proofreader’s marks. • Explain ways your model fits expectations for their revision. • Show proofreaders’ marks: adding, deleting, changing, rearranging. Root, T. (2012). Writing process. Retrieved from http://www.valdosta.edu/~troot/eced4300/writing_process.htm
Stage 3: Revising: Modeling Model writing group procedure on your draft: • Read your composition aloud. • Ask listeners for compliments. Model appropriate responses. • Ask listeners questions about trouble-spots. • Get suggestions. • Add, delete, rearrange, change contentbased on feedback. Revising - Practice Root, T. (2012). Writing process. Retrieved from http://www.valdosta.edu/~troot/eced4300/writing_process.htm
Stage 3: Revising with Drawing Optional – diverse learners – additional activity • Teach one of the drawing strategies to assist reluctant writers to revise. • Model the drawing strategy. • Do a class collaboration example of the drawing strategy. • Have writers apply the drawing strategy to their own writing. Examples of these strategies follow – Root, T. (2012). Writing process. Retrieved from http://www.valdosta.edu/~troot/eced4300/writing_process.htm
Stage 3: Drawing for Revising: Sentence Building For S. who need to develop descriptive sentences, work in pairs with each approving new sentence before it is written: • S. draw with one color of pencil. • S. write short sentence that describes drawing. • S. add to drawing with a second color of pencil. • S. revise sentence to incorporate new picture. Root, T. (2012). Writing process. Retrieved from http://www.valdosta.edu/~troot/eced4300/writing_process.htm
Stage 3: Drawing for Revising: Selective Expansion For S. who write long/complex stories without expanding significant part: • S. writes long/complex story without expanding significant part. • T. brackets this part of the story. • S. draws picture of this part of the story. • T. asks questions to help S. translate meaning from the picture to words. Root, T. (2012). Writing process. Retrieved from http://www.valdosta.edu/~troot/eced4300/writing_process.htm
Stage 3: Drawing for Revising: The Too - Short Story For S. who write too short of stories: • S. write short story. • S. divide paper into sections. • S. write key phrase or sentence from story at the bottom of each section. • S. draw a picture in each with as much detail as possible. • S. could list descriptive words while drawing. Root, T. (2012). Writing process. Retrieved from http://www.valdosta.edu/~troot/eced4300/writing_process.htm
Stage 3 : Revising: Structured Practice/Exploration and/or Guided Practice/Feedback Work on class collaboration draft by modeling writing group procedure: • Post class collaboration draft. • Read draft aloud. • Ask for compliments. • Ask questions. Get suggestions. • Add, delete, rearrange, & change contentand writing traits based on feedback. Root, T. (2012). Writing process. Retrieved from http://www.valdosta.edu/~troot/eced4300/writing_process.htm
Stage 3: Revising: Writing Groups Functions of Writing Groups • to offer writer choices • to give writer responses, feelings, and thoughts • to show different possibilities • to speed up revising Use writing groups: After students have revised their own piece Root, T. (2012). Writing process. Retrieved from http://www.valdosta.edu/~troot/eced4300/writing_process.htm
Stage 3: Revising: Writing Groups Formation of Writing Groups • Spontaneous: S. share writing through use of author's chair. • Formal: S. assigned & T. participates; group leader changes regularly. • Informal: S. Choose own partner. Root, T. (2012). Writing process. Retrieved from http://www.valdosta.edu/~troot/eced4300/writing_process.htm
Stage 3: Revising: Writing Groups Procedure for Writing Groups • Author reads composition aloud to the group or partner. • Listeners offer compliments: (Teacher will need to model appropriate compliments.) • Author asks questions about trouble-spots. • Listeners offer suggestions about revising. • Repeat the process for all in the group. • Authors plan for revision: Each makes a commitment to revise based on comments & suggestions. Root, T. (2012). Writing process. Retrieved from http://www.valdosta.edu/~troot/eced4300/writing_process.htm
Stage 3: Revising: Writing Groups Teacher’s Roles during Writing Groups: • Be a listener & respond. • Participate in writing groups & conferences. • Model appropriate responses during writing groups. Root, T. (2012). Writing process. Retrieved from http://www.valdosta.edu/~troot/eced4300/writing_process.htm