Download
1 / 67
670 likes | 771 Vues
Learn about GPS technology, Geocaching rules, and classroom activities integrating GIS tools like Google Earth. Discover fun learning ideas using GPS devices and create interactive projects.

E N D
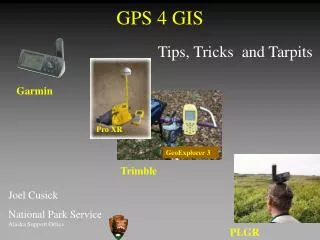
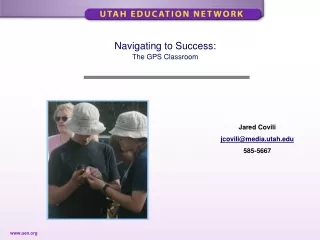
What is GPS? • GPS is funded by and controlled by the US Department of Defense (DOD). While there are many thousands of civil users of GPS world-wide, the system was designed for and is operated by the U. S. military. • GPS provides specially coded satellite signals that can be processed in a GPS receiver, enabling the receiver to compute position, velocity, and time. • Four GPS satellite signals are used to compute positions in three dimensions and the time offset in the receiver clock.
How is GPS used? • Besides being used by the military, GPS is used in forestry, biology, fishing, hunting, boating, racing, nursing, and many other fields. • GPS technology can be effectively used in your classroom as well.
How does GPS work? • A GPS device receives signals from satellites orbiting the earth to triangulate your location, which will be given as a global address. • Or, the GPS device can lead you to a previously marked location, much like a compass.
How do I get a GPS receiver? • They range in price from about $100 to well over $1,000. • Consider writing a mini-grant to get 4 or 5 to be used at your school. • I used http://www.donorschoose.org and obtained 3 this year in addition to 3 others that I received from a past workshop. My GPS Units…eTrex HC Garmin
What is Geocaching? • One of the fastest growing “new” sports. • Has participants in many countries outside of the US and Canada. • Is a modern day active treasure hunting activity that allows you to use GPS – and therefore a “global address” – to locate a cache.
Are there rules for Geocaching? • Yes, there are: • 1. Take something from the cache • 2. Leave something in the cache • 3. Write about it in the logbook • 4. Do not move the cache
Versions of Geocaching to use in the Classroom • Scavenger Hunt – students take a sealed clue from each cache and bring back to a predetermined location to open and solve a riddle or mystery • Content Specific Caches – each cache has an activity that deals with one particular subject area (ex. – each cache has a math problem that students must solve)
1. Problem Solving Caches • Students find a cache with a problem inside & solve together 2. Puzzle Caches • Solve a Math or Logic (Sudoku) Puzzle to get the co-ordinates to find the cache 3. On Average • Each cache has a different object of the same type (all pencils). Students record each length and find the average of all of the caches 4. Play Money Caches • Each cache has a math puzzle on the lid and they have to find the answer and bring back the correct amount of change
5. Find the Clues • Each cache has a clue to an ultimate problem. Students collect clues to solve a mystery 6. Kickball Challenge • Students waypoint a series of kicks and then graph them to see who kicked the farthest. Great for distance and measurement 7. Perimeter • Waypoint the corners of a space or structure and record the distance between each waypoint to find the perimeter 8. Possible Outcomes • Have three caches, one with three shirts, one with three pairs of pants, one with three accessories and they have to create a tree diagram of all of the possible outcomes
9. Dinosaurs of Waterhouse Hawkins • A story about the first man to try and piece together dinosaur fossils. After reading the book, in each cache would be "dinosaur bones" to put together in strange and interesting ways 10. Name that Triangle • Mark waypoints and have students stake out different shapes of triangles and have them identify the geometric shape 11. work with community Firefighters to mark fire hydrants 12. Town Tours 13. Historic Sites 14. Follow the Railroad 15. Trackables -- Flat Stanley Type Project 16. Design a themed cache
What is Google Earth? Google Earth is free program which allows users to: • Explore geographic locations both on Earth and in space. • View Buildings in 3D • View Featured Content • Create interactive projects which include, images, text, video and sound.
Exploring Google Earth • When Google Earth launches, it automatically loads a folder and places it into “temporary places” section. In order to save locations you will need to move folders under “My Places” and save. • A plus sign + indicates there are sub menus under the “sightseeing” heading. • To access one of the locations, double click on the location. • To move through the list of locations, click on the . • To view a location or placemark in detail, double click on the link, in the left sidebar.
The Google Toolbar Add Path Add ruler Sky View Add Polygon Full Screen Printer View in Google Maps Create a Place mark Add Image overlay Earth day view
The Google Sidebar Search bar Tour Player My Places Set transparency level of overlays Sightseeing Layers Tour player
Setting up Google Earth • You can set a default start location each time you launch Google Earth, by navigating to the location, then in the toolbar, click on view, then make this my start location. • You can also set options in by going to Tools in the menu bar and selecting options.
Layers in Sidebar • Use the Layer feature in Google only when necessary. Each layer added to Google Earth will add rendering time each time the map is moved and redrawn. Especially taxing, yet very cool, is the use of the 3D layer. • Often the layers can be extremely useful teaching resource, such as the geographic options. • Using the Digital Global coverage layer, will assist students in viewing when the latest image of each location was last taken.
Navigating Google Earth North Return Look Joystick Move Joystick Zoom Slider You can also use the arrow buttons on the keyboard to navigate
New Features Sun and Shadows time slider/player Jump to street view- option in layers Discover the night sky, option in toolbar Hide 3D Buildings – in 3D view, right click on building, then choose Hide, will not reappear until Google Earth is restarted
Searching a location the “Fly To” • Using Google Earth, you can search by: • Street Address • General name or location Name • Coordinates Click on the Magnifying Glass (search button)
Using “Directions” in Google Earth • The Directions Tab allows users to view travel from one location to another. • Key the address or location site in the first text box, then tab to the second and add the destination address or location. • Use the navigation options to view or the press the play button on the tour bar. • The File, Print option to print the directions.
Find Businesses • You can use the “Find Businesses” tab to locate a specific type of business in a designated area on the map. • Navigate to the location you are interested in, key the “type” of business you are looking for. • Google Earth marks the businesses in balloons and provides additional information if available.
New Project • To begin a new project using Google Earth it is very helpful to keep all the information in one folder. • To create a new folder, click on Add in the menu bar, then folder or use the short cut combination Ctrl+Shift+N • Once created this folder will appear in the My Places area of the search panel.
Tips for Projects • Have students design a storyboard prior to beginning their project. The storyboard should contain the locations they are going to select, and the images, sounds or video, they will be adding to the location. • Keep all images in a single folder, keep image names as short as possible. • Make sure images are resized to less than 3” for a better fit and reduce the resolution. 72 dpi is perfect for web viewing.
Adding Place Marks • Place Marks are like pushpins which help identify a specific location. • Key the location address in the “what you are looking for” text box and click the magnifying glass. • You can use the navigation controls to zoom in, out or change direction. • Click on the add placemark icon to add a placemark. • You can change the icon for the placemark by clicking on the icon button in the dialogue box. • You can add text information to this placemark by keying the information in the description area. • This is also the location you will add additional multimedia.
Adding an image to the placemark • You can add an image to a placemark. Google earth supports the following: JPG,BMP,GIF, TIFF, TGA, and PNG formats. • The most common issue when inserting and image overlay is the size of the image. It is important to keep this in mind when designing your project or edit graphics in a graphics editor prior to adding to the project. Larger images can also be memory intensive. Images less than 3” in size and saved at 72dpi is prefect. • All objects added into the placemark, must be added using hypertext markup language (HTML). I have prepared a cheat sheet to assist you with the basics. • In the preplanning we saved the images in a folder, and gave them a short name. To insert the image in the placemark you will need to know the location path to the image. To get this path, you will right click on the image and go to properties. Highlight this path, right click and choose copy. • You will need to start the line by keying <img src=“paste path add\name of image.format”>
Geo Tagging in Picasa • Picasa is a graphics organizer which will gather all graphics located on your computer and put them into one location. • To “tag” a graphic in Picasa, select the photos you want to use, then click on Tools in the Menu bar, then select, Geotag, Geotag with Google Earth. This will bring the photos into Google Earth. • Navigate to the location you want to place the photo, make sure the cross hair is over the location you want the photo to appear. • Click on the Geotag button, then done. The photo will be placed on the map in Google Earth, once it appears, the item can be edited to appear as a place mark by right clicking on going to properties.
“Geotagging” in Google Video • If you create a video and save it to Google Video’s it can be Geotagged for use on Google Earth. • Upload the video to Google Video. Once the video has been uploaded, click on the Embed Video link, a drop down box with coding will appear. Copy this coding and paste it into your properties area of the place mark in Google Earth. This will embed the video into the place mark.
Graphic Overlays • Graphic Overlays can be in one of the following formats: • BMP, GIF, JPG or TIFF • The graphic overlay lays directly over the map image.
Saving a Project • The file format for Google Earth is .KMZ this extension format must be reopened in Google Earth. • Once the project is completed, be sure you have the project selected, a check mark in all boxes, then click File, Save, in “My Places”.
Resources • Google Earth Users Guide • Google Earth tutorials • Google Earth for teachers
Cool Things to Do with Google Earth
#1 - Look before you leap View the location of a field trip in Google Earth before you actually visit.
Embed media in Google Earth from web sites like Youtube, Voicethread and Slideshare by cutting and pasting the "embed code" into thedescription area of Placemarks, Paths, Polygons and Models. #2 - Embed Media
Use the Line and Path measurement tools to find distances that are challenging to measure. #3 - Line and Path
#4 - Take it Slow, Enjoy the view! Google Earth is fantastically visual and the kids love it when we quickly zoom back to Earth from afar. But we are missing so much! I decided to slow things down. I basically changed the Fly-To speed settings, from the Tools menu>Options>Touring. I reduced the speed as much as I could using the slider.Now with a much slower zoom you have the ability as a teacher to reflect on what you see - so if we are zooming in from space I am able to talk about the continents we can see and then countries and regions. It just gives you and the kids much more time to take in the view!
#5 - Leaf colour changes in the UK Use this KML data file of the leaf colour in the UK for your science lessons. Track the colour as it changes throughout the seasons.It shows the leaf colour of major forests in and around the UK, the information is gathered from the Forestry Commission sites and coverted into a data layer in Google Earth. Open this Placemark
#6 - City Planning and Construction A great collaborative assignment would be to have students plan and construct the next great city in Google Earth. Find a massive area of undeveloped land within GE, and let the fun begin. Students have to research city infrastructure, etc. Then, they would work together to develop the actual buildings and city layout using GE and Sketchup.
#7 - GeoTweets Use a combination of Twitter and Google Earth as a unique mapping activity or intro to using GE. • Ask your Twitter network for challenges, GeoTweets if you will. Do this in advance of the session to give people time to respond. • Guide the children quietly - you want them to be explorers not tourists! • Encourage the children to found out about the area of the GeoTweet - find proof - we found the name of the local garage for one! • Tweet back the proof to the sender to say you have found them. Maybe ask a further question about the area.
Plan a trip with the class to any destination in the world • Get driving directions, then click play • Everyone gets to take the virtual drive, watching the scenery and interesting stops along the way. #8 - Take a Virtual Drive
Have students create a virtual autobiography • They make placemarks at any location of significance then edit the placemarks to add stories, photos, videos, or URLs • This can also be used to present research on a famous person #9 - This is My Life
#10 - Find your blog visitors in Google Earth using Geovisitors • Grab a Geovisitors badge for your blog. • Click the link to see a map of your recent visitors. • Click on a placemark and you will see a balloon that gives you a link to "View in Google Earth" • Follow the link and it will opena and zoom into that visitor's location in GE+add a placemark to "My Places". How cool is that! • Encourage your children to use this when they come into class to check your blog visitors - great way into using GE. (Have GE already open when demonstrating as it will save time opening the app) "I told you they would be excited…" ICT in my Classroom