Download
1 / 18
180 likes | 262 Vues
Gain hands-on experience and understanding of Reverse Transcriptase-based Polymerase Chain Reaction (RT-PCR) principles, HIV replication, electrophoresis for DNA size determination. Explore HIV life cycle and viral structure along with practical lab activities. Learn about RT-PCR, gel preparation, DNA separation, and size determination. Understand the significance of viruses, vector use in biotechnology, and comparing virus sizes. Highlight the PCR method, gel electrophoresis process, and visualization techniques for DNA fragments.

E N D
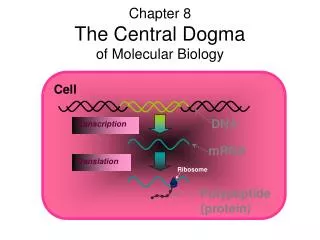
Major Goals of this Experiment To gain an understanding and hands-on experience of the principles and practice of each of the following: Reverse Transcriptase-based Polymerase Chain Reaction (RT-PCR) and to relate these reactions to HIV replication Use of Electrophoresis to separate and determine the size of the RT-PCR amplified DNA fragment. Learn the Molecular biology of HIV life cycle Lab 8. RT-PCR A Model for the Molecular Biology of HIV Replication
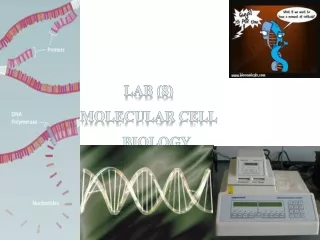
Day 1 Activities: Module I: Production of cDNA by RT-PCR Reaction Module II: Pour Gel and Preparation of Gel for Electrophoresis (Steps 1-15)—store gels under buffer in the refrigerator until day 2. Day 2 Activities: Complete Module II: Load Gels with DNA samples produced by RT-PCR and carryout Electrophoresis to separate the DNA fragments. Time permitting: Stain gel and visualization the DNA in gel. Day 3 Activities: Stain gel and visualization the DNA in gel (if not done day 2) Module III: Size Determination of the RT-PCR fragments RT-PCR Lab: Overview of the Procedure
Cause many diseases Viruses easily controlled with a vaccine Mumps, Measles, Smallpox, Polio Viruses difficult to control with a vaccine (retroviruses) Retroviruses (RNA DNA) Common cold, Influenza (Flu), HIV Used as vectors in biotechnology Used to insert therapeutic genes into a host cell chromosome Importance of Viruses
Comparing the size of a virus, a bacterium, and a eukaryotic cell
Nucleic Acid + Protein Coat (Capsid) Some viruses with Membrane (envelope) surrounding capsid Envelope derived from plasma membrane of host cell No organelles Obligate intracellular parasite Lacks metabolic enzymes, ribosomes, mitochondria Alone, can only infect host cell Nucleic Acid: DNA or RNA Single or Double Stranded 4 genes to a few hundred Viral Structure
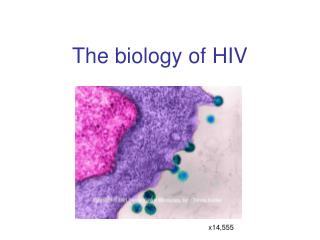
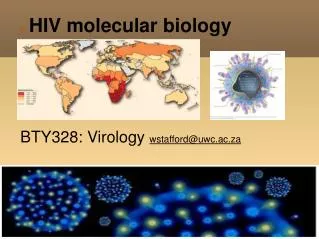
HIV Life CycleHIV is a retrovirus:ssRNA dsDNAFunction of Reverse Transcriptase?Proofreading?
Quick, easy, automated method to make copies of a specific segment of DNA What’s needed…. DNA primers that “bracket” the desired sequence to be cloned Heat-resistant DNA polymerase DNA nucleotides PCR—Polymerase Chain Reaction
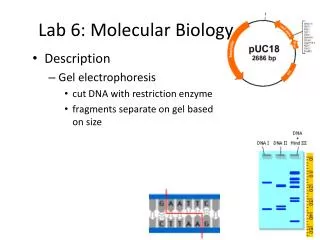
A method of separating mixtures of large molecules (such as DNA fragments or proteins) on the basis of molecular size and charge. How it’s done An electric current is passed through a gel containing the mixture The each molecule travels through the gel is inversely related to its size and electrical charge: Rate a 1 / size & charge Agarose and polyacrylamide gels are the media commonly used for electrophoresis of proteins and nucleic acids. Gel Electrophoresis
Process of DNA electrophoresis Step 1 Prepare a tray to hold the gel Step 2: Pouring the Gel A "gel comb" is used to create “wells” (holes in the gel to hold the mixture of DNA fragments.
Step 2: Pouring the Gel • The gel comb is placed in the tray. • Agarose powder is mixed with a buffer solution, The solution is heated until the agarose is dissolved—like making Jello • The hot agarose solution is poured into the tray and allowed to cool. • After the gel is cooled and solidified, the comb is removed and the gel tray is placed in an electrophoresis chamber.
Step 3: Loading the Gel • Fill electrophoresis chamber with buffer, covering the gel to allow electrical current from poles at either end of the gel to flow through the gel. • DNA samples are mixed with a "loading dye". • The loading dye • allows you to see the DNA as you load it and contains glycerol to make the DNA sample dense so that it will sink to the bottom of the well.
Step 4: Running the Gel • A safety cover is placed over the gel (to keep you from frying yourself) and electrodes are attached to a power supply. High voltage is applied. • DNA fragments migrate through the gel at various rates, depending on their size and • When the loading dye reaches the end of the gel, the current is turned off, the gel removed from the try and then developed to see the DNA fragments
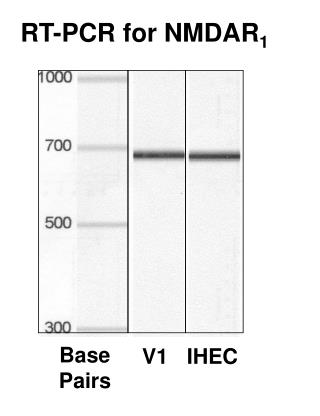
Step 5: Visualization of the DNA Fragments • Stain gel with dye that binds to DNA • Methylene blue (safe) • Time consuming • Poor resolution • View with naked eye • Ethidium Bromide (carcinogen) • Fast + high resolution • View under uv-light • Take Polaroid picture