Set up DNRGPS for ArcMap 10.0
150 likes | 167 Vues
Learn how to set up DNRGPS in ArcMap 10.0 and Toolkit 6.0 on your PC. This document provides step-by-step instructions for installation, connection with Garmin, setting projection, and transferring data to ArcMap.

Set up DNRGPS for ArcMap 10.0
E N D
Presentation Transcript
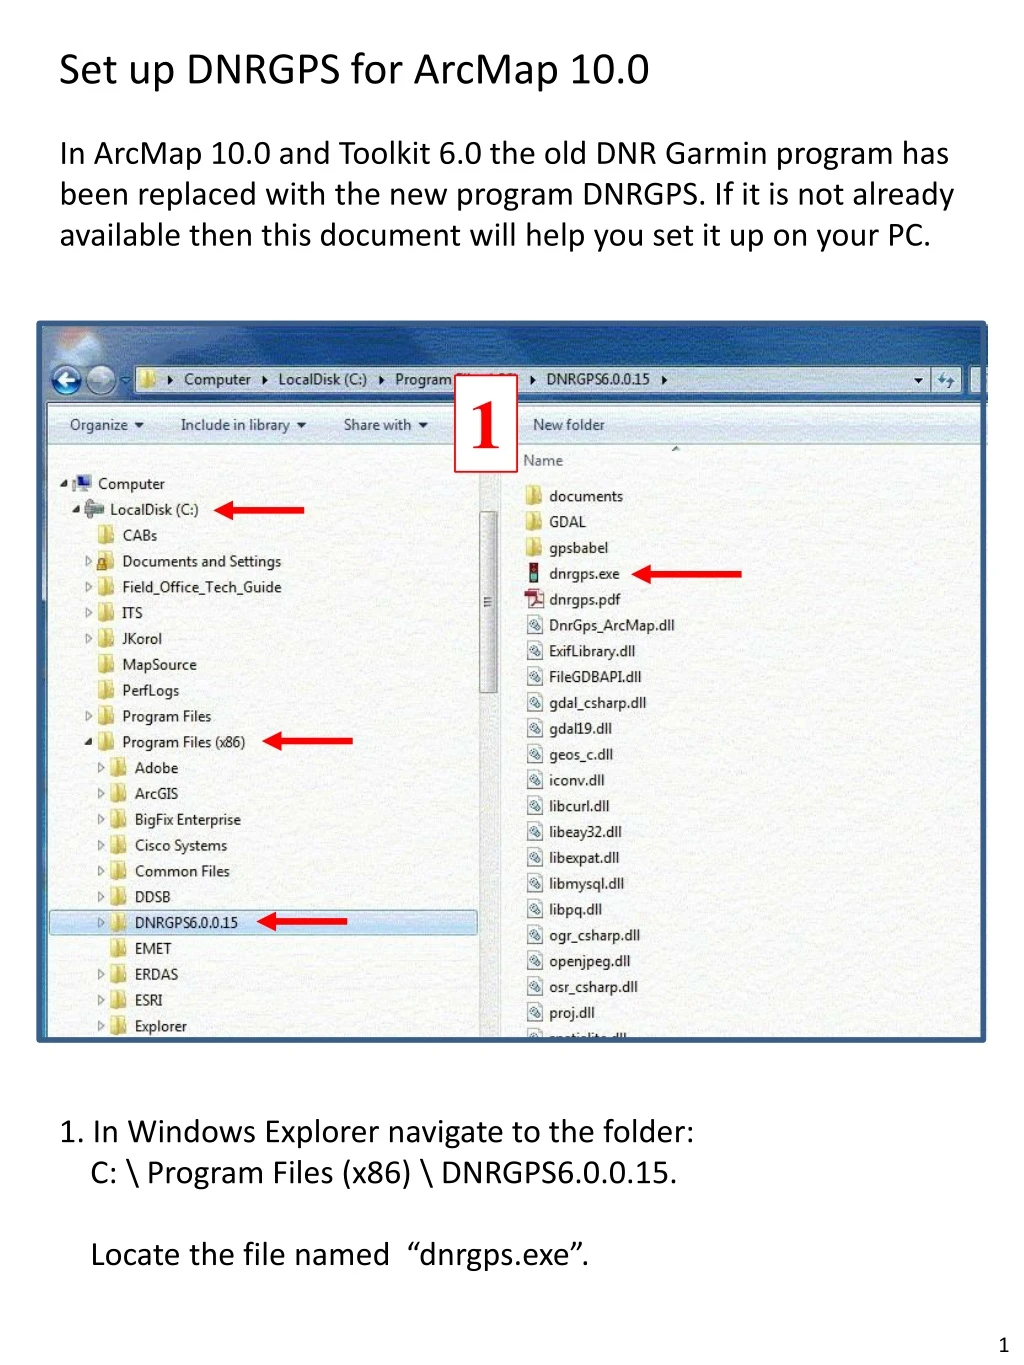
Set up DNRGPS for ArcMap 10.0 In ArcMap 10.0 and Toolkit 6.0 the old DNR Garmin program has been replaced with the new program DNRGPS. If it is not already available then this document will help you set it up on your PC. 1 1. In Windows Explorer navigate to the folder: C: \ Program Files (x86) \ DNRGPS6.0.0.15. Locate the file named “dnrgps.exe”. 1
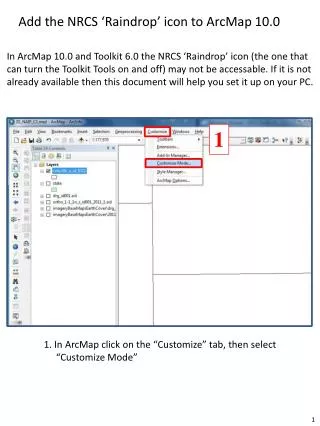
2 2. Right-click on the name of the file, then select: “Pin to Start Menu”. You can select “Pin to Taskbar” if you prefer that option. 2
3 3. This figure shows dnrgps now pinned to the Start Menu. 3
4 4. If the software does not connect immediately to the Garmin you can select ‘Connect to Default GPS’ or ‘Find GPS’. These options will usually establish a connection to the unit. Call Jerry Korol if these options fail to connect. 4
5 5. This window shows that the connection has been established. 5
6 6. When you start DNRGPS your first task should be setting the projection. Click on the “File” tab, then select “Set Projection”. 6
7 8 7. Under the “Projection” tab make sure the Datum is set to NAD83. If it is not then use the drop-down menu to find it. 8. Once the Datum is set then scroll down the list until you find the setting for “UTM zone 11N” (or UTM zone 12N) depending on your location. The map on the next page shows the correct UTM settings for the state. 7
Idaho UTM Zones by County 8 UTM Zone 11 North UTM Zone 12 North 8
9 9. To move points from the Garmin unit to your PC or laptop first select the WayPoints tab, then choose Download. 9
10 10. In this example five points have been downloaded. 10
11 11. At this point you can edit the points if you choose to. Once your edits are complete select the points that you want to move to ArcMap. 11
12 12. Once you have selected the points click on the “File” tab, then select: “Save To > File...”. 12
13 13. Choose the folder where you want to save the shapefile, name the file, and select “ESRI Shapefile” as the file type. Click on OK to finish the import. 13
14 14. You will have to add the new shapefile manually. 14
15 15. Here are the new points in postion. Contact Jerry Korol (208-378-5785) if you have questions about DNRGPS. 15