Download
1 / 29
290 likes | 529 Vues
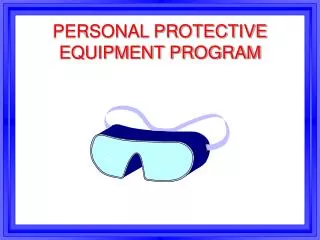
Use of Personal Protective Equipment – Pandemic Influenza. Presenter:. Types of PPE used for Pandemic Influenza. Gloves – protect hands Gowns/aprons – protect skin and/or clothing Masks and P2/N95 respirators– protect mouth/nose

E N D
Use of Personal Protective Equipment – Pandemic Influenza Presenter:
Types of PPE used for Pandemic Influenza • Gloves – protect hands • Gowns/aprons – protect skin and/or clothing • Masks and P2/N95 respirators– protect mouth/nose • P2/N95 Respirators – protect respiratory tract from airborne infectious agents • Protective eyewear – protect eyes • Face shields – protect face, mouth, nose, and eyes
Key points about PPE • Follow a consistent sequence when donning and removing PPE • Ensure your PPE is fitted correctly to provide maximum protection • Take your time • Don’t touch your face/mask/eyewear when in the isolation area
Key points about PPE • Don before contact with the patient, before entering the room • Use carefully – don’t spread contamination • Remove and discard carefully; remove P2/N95 respirator (if used) outside room • Immediately perform hand hygiene
Sequence for Donning PPE • Perform hand hygiene • Gown • Mask (or P2/N95 respirator if aerosol generating procedures to be performed) • Perform fit check if P2/N95 respirator worn • Protective eyewear or face shield • Perform fit check if P2/N95 respirator worn • Gloves • Stop & check
Step 1 - Perform Hand Hygiene • Washing hands with the use of a water and soap or a soap solution, either non-antimicrobial or antimicrobial OR • Applying a waterless antimicrobial hand rub to the surface of the hands (e.g. alcohol-based hand rub) • Refer to Hand Hygiene Australia for detailed instructions http://www.hha.org.au/home.aspx
Step 2 – Don gown • Select appropriate type and size • Opening is in the back • Secure at neck and waist • Ensure all clothing is covered • If gown is too small, use two gowns • Gown #1 ties in front • Gown #2 ties in back • When non-impervious gowns being used, use a plastic apron over cloth gown
Step 3 – Don mask • Place over nose, mouth and chin • Fit flexible nose piece over nose bridge • Secure on head with ties or elastic • Adjust to fit
ORStep 3 – Don P2/N95 Respirator • A P2/N95 respirator should be worn whenever aerosol generating procedures are going to be performed • Select a suitable P2/N95 respirator • Ensure mask is not damaged in any way • Place over nose, mouth and chin • Follow the manufacturer’s instructions for fitting • Fit flexible nose piece over nose bridge • Secure on head with elastic • Adjust to fit • For detailed information on donning a P2/N95 mask, please refer to the presentation available at http://www.health.qld.gov.au/chrisp/resources/Fit_Check.ppt
Step 4 – Perform fit check (if wearing P2/N95 respirator) • Every time a P2/N95 respirator is worn a fit check must be performed: • Inhale – respirator should collapse slightly • Exhale – respirator should expand, check for air leakage around face • If mask does not collapse, expand or air leakage or fogging of glasses/protective eyewear is observed, check seals around bridge of nose and check if mask is crooked, bunched or folded. Then fit check mask again • For detailed information regarding fit checking P2/N95 masks, please refer to the presentation available at: http://www.health.qld.gov.au/chrisp/resources/Fit_Check.ppt and the factsheet available at: http://www.health.qld.gov.au/chrisp/resources/fit_check_factsheet.pdf
Step 5 – Don eye/face protection • Put on prescription eyewear (if worn) • Position protective eyewear over eyes/glasses and secure to the head using the arms of the eyewear • Adjust to fit comfortably
Step 6 – Fit check mask (if wearing P2/N95 respirator) • If wearing a P2/N95 respirator re-fit check mask after donning protective eyewear • This will ensure protective eyewear is not affecting the fit of the mask • Inhale – respirator should collapse • Exhale – respirator should “puff out”, check for air leakage around face
Step 7 – Don gloves • Select correct glove size • Put the first glove over your hand, then pull the end of the glove over the cuff of your gown • Repeat this for the other hand
Step 8 – Stop & check • Do not touch your mask, protective eyewear or your face whilst in the isolation area • Ensure you stop and check the placement of your PPE before entering the isolation area • Ensure you are comfortable • Remove gloves if they become torn; perform hand hygiene before donning new gloves
Safe removal of PPE • PPE may have been contaminated with respiratory droplets • Outside front of PPE most contaminated • Areas of PPE that have or are likely to have been in contact with body sites, materials, or environmental surfaces where the infectious organism may reside • Most likely time you could accidentally infect yourself • Minimise contact
Safe removal of PPE • Remove PPE carefully – take your time • Immediately dispose or place PPE in receptacles for reprocessing • PPE removal principles and sequencing aims to protect the healthcare worker from contamination
Where to remove PPE • Never remove mask inside the patient room • Remove gloves, protective eyewear and gown at doorway, before leaving patient room or in anteroom* • Remove mask/respirator outside room, after door has been closed* *Ensure that hand hygiene facilities are available at the point needed, e.g., sink or alcohol-based hand rub
Sequence for Removing PPE • Gloves • Hand hygiene • Protective eyewear • Gown • Hand hygiene • Mask • Hand hygiene
Step 1 – Remove gloves • Grasp cuff near wrist • Peel away from hand, turning glove inside-out • Hold in palm of gloved hand
Step 1 – Remove gloves • Slide ungloved finger under the wrist of the remaining glove • Peel off from inside, creating a bag for both gloves • Discard
Step 2 – Perform Hand Hygiene • Washing hands with the use of a water and soap or a soap solution, either non-antimicrobial or antimicrobial OR • Applying a waterless antimicrobial hand rub to the surface of the hands (e.g. alcohol-based hand rub) • Refer to Hand Hygiene Australia for detailed instructions http://www.hha.org.au/home.aspx
Step 3 – Remove eye/face protection • Grasp arms of protective eyewear frames • Lift away from face • Place in designated receptacle for reprocessing or disposal
Step 4 – Remove gown • Unfasten ties • Peel gown away from neck and shoulder • Turn contaminated outside toward the inside • Fold or roll into a bundle • Discard
Step 5 – Perform Hand Hygiene • Washing hands with the use of a water and soap or a soap solution, either non-antimicrobial or antimicrobial OR • Applying a waterless antimicrobial hand rub to the surface of the hands (e.g. alcohol-based hand rub) • Refer to Hand Hygiene Australia for detailed instructions http://www.hha.org.au/home.aspx
Step 6 – Remove mask • Untie the bottom, then top, tie • Remove from face – avoid touching the front • Discard • Do not reuse mask
Step 6 – Remove P2/N95 Respirator • Never remove respirator inside the patient room • Avoid touching the front of the respirator • Remove by the straps • Remove down and away from face • Discard • Do not reuse respirator
Step 7 – Perform Hand Hygiene • Washing hands with the use of a water and soap or a soap solution, either non-antimicrobial or antimicrobial OR • Applying a waterless antimicrobial hand rub to the surface of the hands (e.g. alcohol-based hand rub) • Refer to Hand Hygiene Australia for detailed instructions http://www.hha.org.au/home.aspx
For Further Information • Queensland Health factsheet – P2/N95 Mask Fit Checking http://www.health.qld.gov.au/chrisp/resources/fit_check_factsheet.pdf • Department of Health and Ageing – Pandemic Influenza Preparedness, Safe Use of Personal Protective Equipment (PPE) http://www.health.gov.au/internet/panflu/publishing.nsf/Content/safeuse-dvd-1 • The World Health Organisation and 2014 AHMPPI assert that pandemic influenza patients should be managed using contact and droplet transmission-based precautions, however, the DoHA presentations do not currently reflect this • P2/N95 respirators are necessary for aerosol generating procedures – staff caring for closed circuit ventilator patients may wish to consider wearing P2/N95 respirators • Surgical masks provide sufficient protection for general care of pandemic influenza patients
For Further Information • Centres for Disease Control (CDC) Protecting Healthcare Personnel http://www.cdc.gov/HAI/prevent/ppe.html