Download
1 / 34
340 likes | 476 Vues
The Classified Human Resources Information System (CHRIS) is a web-based application that automates the management of employee positions at the University of Wisconsin-Madison. This guide provides essential log-on information, steps for application installation for both PC and Mac users, and instructions for creating a user profile. It outlines various HR transactions, including new hire authorization, goal setting, and organizational chart updates. The system aims to streamline the processes of filling vacancies, updating positions, and managing employee data efficiently.

E N D
CHRIS Classified Human Resources Information System Permanent & Project & LTE College of Engineering UW-Madison 10/26/04
CHRIS System • General Information • Log on Information • Application Installation (if needed) • PC Users • Mac Users • Printing • Log on Screen • Creating a Profile—New Users • CHRIS Main Menu • CHRIS Main Menu—What do I want to do? • Menu Information • Entering Data from a Word document • Creating a New HR Transaction—Authorization to Hire • Creating a New HR Transaction—Goals & Activities
CHRIS System (cont.) • Creating a New HR Transaction—Knowledge and Skills • Creating a New HR Transaction—Organizational Chart • Creating a New HR Transaction—Comments • Creating a New HR Transaction—Comments specific to COE • Creating a New HR Transaction—Exclusions • Creating a New HR Transaction—History • Creating a New HR Transaction—Submission • Printing • Checking HR Transaction Status • HR Transaction Status—Definitions • Creating a New HR Transaction—LTE Positions
General Information • The Classified Human Resources Information System (CHRIS) is a web-based application system built under the auspices of the Classified Human Resources (CHR) within the Office of Human Resources at the University of Wisconsin - Madison. • The purpose of CHRIS is to automate and facilitate entry of new positions (fill vacancy), update current positions and process reclassifications and reallocations, for employee positions at the UW - Madison.
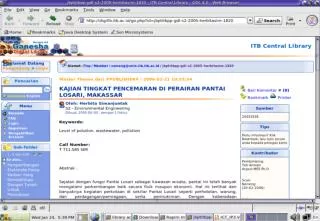
Log on Information The URL to access CHRIS is: http://oradevprod.doit.wisc.edu/pd/pvpd.html Please bookmark this URL.
Application Installation-PC Users • Sun Java Plug-in version 1.4.1, and version 1.4.2(preferred) for MS WindowsBefore PC users logon to the CHRIS or PVL systems for the first time and use the default Java Virtual Machine(JVM) associated with their browser, they will need to load Sun's Java plug-in if they don't have it already. Once installed as the default JVM for the web browser, the browser will use it as necessary for these applications and any other Java applications or applets from this site or any other site on the Internet. For installation, please click Sun's Java™ Plug-in 1.4.2(preferred) or Sun's Java™ Plug-in 1.4.1 for MS Windows and FOLLOW THE INSTRUCTIONS there. • WHICH Plug-in? The 1.4.2 plug-in is a newer release and has significant improvements over previous versions. If you have already installed JVM 1.4.1, you do not need to install JVM 1.4.2. • NOTE: The default JVM under Microsoft Windows operating systems is Microsoft's JVM, which is incompatible with the Java standards, and does not support the functionality which the applications require. Changing the browser's default JVM to Sun's Java™ plug-in is required. • NOTE: After installation, be sure to CLOSE ALL BROWSER WINDOWS before opening the browser again to go to the CHRIS or PVL. • NOTE: This is a one-time installation
Application Installation-PC Users (cont.) • JInitiator:Before PC users logon to the CHRIS or PVL systems for the first time they will have to load the JInitiator plug-in if they don't have it already. Once installed, they do not have to access the JInitiator software directly; the web browser will use it as necessary. For installation, please go to Download JInitiator 1.1.8.14 and FOLLOW THE INSTRUCTIONS there. • NOTE: After installation, be sure to CLOSE ALL BROWSER WINDOWS before opening the browser again to go to the CHRIS or PVL.
Application Installation-Mac Users • Mac Runtime for Java (MRJ) 2.2.5, for OS 8, OS 9Before Mac users running Operating Systems OS 8 and OS 9 can logon to CHRIS or PVL systems for the first time, MRJ 2.2.5 must be installed on their computers. After installation, the web browsers will use this new Java Virtual Machine (JVM) to execute the applications. For installation, please follow the instructions. • NOTE: The above MRJ does not apply to Mac OS X operating system. OS X installs with the most current JVM.
Application Installation--Printing • Adobe™ Acrobat Reader:For printing purposes, people using these systems should have a recent version of Adobe™ Acrobat Reader on their machines. This software can be downloaded for free for all supported platforms from Download Adobe™ Acrobat Reader.
Log on Screen This info is the same as the Application Installation instructions on previous pages. New Users click here to create a PROFILE. Existing users enter Logon Name and Password.
Creating a Profile—New Users • All UW - Madison staff using the CHRIS system need to create a profile before accessing the system. • The profile is a means for you to establish a unique logon name and password and to set defaults that automatically fill in when you create a HR Transaction. • It also allows you to assign proxies who, when needed, can access HR Transactions you have created. • Click on the “New User” Button. • Specific information can be found at http://www.ohr.wisc.edu/pd/helpprod/profile_screen.html • After completing the necessary information, you will be taken to the CHRIS Main Menu page.
CHRIS Main Menu After log in, this is the main menu. Must pick one HR Transaction Type What do I want to do? Pick one from either “Create an HR Transaction” or “List My HR Transactions”
CHRIS Main Menu—What do I want to do? • New Transaction - Press button to go to a new HR Transaction screen according to the HR Transaction Type selected. • Copy from Existing Transaction - Press button to go to the Search Results screen and allows you to find which existing Transaction you would like to copy to create an HR Transaction of the type selected. After the Transaction to copy is found, press the copy button on the Search Results screen to start the copy process. • Tran ID – If known, enter the Transaction ID that you would like to view or edit from document previously entered on CHRIS. • Edit HR Tran- Press button to go to the HR Transaction screen for the entered Transaction ID in Edit mode. You can only edit those you created or are proxied to you and are not yet submitted. You can edit applicant data for an LTE transaction if it was originally submitted without an applicant. • View HR Tran - Press button to go to the HR Transaction screen for the entered Transaction ID in View mode.
CHRIS Main Menu—What do I want to do? (cont.) • List My Active Transactions - Press button to go to the Search Results screen showing all the active (not Closed or Cancelled) transactions of the selected types that you created or transactions in “draft”. • List All Mine of Selected Types - Press button to go to the Search Results screen showing all the transactions of the selected types that you created. • Search All HR Transactions - Press button to go to the Search screen to enter search criteria. • Edit Profile - Press button to go to the Profile screen to edit your profile. • Exit CHRIS - Press button to go to close all the open windows and exit the CHRIS system.
Menu Information • The menu bar at the top of CHRIS screen is similar to the standard Windows menu. • The sub-menus have some standard selections and some selections unique to CHRIS. • The selections that are available on a certain screen depend on that screen, on the status of the displayed data, and on the authorization of the current user. • The active selections on the sub-menus are in black font, while the inactive selections are in a dull gray color. • Additional information can be found at: http://www.ohr.wisc.edu/pd/helpprod/menu.html
Entering Data from a Word document • Cut (Control+X) - Cuts out the highlighted text and saves it on the clipboard. • Copy (Control+C) - Copies the highlighted text and saves it on the clipboard. • Paste (Control+V)- Pastes the text on the clipboard to the position designated. • This option is only available if the Cut or Copy was done using the CHRIS system itself. If the Cut or Copy was made from an external document, use Control+V, the standard Windows command, to do a paste. • Note: If the text to be pasted is more than the receiving field can accept, NONE of the text will paste. You will have to reduce the text length until it is within the limit for the receiving item. • CAUTION: When copying from Word and pasting into a HR Transaction • the single quote (apostrophe) is sometimes converted into a question mark (?). It seems to be those in the middle of a word (e.g., don't) or end of a word that are converted. • Other special characters such as a hyphen are sometimes converted too. • These conversion do not occur until the data is saved so you may not notice it immediately. • These all can be typed over and restored to the correct character by anyone with authorization to submit or approve the HR Transaction. • You may want to review the large text fields in the HR Transactions you have not yet submitted or approved if you suspect you did a copy and paste of text that had quotes or other special characters.
Creating a New HR Transaction–Authorization to HireHR Transaction General Information Page 1 Employees with Similar Duties, HR Tran ID Must enter data into highlighted fields. HR Tran ID Created as soon as you save the package. It is now the same as the CHR number Employees with similar duties: This is not a required field. Do not enter the prior incumbent. Additional info can be found at: http://www.ohr.wisc.edu/pd/helpprod/auth_page_1.html HR Tran Type
Creating a New HR Transaction–Authorization to HireHR Transaction General Information Page 2 New/Replace/Change, Contact Person New/Replace/ Change Replace – Same Duties means the EXACT same PD. Use Changed duties if there are any changes to the original PD. Contact Contact should be someone in your Department. HR Personnel or Supervisor? Additional info can be found at: http://www.ohr.wisc.edu/pd/helpprod/auth_page_2.html
Creating a New HR Transaction–Authorization to Hire HR Transaction General Information Page 2 (cont.) Percent time, Schedule Comment Part-time Positions Enter the smallest part of the percent in the FTE% field; Select Part-Time in the Work Schedule field, Clarify in the Schedule Comment Field Schedule Comment Provide ample information about the hours of the position in the Schedule Comment field. Do not just write “M-F” or “8-5.” Do not leave blank.
Creating a New HR Transaction– Goals & Activities Summary, Percentages Summary Do not leave knowledge and skills required in Summary. Percentages The % time should correlate appropriately with the letters: Highest % = A 2nd Highest % = B and so on… Additional info can be found at: http://www.ohr.wisc.edu/pd/helpprod/goals_and_activities.html
Creating a New HR Transaction–– Goals & Activities (cont.) Formatting Issues from Copying & Pasting Extra Spaces If there are extra spaces in your fields, you will be able to highlight them (see blue line). This will create spaces in the printed PD. Please proofread and delete. Question Marks Sometimes when copying and pasting from another document, question marks appear instead of other punctuation marks. Please proofread and delete.
Creating a New HR Transaction––Knowledge & Skills Knowledge & Skills are Required Do not leave the Knowledge and Skills section blank. If there is knowledge and skills information in the summary, please move it to this section. If there are knowledge and skills referred to in the PD, please make sure they are referenced in this section. Additional info can be found at: http://www.ohr.wisc.edu/pd/helpprod/knowledges_and_skills.html
Creating a New HR Transaction–– Organizational Chart Lengthy Org Charts Can Cause Technical Difficulties They may cause CHRIS to freeze. What Goes on the Org Chart? 1. The direct chain of command from the top of the department down to the supervisor of the open position. 2. Anyone the direct supervisor of the open position supervises. More Detail Occasionally CHR will ask for a more complete org chart, and then you may submit a printed document-type version i.e. Word, PowerPoint, etc.
Creating a New HR Transaction––Organizational Chart (cont.) How Do You Indicate an Open Position? Enter “Vacant” in the Name field for Replacement positions and New positions Appointment Type Don’t use OT (Other) for FA (Faculty) and AS (Academic Staff) positions Additional info can be found at: http://www.ohr.wisc.edu/pd/helpprod/organization_chart.html
Creating a New HR Transaction––Comments Lengthy Comments May Cause Technical Difficulties If your comments are too long – it can cause CHRIS to freeze. Anything you write here will be included in the email that alerts COE HR that the position has been submitted and approved by your Department. Additional info can be found at: http://www.ohr.wisc.edu/pd/helpprod/position_description_comments.html
Creating a New HR Transaction–– Comments Specific to COE • Comments MUST include • How soon the unit would like the vacancy posted, • How the vacancy fits into the “Strategic plan”, • Supervisor and/or Dept/Program/Center approval • Example: John Smith, Chair, ECE, approved this request for (position title) on (date).
Creating a New HR Transaction–– Exclusions • Exclusions are not submitted frequently enough to cause recurring problems at this point. If you have a position that requires an exclusion, and you have questions – please contact COE HR.
Creating a New HR Transaction–– History Check the Status of Your Position You can view the Event, Status, Date/Time, and Logon ID of the Person who changed the Status. You may want to check here to make sure your position has been received by COE HR if you have any doubts. Additional info can be found at: http://www.ohr.wisc.edu/pd/helpprod/status_history.html
Creating a New HR Transaction–– Submission • When all of these steps are completed, go to the menu bar, and under 'Tools', select 'Error Check Entire HR Transaction'. This will check for any errors that have to be fixed before continuing. Fix everything that needs to be changed. Continue until no more errors. • When the error check returns with no errors, you are now ready to submit the HR transaction to the next level for approval. To do this, press 'Submit' under the 'Action' menu item at the top of the screen. This will send the Transaction to the next level for approval. • To keep track of the status of your HR Transaction, go into the Transaction and select the 'History' tab.
Printing • At the time you submit the document, you can also print out a copy of the documents you have created. To print a copy: • Click on “File” on the menu bar • Choose “Print HR Package” • Choose the package you want to print (“Print Authorization to Hire…”) • The documents will be open in Adobe Acrobat • Print the documents.
Checking HR Transaction Status–– • Go back to the main menu • Search for your specific transaction by entering the HR Transaction ID Or • List HR transactions and then pick from list • Once correct transaction is displayed click on the “History” tab to view the status of the transaction • Check here periodically to view the status.
HR Transaction Status—Definitions • Draft—Position has been created but not “Submitted” • Department HR Review—Position has been “submitted” by the Department to the Department. Either a supervisor submitted it to HR Personnel or HR Personnel submitted it to him/herself. • Division HR Review—Position has been “Approved” by the department and is being reviewed by COE HR. • CHR Review—Position has been “Approved” by COE HR and is being reviewed by CHR. • Validated—For non-delegated titles. CHR has received the PD and posted it, but it may not be approved yet. • Class Approved—Delegated title has been approved by COE HR. Non-delegated title has been approved by CHR. • Contractually Posted—Position has been posted contractually. • Applicants Referred—Refers to contractual transfer candidates. • Recruiting—Position is approved, contractual obligations have been satisfied, and the recruitment process has begun. • Applicant Selected—Applicant has been Class Approved.
Creating a New HR Transaction–– LTE Positions Most of the LTE process will be the same as for other HR Transaction types. Here are some differences: • Though only one goal (and related activities) is required, the PD Summary is optional. • Some items that do not apply to LTEs are protected or removed, while others, such as Hourly Rate if posting on the web, are required. • If there is no Applicant entered, you can choose whether the position should be posted on the web in the nightly automated process. • An Organizational Chart is optional. • A selected applicant can be entered before the original submittal of the LTE Transaction, or after. If after, only applicant data will be allowed to be updated. Then the applicant is submitted separately for approval. HR staff can then approve or reject the applicant together with or separately from the Transaction.
Creating a New HR Transaction–– LTE Positions (cont.) • The Applicant status will display separately from the LTE Transaction status on the Search Results screen. The Applicant status will display with the detail data on the lower part of the screen. • An Applicant hired through this process cannot be entered into IADS or Payrolled until the LTE Transaction is Class Approved by Division HR staff (if the title is delegated) or CHR. • Detailed instructions for the LTE process and other enhancements will be available as soon as they are developed.