Download

1 / 5
0 likes | 3 Vues
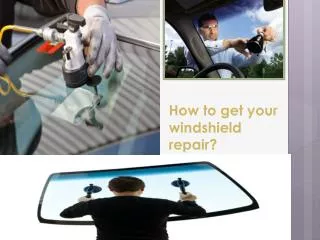
Trust trained technicians for exact windshield alternative employing OEM-authorised processes, torque specifications, and digital camera calibration gear.

E N D
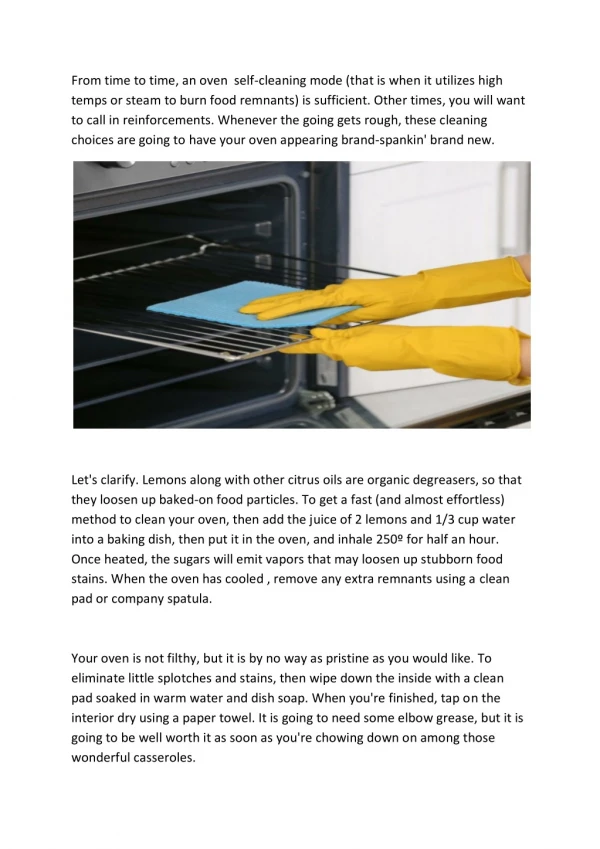
A brand-new windshield changes how a car feels. The cabin gets quieter, the glass is crystal clear, and drive-time fatigue drops because you’re not peering through pits and wiper scars. Yet the most important part of that new glass is the bond you don’t see: the seal. Whether your shop used urethane for a full Windshield Replacement or installed a bonded backlite on an SUV, the adhesive and the surrounding trim do the heavy lifting. Clean the wrong way, especially in the first days, and you can weaken that bond, introduce leaks, or etch a haze into the glass that never quite goes away. I’ve installed and cared for more panes than I can count, from everyday commuters to high-end panoramic windshields with embedded cameras and sensors. The cleaning details matter. Small habits, repeated over months, keep that seal sound and your view pristine. Here’s how I approach it, and why. Why the seal is so easy to harm, and how to respect it Modern Auto Glass relies on moisture-curing urethanes that build strength over hours and days, not minutes. The bead is designed to hold fast to painted body flanges and the ceramic frit around the glass perimeter. Solvents, petroleums, and overly aggressive mechanical scrubbing can swell or soften an uncured bond. Even after cure, harsh chemicals can embrittle the edge trim, and pressure washing can blast water between layers that are meant to shed, not catch, moisture. Two realities set the rules. First, cure time varies. Some fast-set urethanes achieve safe drive-away in as little as 30 to 60 minutes, but full strength typically takes 24 to 48 hours, sometimes longer in cold or very dry air. Second, the edge of the glass is not just decoration. That black dotted border and the surrounding trim protect the adhesive from UV and physical damage. Any cleaning method that scrubs or saturates that edge asks for trouble. Respect those facts, and you can clean confidently without compromising the bond. The first 48 hours after Auto Glass Replacement If you’ve just had a Windshield Replacement, the next two days shape the long-term health of the seal. When customers pick up a car from my shop, I don’t hand them a bottle of glass cleaner. I give them a plan. Keep it simple early. If the glass has fingerprints or a light film, use a barely damp, clean microfiber cloth on the interior only, and avoid the last inch around the perimeter. On the outside, leave it unless there’s obvious debris. A dry duster or a puff of clean air is fine for pollen. Skip squeegees, chemicals, and any pressurized water. The adhesive is windshield chip repair Burlington still scouting strength, and the trim is settling into place. Any taping the installer used should stay until they say otherwise, usually 24 hours. The tape helps keep the molding positioned and prevents the glass from creeping on sloped windshields before the urethane grips fully. Don’t peel tape early to get a cleaner look. That strip is insurance. You’ll likely see a little fog or haze at the edges in humid weather. That’s normal. Moisture in the cabin reacts with curing urethane and sometimes fogs the fringe before it dissipates. Do not chase it with cleaners. Let it fade on its own. Choosing cleaning products that won’t attack the seal Not all glass cleaners are equal, and the wrong kind can be hard on the bond. I keep three product categories in rotation, each with a job. For routine cleaning, an ammonia-free automotive glass cleaner with surfactants that flash quickly and leave no residue. Household glass products often contain ammonia or perfumes that can soften or streak tint and can migrate into porous rubber or foam at the edges. Many modern windshields have acoustic interlayers and sensor housings that respond better to automotive formulas. For heavier grime, isopropyl alcohol diluted with distilled water at about a 10 to 20 percent alcohol content. This cuts road film without delaminating tint or drying edge trim the way stronger solvents can. Full-strength alcohol can brittle some rubber over time, so moderation wins. For bonded contaminants like tree sap or sticker glue, a small amount of automotive tar and adhesive remover on a cloth, never sprayed directly at the glass edge. Keep it at least an inch away from the frit line. Apply sparingly, work the spot, then neutralize with your standard cleaner to remove the oily residue. If the sap sits at the very edge, skip solvents entirely and rely on time, heat from the sun, and friction with a microfiber until it releases.
Avoid acetone, lacquer thinner, household degreasers, and ammonia-heavy cleaners anywhere near a new seal. They can wick under trim, stain the frit, and soften uncured adhesive. Silicone “glass sealants” belong in another category entirely, and I don’t use them on new glass. They smear, attract dust, and can interfere with rain-sensing systems. Microfibers, paper towels, and why your cloth matters I can tell what someone uses on their glass by the micro-marring patterns. Paper towels scratch more than people realize. They’re wood pulp, they shed, and the binder chemicals can leave streaks under bright polarizing light. Old T-shirts tend to leave lint and may carry fabric softener residues that smear. Good microfiber makes the work easier and safer. I keep two piles: one for glass only, one for everything else. Separate them so you don’t grind grit from a fender into your windshield. Tight-weave, low-pile microfiber is best for glass. Wash them without fabric softener, which coats fibers and ruins their capillary action. Dry on low heat or air dry to preserve the weave. Replace cloths when they feel less grabby. A glass towel that glides effortlessly often means it is loaded with residues. Think of them as filters. Once saturated, they spread grime instead of removing it. Technique: pressure, passes, and the fragile perimeter How you move across the glass matters more than how hard you press. Most streaks come from uneven evaporation, residues on the cloth, or missed overlap. Start with two cloths: one damp with your chosen cleaner, one dry for buffing. Mist cleaner onto the cloth, not the glass, unless the center area is truly filthy and you are several inches away from the edge. Spraying directly at the perimeter risks wicking cleaner under the trim. Split the glass into halves or quadrants in your head so you don’t chase streaks forever. Work from the center outward with light, overlapping passes. Stop an inch shy of the edge and change angle for the last bit, using almost no pressure and very little moisture. This protects the trim and keeps the cleaner from pooling in the frit area. On the interior, mind any camera pods, sensor housings, or mirror mounts. These areas like lint. Clean around them, then come back with a barely damp corner of the cloth to trace their edges. Flip to the dry cloth while the cleaner is still flashing, then buff in perpendicular passes to your initial wipes. If you wiped horizontally first, buff vertically. This crosshatch uncovers streaks before they set. If you see a stubborn streak, resist the urge to soak it. Add a small amount of cleaner to the cloth and reset the surface with a few light passes. For the last inch around the border, I use a third towel that is barely damp or completely dry, and I feather the area with gentle strokes. The goal is to lift any faint residue without massaging liquid into the perimeter gap. If the sealant is fresh, err on the side of leaving the very edge alone for the first couple of cleans. Dealing with the scourges: bugs, sap, road film, and hard water A new windshield attracts a rude initiation. Bugs bond to hot glass like varnish. Sap drips while you are parked and then bakes in. Road film accumulates faster on pristine surfaces because there is no microtexture for grime to anchor, so it spreads evenly and shows every streak. Bugs prefer heat-soften, not brute-force scraping. Park the car in the shade to cool the glass. Lay a clean, damp microfiber across the bug-splattered area for five minutes to rehydrate the remains. Lift, then wipe with minimal pressure. If the mess is dense, repeat the soak rather than scrubbing. A plastic razor blade used flat against the glass can be safe in the center area, but never pry at the edge or anywhere near the frit. Keep the blade away from the perimeter for the first few weeks. Sap responds to patience and warmth. The sun will soften it; your cloth will finish the job. If the blob sits away from the edge, a drop of adhesive remover on the cloth can help. If it straddles the border, skip solvents and rely on repeated warm compresses with a damp towel. I’ve seen a week-old sap spot lift in two sessions without risking the seal. It takes restraint, but that’s better than a weeping corner six months later. Road film is often a mix of oils and minerals. If your usual cleaner leaves a rainbow sheen, introduce the mild isopropyl solution. Wipe with overlapping passes and a fresh towel, then follow with your standard cleaner for the final flash.
Avoid clay bars on a brand-new windshield for at least a month. If you insist on claying, keep it away from the perimeter and use a very light touch with abundant lubricant. Hard water spots form quickly if you wash in sunlight or let sprinklers mist the car. The safest early remedy is a vinegar- diluted wipe, about one part white vinegar to three parts distilled water, applied to the center only and kept away from the edge. Vinegar can creep and doesn’t play well with rubber. Work small sections and neutralize with your normal cleaner. For heavy etching, wait until the urethane is fully cured, then consider a purpose-made glass polish applied by hand, not a machine, and keep an inch from the frit. Interior film, outgassing, and the “new glass smell” After a Windshield Replacement, you may notice a faint film building on the inside over the first month. Part of that comes from cabin plastics outgassing more noticeably now that your view is flawless. It isn’t from the urethane itself if the work was done correctly and the bead is protected by the frit and trim. New vehicles also shed a lot of volatile compounds in their first year, which then condense on glass. The fix is routine, gentle cleaning. Keep a small bottle of ammonia-free cleaner and a dedicated glass cloth in the glove box. Avoid air freshener sprays, which mist oils that land on glass and smudge. On hot days, crack the windows slightly when parked to vent vapors. Cabin filters help, but they don’t stop interior plastics from breathing. If a car has had an aftermarket tint applied on the windshield’s top brow or sides, be doubly cautious. Ammonia can haze tint, and aggressive scrubbing at the edges lifts film. Use the same glass-only microfiber and light passes. Wipers, washer fluid, and how they affect the seal Most people ignore wipers until they chatter. On a new windshield, worn blades can scuff or leave chatter marks that mimic cracks in the right light. Replace blades if they’re more than a year old or if the rubber feels stiff. I prefer beam- style blades for their even pressure on curved glass. Clean the blades by wiping them with the same diluted isopropyl solution until a wipe comes away clean. Then rinse the windshield with pure water and a final light glass cleaner pass. Do not coat blades with petroleum conditioners. They migrate to the glass and attract grime. Washer fluid matters because it sprays at the base of the windshield and can dribble into the perimeter. Avoid concentrated bug removers in the reservoir during the first month after installation. Standard winter blends or basic blue fluid is fine. Check that your washer jets don’t shoot under the trim. I’ve adjusted more than a few misaligned jets that wet the frit more than the glass. If you have rain-sensing wipers, clean the sensor area from inside with extra care. The sensor reads through the glass. Residue here makes wipers twitchy. A single gentle pass with a clean towel and a tiny amount of cleaner is enough. Heavy scrubbing can stress the mounting gel pad. Pressure washers and car washes: proceed, but intelligently I won’t tell you to avoid car washes forever, but in the first week after Auto Glass Replacement, I advise hand washing or touchless at low pressure. High-pressure nozzles can drive water at seams and into moldings. If you must use a car wash, choose a touchless option and skip the wax cycle for the first week to keep heavy surfactants off the edge. Brush tunnels are risky for fresh moldings; a strip can catch and tug on a still-settling trim piece. If you use a home pressure washer, keep the tip at least two feet from the glass and avoid directing the jet at the very edge or into the cowling. Work at oblique angles so water sheds across the surface rather than blasting into gaps. Most failures I’ve seen after good installs started with an innocent detail: a pressure wand hovered at the lower corners where the glass meets the weatherstrip. Temperature swings, doors, and driving right after install Two common habits stress a fresh seal. Slamming doors with windows fully up can pressure-pulse the cabin, pushing on the glass from inside. For the first day after a Windshield Replacement, close doors gently or crack a window. The other habit is cranking the defrost on high right away in freezing weather. Rapid temperature differentials can stress the glass and the bead. Warm the cabin gradually for the first few drives. After cure, normal use is fine.
If you live at altitude or drive from sea level to a mountain pass within a day of install, know that pressure changes can be dramatic. The urethane will handle it if the installer chose the right product and the car has had adequate set time, but it doesn’t hurt to extend the gentle-hand period to 48 hours before long, steep climbs. How to inspect your seal without picking at it Customers sometimes touch the edge to see if it’s cured. Don’t. Instead, confirm health with your eyes. Look for even trim seating, no gaps at corners, no fresh moisture lines wicking into the cabin, and no visible bead poking beyond the frit. Press gently on the interior glass near the mirror mount. You shouldn’t feel flex or creaks. If you do see a small gap in a molding or a corner that doesn’t look right, take photos and contact the installer. Good shops stand by their work. They’ll reseat a molding or run a small supplemental seal where appropriate. DIY sealants at the edge often cause more harm than good. The quiet payoff: habits that keep the bond healthy for years Cleaning routines often determine whether a windshield stays silent and dry. Two or three habits make the difference. Keep cleaners off the perimeter by loading your cloth, not the border. Choose ammonia-free formulations to protect tint and rubber. Use fresh, clean microfibers and swap them often. Avoid aggressive pressure washing at the edges. Treat bugs and sap with patience instead of force. Do that, and the seal will last as long as the glass. The cabin stays quiet, the ADAS systems see clearly through the camera window, and you spend your weekends driving instead of chasing streaks. Here’s a compact routine that works for almost every vehicle after the first 48 hours have passed: Park in the shade so cleaner doesn’t flash too quickly, then start with a dry dust-off of the exterior to lift grit. Mist an ammonia-free cleaner into a clean, glass-dedicated microfiber, not directly at the glass edge. Wipe from center outward with light, overlapping passes, stopping an inch shy of the perimeter until the final feather pass. Buff with a second, dry microfiber in perpendicular strokes to kill streaks before they set. For stubborn spots, apply a small amount of diluted isopropyl on the cloth, work the area, then return to your regular cleaner and finish with a dry buff. When to call your installer, and what to expect If you notice water marks inside after rain, a faint whistle at highway speeds that wasn’t there before, or trim that lifts at a corner, loop in your shop. These are fixable issues. A whistle often means an outer garnish is slightly proud of the body line. The tech can reseat it or add a thin foam strip designed for that trim style. A moisture line can indicate a void in the urethane bead, which is rare but not unheard of, especially on complex body flanges. Proper repair involves removing and reinstalling the glass with a fresh bead, not smearing sealant over the leak path. If your car carries advanced driver assistance systems mounted to or looking through the windshield, replacing glass often requires calibration. Cleaning the interior camera area roughly or leaving residue can make systems behave erratically. If a system acts up after cleaning even when the lens looks clear, ask the installer whether a recalibration or inspection is needed. The fix may be as simple as a gentle, proper cleaning of the sensor window. A note on coatings, hydrophobics, and “never clean again” promises Hydrophobic coatings can help keep water beading and flying off at speed, which means less wiper use and less mechanical wear. I apply them on mature bonds, not during the first month after installation. Choose products that are glass-safe, not multi-surface sprays heavy with silicone oils. Follow the manufacturer’s prep steps, which usually include a true glass cleaner and a dry, lint-free towel. Keep coatings away from the perimeter and any plastic moldings. Many coatings will stain the frit if sloppily applied. The truth behind “never clean again” claims is simple: you’ll clean less, not never. Coatings reduce adhesion of grime, but film still forms. The benefit is that gentle, low-pressure wipes work, which aligns perfectly with preserving your seal. What experienced installers quietly wish every owner knew
After years in Auto Glass, a few patterns repeat. The customers who baby the perimeter early almost never come back with leaks. The ones who blast edges with pressure washers too soon are often back with a whistle. And the car that sits in blazing sun with the defrost cranked to high on a fresh bond sometimes returns with a corner crack that started at the edge. None of this is about fragility. It is about chemistry, time, and respecting how this assembly was designed to work. Your windshield does more than keep wind out. It contributes to roof strength, frames cameras for lane-keeping, and serves as a mounting substrate for sensors and mirror hardware. The bond is structural. Clean with that in mind and you’ll extend the life of the entire system. If you’re choosing a shop for Windshield Replacement, ask about their urethane choice, their safe drive-away times, and their guidance for aftercare. A shop that talks you through the first 48 hours is a shop that understands the whole story. The bottom line A pristine windshield deserves care that’s disciplined but simple. Use the right cleaner, the right cloth, and the right touch. Keep moisture and chemical load away from the perimeter, especially at first. Treat stuck-on grime with patience instead of force. Check your work in different light, and don’t be afraid to call the installer with questions. The reward is clear vision, a quiet cabin, and a seal that performs as intended for years. Your future self will thank you every time the rain starts and you hear nothing at all.