Instructions for Using Horizontal and Vertical Picture Slide Templates
90 likes | 207 Vues
This guide provides step-by-step instructions for utilizing slide templates designed for horizontal and vertical images. The process includes inserting your chosen picture, sending it to the back for an unobstructed view, and centering it behind the provided frame opening. Additionally, text can be added into designated text fields, and the initial instruction box should be deleted upon completion. Follow these guidelines to ensure a polished and professional presentation of your images.

Instructions for Using Horizontal and Vertical Picture Slide Templates
E N D
Presentation Transcript
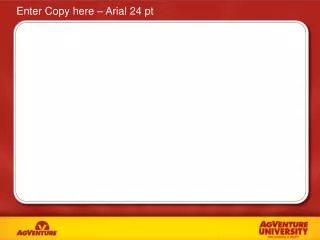
Use this slide template For pictures that are more Horizontal in shape. Instructions: 1.) Insert picture, select picture 2.) Send picture to back (Under Formatting Pallette select Ordering --- From there select Arrange --- Send to back. 3.) Position picture so it is Centered behind frame opening 4.) Enter text into text field If there is any 5.) Delete this box when finished Enter Copy here – Arial 24 pt
Use this slide template For pictures that are more vertical in shape. Instructions: 1.) Insert picture, select picture 2.) Send picture to back (Under Formatting Pallette select Ordering --- From there select Arrange --- Send to back. 3.) Position picture so it is Centered behind frame opening 4.) Enter text into text field If there is any 5.) Delete this box when finished Enter Copy here – Font: Arial 24 pt
Finished Example after photo is inserted and sent to back