The Extruded Aluminum Chamber…
190 likes | 345 Vues
The Extruded Aluminum Chamber…. Why the Aluminum Extrusion…. Relatively fast and inexpensive We have experience Built more than than 40 extruded aluminum insertion device chambers used at APS Built extruded aluminum insertion device chambers in use around the world

The Extruded Aluminum Chamber…
E N D
Presentation Transcript
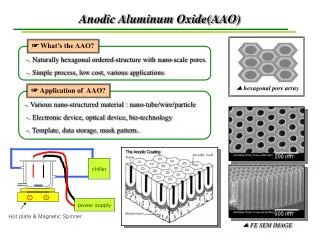
Why the Aluminum Extrusion… • Relatively fast and inexpensive • We have experience • Built more than than 40 extruded aluminum insertion device chambers used at APS • Built extruded aluminum insertion device chambers in use around the world • Bessy II, SLS, CLS, Desy TTF • Minimal welding needed • Only a small, simple TIG weld on each end to attach a bi-metal flange • Aluminum surface provides high AC conductivity • Magnetic permeability of the chamber not a problem • No need for surface coating
The disadvantages… • The as-extruded aperture is not smooth enough to minimize wakefield effects. • The aperture must be polished to reduce Wakefield effects. • New methods of polishing had to be explored to reach an acceptable surface finish. • We have settled on an approach utilizing “abrasive flow machining” technology.
Abrasive Flow Polishing… • Normally an abrasive media is pushed back and forth through a part through the use of a hydraulic ram. • Our extrusion is greater than 10x longer than they are used to pushing through. • A custom built diverter directs the media out orthogonal to the hydraulic ram. • A flange attaches our extrusion with the diverter, and the media then flows out through our extrusion and drops into a bucket. • After some refinements, the process produces satisfactory results.
Best test results compared to the acceptability table… • The average rms slope error of the internal aperture in both the X (transverse) and Z (longitudinal) directions should ideally fall within the green or yellow sections of the acceptability table. • The green, yellow, orange and red symbols on the chart on the right are from the acceptability table. • Green is very desirable. • Yellow is acceptable. • Orange is not desirable. • Red should be avoided. • The blue diamonds are our data points. The red circle is the average of our data points—within the realm of acceptability.
Prototypes were built… • To test the viability and mechanical characteristics of the full length chamber we had two prototype chambers produced. • Both chambers were cleaned, baked, vacuum tested and mechanically measured. • The results were excellent.
Prototype 1 Results After a learning curve, the chamber was able to be straightened to ±50µm. We did find that adjustment screws must be located every 10” over entire length to achieve desired straightness.
Prototype 1 Results, Cont’d The chamber wall thickness fell within ± 50 µm. There was no appreciable change in chamber thickness within the accuracy of measurement between atmosphere and vacuum measurements. The calculated aperture height range = 50 µm.
Prototype 2 Results • The chamber was straightened to ±80 µm within 4 hours. • Could get within ±50 µm or better with minimal added effort.
Prototype 2 Results, Cont’d The chamber wall thickness fell within ± 50 µm. There was no appreciable change in chamber thickness within the accuracy of measurements between the atmosphere and the vacuum measurements. The calculated aperture height range = 80 µm.
Gap Tolerance Stack-up… • Chambers can be manufactured well within the specified thickness tolerance. • Chambers can be installed within the 250 µm tolerance allocated for chamber thickness variation and installation error using a reasonable amount of effort and modified support system. • The allocation should be switched so manufacturing tolerance is smaller and alignment tolerance is larger.
Vacuum Chamber Specifications • A draft Engineering Specification Document (ESD) is written. Requirements are below.
Prototype Vacuum Tests… • Neither Prototype Chamber had detectable leaks present with a sensitivity of better than 2.0 x10⁻¹⁰ mbar.l/sec • Pumping from only one end, with the gauges on the opposite end of the chamber, the ultimate pressure of the first prototype chamber was 4.7 x 10⁻⁷ torr. • Pumping from only one end, with the gauges on the opposite end of the chamber, the ultimate pressure of the second prototype chamber was 1.2 x 10⁻⁷ torr. • Therefore the average pressure within both was better than 5.0 x10⁻⁷ torr.
Prototype Vacuum Tests… • Separate tests were conducted on a piece of the polished extrusion in parallel with the mechanical tests on the unpolished prototype chambers • Polishing process introduced no contaminants that could not be removed by standard cleaning
Outgassing test results of the polished piece… • Pressure after baking was 7.9 x 10⁻⁹ torr • Residual outgassing is calculated at 2.4 x 10⁻¹³ torr.l/cm2.sec • Comparable to unpolished extrusion • RGA scans were also comparable to the unpolished prototypes
Other efforts continue… • The ESD is in review • The SOW for machining is signed off and part of the requisition • We have requested budgetary estimates for machining and begun writing requisitions • We have begun preparing our fabrication facility specifically for the LCLS chambers • Shipping crates have been ordered
The Cost… So far Extrusion costs are within original (WAG) estimates + contingency factor
Progress to Date… • All Extrusions prepared for polishing and sent to Engineered Finishing Corporation (EFC) • Ends of extrusions are already machined to accept mating flange • Control samples of the first 54 un-polished extrusions were cut and sent for surface finish analysis • Polishing requisition awarded and polishing has begun • Polishing process is ongoing • 10 Chambers already partially polished
