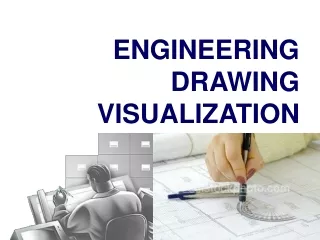
Visualizing Engineering Drawings: Axonometric and Oblique Projections
Learn the principles and techniques of axonometric and oblique projections for engineering drawing visualization. Understand different types of axes and projections. Practice isometric and oblique sketching from actual objects and multiview drawings.

Visualizing Engineering Drawings: Axonometric and Oblique Projections
E N D
Presentation Transcript
ENGINEERING DRAWING VISUALIZATION
Axonometric & Oblique Projection
Parallel & normal to picture plane B A D C B Line of sight A D C Axonometric Projection
a b c B A a D c C b B a A c b D C Axonometric Projection Type of axonometric drawing Axonometric axis 1. Isometric All angles are equal. Axonometric axis Two angles are equal. 2. Dimetric Axonometric axis None of angles are equal. 3. Trimetric
A A Line of sight B B C C D D Oblique Projection Parallel & oblique to picture plane
45o 60o A 30o B C B A D D C Full scale Half scale 45o 45o Oblique Projection Oblique drawing angle Type of Oblique drawing 2) Cabinet 1) Cavalier
Isometric Projection & Isometric drawing
Isometric Projection Rotate 45 about vertical axis Tilt forward (35o16’) All edges foreshorten about 0.8 time.
Forshorten Full scale Isometric Drawing Isometric drawing is a drawing drawn on an isometricaxes using full scale. Isometric drawing (Full scale) Isometric projection (True projection)
Positions of Isometric Axes Isometric axes can be arbitrarily positioned to create different views of a single object. Regular isometric Reverse axis isometric Long axis isometric View point is looking down on the top of the object. View point is looking from the right (or left) of the object. View point is looking up on the bottom of the object.
True-length distances are shown alongisometric lines. Isometric line is the line that run parallel to any of the isometric axes. Distance in Isometric Drawing Nonisometric lines Isometric axes
Isometric Sketching
Sketch from an actual object STEPS 1. Positioning object. 2. Select isometric axis. 3. Sketch enclosing box. 4. Add details. 5. Darken visible lines.
In isometric sketch/drawing), hidden lines are omittedunless they are absolutely necessary to completelydescribe the object. Note Sketch from an actual object STEPS 1. Positioning object. 2. Select isometric axis. 3. Sketch enclosing box. 4. Add details. 5. Darken visible lines.
Sketch from multiview drawing 1. Interprete the meaning of lines/areas in multiview drawing. 2. Locate the lines or surfaces relative to isometric axis.
Top H Top View Front Side W D Front View Side View H Side D Front Bottom View W Bottom Example 1 : Object has only normal surfaces Regular Reverse
D Nonisometric line q y H y x Front View x W Example 2 : Object has inclined surfaces
x B A x C x x B B A C y y C A Nonisometric line Example 3 : Object has inclined surfaces
x C y E A D F B Front View B D C A E F Example 4 Regular Reverse
In isometric drawing, a circle appears as an ellipse. Circle & Arc in Isometric Sketching Steps 1. Locate the centre of an ellipse. 2. Construct an isometric square. 3. Sketch arcs that connect the tangent points.
Four-centremethod is usually used when drawn an isometric ellipse with drawing instrument. Circle & Arc in Isometric Sketching Steps 1. Locate the centre of an ellipse. 2. Construct an isometric square. 3. Construct a perpendicular bisector from each tangent point. 4. Locate the four centres. 5. Draw the arcs with these centres and tangent to isometric square.
Irregular Curve in Isometric Steps 1. Construct points along the curve in multiview drawing. 2. Locate these points in the isometric view. 3. Sketch the connecting lines.
Oblique Sketching
Object Orientation Guidelines Place complex features (arc, hole, irregular shape surface parallel to frontal plane.
Object Orientation Guidelines The longest dimension of an object should be parallel to the frontal plane. GOOD GOOD WORSE WORSE
Object Orientation Guidelines Which orientation is better ?
D 45 Sketch from actual object ESTIMATE DEPTH ESTIMATE LINES
E D C B A Sketch from multiview drawing
Sketch from multiview drawing E D C B A
Sketch from multiview drawing E D C B A
Sketch from multiview drawing E D C B A
Cavalier Oblique • Front view true size • Receding Axis Angle (Normally 30°, 45° or 60°) is Variable • Depth dimension (receding axis) true size
Cabinet Oblique • Front view true size • Receding Axis Angle (Normally 30°, 45° or 60°) is Variable • Depth dimension (receding axis) half size
Side by Side Comparison Cavalier Oblique Cabinet Oblique
Angles in Oblique • Angles in front view are drawn true size • Other angles must be located using coordinates • Appearance of angles may be distorted
Circles in Oblique • Drawn true size in front view • Drawn as ellipses on receding planes • Layout using a Rhombus
Cylinders in Oblique • Front and Back surfaces are circular • “Sides” are drawn as lines tangent to the front and back
Isometrics • Axes equally separated (120°) • H, W, and D measurements are true size along iso. axes • Angles must be located by coordinates • Circles appear as ellipses on all surfaces