Microscopes
Microscopes. What is a Microscope?. A device for forming a magnified image of a small object. An optical instrument used for producing a magnified image of a small object. A device that allows a small object to be viewed under high magnification.

Microscopes
E N D
Presentation Transcript
What is a Microscope? • A device for forming a magnified image of a small object. • An optical instrument used for producing a magnified image of a small object. • A device that allows a small object to be viewed under high magnification.
The microscope is the most important tool for biologists. The first cells were seen in 1663. The first microscope was made in 1595. Did You Know . . . ?
The Beginnings • Of the five senses, the most important is sight. • Aids in the process of gathering information about the environment that we are part of. However, this is adequate only to a certain point. • Beyond this point, the human unaided eye fails to help us; the amount of detail that it can provide is severely limited. • In order to overcome those limitations, humans started to develop instruments like the magnifying glass, the spectacles, the telescope and the microscope.
Hans and Zacharias Janssen Robert Hooke Anton von Leeuwenhoek Founding Fathers of Microscopy
Credit for the first microscope is usually given to Zacharias Janssen, around the year 1595. Since Zacharias was very young at that time, it's possible that his father Hans made the first one, but young Zach took over the production. The first compound microscopes produced by the Janssen's was simply a tube with lenses at each end. The magnification of these early scopes ranged from 3X to 9X, depending on the size of the diaphragm openings. Hans and Zacharias Janssen
Hooke’s remarkable engineering abilities enabled him to invent and improve many mechanical devices, including timepieces and the Gregorian telescope. Hooke improved on early compound microscopes around 1660. In 1665, he coined the word cell to describe the features of plant tissue (cork from bark of an oak tree). Robert Hooke
Leeuwenhoek was a man with many talents; his most important attributes were creativity, power of observation, and ingenuity. He made simple (one lens) microscopes. He built the best microscopes for the time period. He was the first person to describe bacteria (from teeth scrapings) and protozoan (from pond water). Anton von Leeuwenhoek
Compound Deals with the microscope having more than one lens. Light Refers to the method by which light transmits the image to your eye. Microscope “Micro” – small “Scope” – view Compound Light Microscope
Objective Ocular Total magnification Resolution Focal Point Lens closest to the specimen. Lens you look through. The total power of the microscope (multiply the magnification of both lenses). The amount of detail you can see in an image. The point at which the light from a lens comes together. Terminology
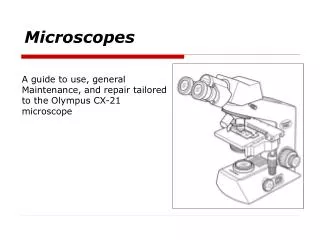
Microscopes take an image of something generally too small to see with the naked eye and magnify that image so that the observer can see it in greater detail. To magnify images, a microscope uses several lenses to change the angle at which rays of light strike the eye of the observer. How Does it Work?
This lens sits directly in front of the observer's eye and does not typically change in magnification power. Older-style microscopes were "monocular," meaning they had only one eyepiece, but in recent years microscopes have been made "binocular" in order to relieve eyestrain and allow for more natural viewing. Ocular Lens or Eyepiece
The objective lenses combine with the power of the ocular lens to create the magnified image. Frequently one starts on the lowest magnification to find focus and then increases magnification one objective at a time. This is facilitated by a rotating nosepiece that allows the objectives to be interchanged smoothly. Objectives
Objective lenses come in several varieties. In a light microscope, the lowest power objective (frequently 4x or 10x) is referred to as the "scanning" objective, as it allows the observer to find an area of interest before increasing magnification. As magnification increases, the amount of light collected from the sample decreases. For this reason, the highest objective on a light microscope (such as the 100x) requires mineral oil to be applied to the gap between lens and sample. The oil has a greater refractive index and bends more light into the objective. Objective Lens
Both knobs change the distance between objective and viewing sample. The coarse adjustment knob is primarily used with the scanning objective. It allows the user to bring the scope into approximately the right plane of focus. Once this has occurred, it is preferential to leave the coarse adjustment alone and use only the fine adjustment. Coarse Adjustment Knob
The fine adjustment knob helps clarify a partially focused image. It requires many more turns than the course adjustment to do the same amount of work. This allows the observer to take great care in clarifying the image. Fine Adjustment Knob
The stage, usually adorned with stage clips of some sort, is where the specimen rests. After being centered over a hole in the middle and secured with the clips, the subject can be raised or lowered by the course and fine adjustment knobs. Also, the stage has its own controls for moving the subject left, right, back, and forward on the horizontal plane. Stage
The light source sits at the base of the microscope (usually) and either consists of a radiant bulb or a mirror for redirecting light. Light is shined up through the hole in the stage to illuminate the sample. Light Source
Before the light enters the stage opening, it passes through the diaphragm. The diaphragm, which has an opening or "aperture" in the form of an iris, only allows light to pass through its center. By increasing or shrinking the size of the iris, you can control how much light passes through to the sample. The light is condensed in order to create the highest level of clarity to an image. Diaphragm
The "body" of the microscope is divided into two parts: the base and the arm. The base is heavy and prevents the scope from slipping on the bench top or tipping over. The arm holds all of the apparatus in place above the light source. A microscope should ALWAYS be carried by both the base and the arm. The Body - Base & Arm
Transporting Handling Cleaning Storage Grab the arm with one hand and place your other hand on the bottom of the base. Never touch the lens with your fingers. Only use lens paper to clean the glass. Put the low power objective in place and the stage all the way up. Microscope Care & Handling
Using the Microscope Before You Start • Place the microscope on a table with the arm towards you about a fist’s length from the edge of the table. • The microscope should be on the lowest power objective and the stage should be all the way up. • The diaphragm should be set on the brightest field of view.
Using the Microscope First Focusing • Place a slide on the stage centering the specimen over the stage opening. • Use the stage clips to hold the slide in place. • Looking through the eyepiece, slowly turn the coarse adjustment knob until the specimen comes into focus.
Using the Microscope Switching Objectives • Look at the microscope from the side. • Carefully revolve the nosepiece until the high-power objective lens clicks into place. • Make sure the lens does not hit the slide. • Looking through the eyepiece, use the fine adjustment knob until the specimen comes into focus.