Download

1 / 24
290 likes | 503 Vues
MULTIMETER Introduction. This PowerPoint is a companion to the videos in “Background / Resources / Multimeter Guide” It is recommended that you watch the videos for an animated explanation of this PowerPoint. MULTIMETER Overview. In this presentation, you will learn: Continuity

E N D
MULTIMETERIntroduction • This PowerPoint is a companion to the videos in “Background / Resources / Multimeter Guide” • It is recommended that you watch the videos for an animated explanation of this PowerPoint
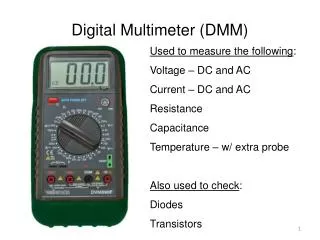
MULTIMETEROverview • In this presentation, you will learn: • Continuity • Using a multimeter to test continuity • Reading direct current voltage using a multimeter • Reading the voltage of a battery
MULTIMETERContinuity • What is continuity? • Defined as: uninterrupted connection • The circuit below has continuity • The circuit has an uninterrupted connection with the battery Battery
MULTIMETERContinuitycontinued • If the wire is cut, the circuit no longer has continuity and the light bulb is not lit Missing segment of wire Battery
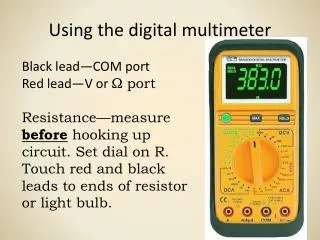
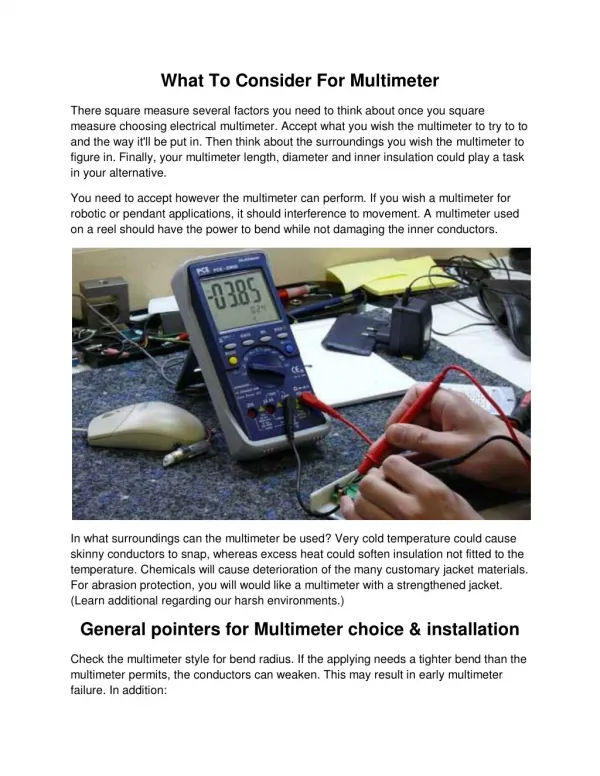
MULTIMETERContinuity Testing How to perform a continuity test: • Continuity testing is done with a multimeter • Allows a technician to see whether or not a circuit is complete • Checking for continuity can help you locate: • Broken wires • Defective switches • Loose connections
MULTIMETERStep 1 • Move the selector switch to the continuity setting
MULTIMETERStep 2 • Remove insulation from the ends of a piece of wire • Touch the multimeter test probes to the wire, as shown • If the wire is good, you will hear a tone from the multimeter, and the display will show all zeros
MULTIMETERStep 2continued • Note that polarity does not matter • If you switch the probes of the multimeter, you should still hear a tone if the wire is good
MULTIMETERStep 3 • Test the bumper switch by building the setup to the right • If you press the bumper switch, you will hear a tone • The tone means that the bumper switch is working • Repeat this set of steps for the limit switch
MULTIMETERStep 3continued • Note that you can directly connect the probes to the proper pins of the bumper switch instead of using the breadboard • You will see the same results
MULTIMETERBatteries and Continuity • Continuity tests cannot be performed on batteries • If you try to perform a continuity test on a battery, you will not harm the meter, but you will get incorrect readings • Batteries should be removed before testing the continuity of any device
MULTIMETERPractice • You can try continuity tests on: • Switches • Wires • Cables • Flashlight bulbs • This will give you more experience with continuity testing Battery
MULTIMETERDC Voltage Testing • What is DC Voltage testing? • Reading the voltage of circuit elements, such as batteries and cells • Why is this useful? • Weak or dead batteries will render your electronic device useless • DC voltage testing is a good first step in troubleshooting For more information on direct or alternating current, refer to “Overview / Guides / Note to the Student”
MULTIMETERStep 1 How to read DC voltage: • Insert the red test wire into the red jack, as shown • Do the same for the black wire
MULTIMETERStep 2 • Rotate the multimeter’s selector switch to DC Volts • The multimeter is now ready to read voltage from a device
MULTIMETERStep 3 • Touch the multimeter probes to the ends of a AA battery • Standard voltage for AA batteries is 1.5 V • Does your display show this? • What happens when you switch the multimeter probes?
- - + + Battery Battery MULTIMETERStep 3continued • If you switch the probes, your voltage reading will become negative • What is polarity? • Having two oppositely charged poles, one positive and one negative • Batteries have polarity • On a multimeter: • The black probe is negative • The red probe is positive Multimeter Reading: 1.5 V Negative probe Positive probe Multimeter Reading: - 1.5 V Positive probe Negative probe
MULTIMETERStep 4 • Touch the probes of the multimeter to a 7.2 V battery • Do this by connecting the probe tips to the connector pins inside the plug as shown • What is the multimeter’s reading?
MULTIMETERStep 5 • Remove the batteries from your radio control transmitter • Lay them out end to end, as shown • Make sure the negative terminals only touch positive terminals
MULTIMETERStep 5continued • Connect the meter as shown • Make sure that the red probe is touching the positive terminal of the top battery • Make sure that the black probe is touching the negative terminal of the bottom battery • What is the total voltage of these 8 batteries?
MULTIMETERStep 5continued • When batteries are connected together like below, their voltages add together • These batteries are “in series” Voltage of 1 AA battery = 1.5 V Number of AA batteries = 8 Total voltage of 8 AA batteries in series: 1.5 V + 1.5 V + 1.5 V + 1.5 V + 1.5 V + 1.5 V + 1.5 V + 1.5 V = 12 V 1.5 V x 8 = 12 V
MULTIMETERStep 6 • Place the batteries back in the radio control transmitter • Place the probes as shown • Observe the voltage reading • What do you expect it to be?
MULTIMETERStep 6continued • Now, place the probes differently, as shown at right • What voltage reading did you get?
MULTIMETERStep 6continued • Continue to move the black test probe, as shown • Do the values you read from the multimeter make sense?