Future of Transportation
890 likes | 1.88k Vues
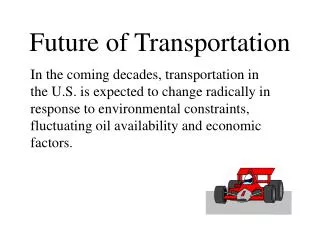
Future of Transportation In the coming decades, transportation in the U.S. is expected to change radically in response to environmental constraints, fluctuating oil availability and economic factors. Future Decision-Makers

Future of Transportation
E N D
Presentation Transcript
Future of Transportation In the coming decades, transportation in the U.S. is expected to change radically in response to environmental constraints, fluctuating oil availability and economic factors.
Future Decision-Makers The transportation systems that emerge in the 21st century will be defined largely by the choices, skills and imaginations of today’s youth.
Future Workforce As scientists and engineers, they will develop new vehicle and fuel technologies. As citizens, they will make decisions balancing mobility,environmental, and economic needs.
Social Implications Students are encouraged to consider the influence of transportation on social and economic patterns, energy use and the environment. JSS is an excellent opportunity to combine the teaching of scientific and social principles in an atmosphere of fun and excitement.
Junior Solar Sprint Goals • Generate enthusiasm for science and engineering at a crucial stage in the educational development of young people. • Improve students' understanding of scientific concepts and renewable energy technologies; and • Encourage young people to consider technical careers at an early age.
Program Description • Students use mathematics and science principles together with their creativity in a fun, hands-on educational program • Using engineering principles, students get excited about generating ideas in a group and then building and modifying models based on these ideas • Students can see for themselves how changes in design are reflected in car performance
Junior Solar Sprint Strategy JSS challenges students to use scientific know-how, creative thinking, experimentation, and teamwork to design and build high-performance model solar vehicles.
Concepts Taught By TheJunior Solar Sprint • Alternative energy sources • Teamwork • How design effects function • Aerodynamics • Force • Motion • Problem solving
What Teachers Like Best • Challenges and excites students • Students become highly motivated because of the competition • Teaches students to think on their feet and react quickly • It’s do-able • Active participation in a competitive situation
Colorado Science Standards • Standard 1: Students understand the processes of scientific investigation: design, communication, and evalution of such investigations. • Standard 2: Physical Science: Student know and understand common properties, forms and changes in matter and energy (Focus: Physics and Chemistry) • Standard 5: Students know and understand interrelationships among science, technology, and human activity and how they can affect the world. • Standard 6: Students understand that science involves a particular way of knowing and understand common connections among scientific disciplines. • Standard 7: Students use appropriate technologies to facilitate understanding of scientific concepts, communicate scientific information and conduct scientific inquiry.
Vehicle Specifications • The vehicle must be safe to contestants and spectators, e.g., no sharp edges, projectiles, etc. • The vehicle must fit the following dimensions: 30 cm. by 60 cm. by 30 cm. • Decals of the sponsor organizations (provided by JSS) must be visible from the side on the body of the car. A 3 cm. by 3 cm. space must be left for the assigned car number. • The sun’s light is the only energy source that may be used to power the vehicle. No other batteries or energy storage devices are permitted.
Vehicle Specifications (cont.) • Any energy-enhancing devices, like mirrors, must be firmly attached to the vehicle. • The vehicle must be steered by the guide wire using one or more eyelets affixed to the front of the vehicle. The vehicle must be easily removable from the guide wire, without disconnecting the guide wire. • The body of the car must be three dimensional. Teams will NOT be allowed to bolt the axles and wheels to the solar cell. The solar cell cannot be used as the body of the car.
Track Specifications • The length of the race course is 20 meters over flat terrain. • Race lanes are at least 60 cm. wide. • The guide wire will be located in the center of the track and will not be more than 1.5 cm. above the track surface. • The track is a hard, flat, smooth surface such as a tennis court or running track. A large sheet of rolled material, i.e., plastic, heavy paper, or roll roofing (half-lap), or hardwood taped or bolted together may be used to cover an unsuitable surface.
Conduct of the Race • At race time, the vehicle will be placed behind the starting line with all its wheels in contact with the ground and an opaque sheet covering (NREL will provide at the regional competition), but not touching the solar panel. The opaque sheet will be removed at the start of the race, allowing the vehicle to collect solar power and start driving. No more than two team members will be allowed in the start area. • An early or push start may result in disqualification or a re-run of the heat. The determination will be left to the race judges.
Conduct of the Race (cont.) • All vehicles will be started when the official signal is given. The winner of the heat will be the first vehicle to cross the finish line or the farthest car down the lane when the race is called. • During the initial heats, the judges may declare multiple wins or losses. • One team member must wait at the finish line to catch the vehicle. • Team members may not accompany or touch the vehicle on the track. Vehicles stalled on the track may be retrieved after the end of the race has been declared by the Lead Judge.
Conduct of the Race (cont.) • Lane changing or crossing will result in disqualification. • Challenges must be made before the race judges begin the next heat. All challenges must come from the team members who are actively competing and directed to the lead judges. The decisions of the race judges are final. • The vehicle and team member must remain at the finish line until the order of the race has been established. • Judges will inspect cars prior to the final heat or at anytime during/after heats.
Junior Solar Sprint Instructions • Kit Materials: • 1 Pitsco Ray Catcher Solar Panel (2.76V, 1, 100 mA) • 1 White Sheet of Plastic Coated Paper • 2 Balsa Sheets (10-1/2”x4”x3/16”) • 2 Alligator Clips • 2 Pitsco GTF Wheels • 2 Pitsco GTR Wheels • 1 Straw • 1 No. 280 Motor • 4 Nylon Spacers • 2 Plastic Delrin Axles • 1 Plastic Gear Font • 4 Rubberbands (2 No. 14 Rubber Bands and 2 Wide Rubber Bands) • Junior Solar Sprint Rules and Regulations
Materials and Tools Needed • Soldering Iron • Sharp Utility Knife or Coping Saw • Cool-Melt Glue Gun • Needle-Nose Pliers • 1/8” Drill Bit or Electric Drill with Bit • 2 C-Clamps • Rulers • Pencils • Wire Strippers and Wire Cutters
Safety Precautions • Instruct students in the proper use and care of sharp utility knives and coping saws. If there are safety concerns, use coping saws, not utility knives. • Cover safety precautions for the use of electrical equipment such as glue guns and soldering irons. • Caution students not to touch the metal top of the cool-melt glue gun and to keep the glue off their skin. • The voltage produced by the solar panel and batteries are entirely SAFE for student use. • Properly dispose of batteries. • Before inserting wheels and gears onto axles, students need to insert a 1/8” drill bit through the holes of the wheels and gears for easy assembly. They should not “drill” the wheels and gear, but merely ream the hole slightly. If the fit is still too tight, either ream the hole again or use sandpaper to bring the diameter of the axle shaft to a good firm fit. • Never force the wheels and gears onto the axles.
5-1/4” 5-1/4” Line A Making the Chassis Step 1 • Using a No. 2 pencil, draw Line A down the center of a balsa sheet.
Line B 3/4” Making the Chassis Step 2 • Turn over the balsa sheet and draw Line B ¾” from one end of the sheet.
1” 1 ½” 5/8” Line B Making the Chassis Step 3 • Draw a 5/8” x 1-1/2” notch 1” from the top of the sheet.
Making the Chassis Step 4 • Draw Line C 2-1/2” from the other end of the same sheet of balsa. 1” 1 ½” 5/8” Line C 2 ½” Line B
Line C 2 ½” Line B Making the Chassis Step 5 • Using a sharp utility knife or a coping saw, cut out the notch drawn in Step 3. Save the cut out piece of balsa for a later step. 1 ½”
Making the Chassis Step 6 • Locate the other sheet of balsa and draw a line 1-1/8” from one of the narrow ends. Cut along the line to produce a 1-1/8”x4” panel support member. Panel Support Member 1-1/8” 4”
Panel Support Member Chassis Line A Making the Chassis Step 7 • Using a cool-melt glue gun, run a small bead of glue along one of the 4” edges of the panel support member and attach firmly at Line A. After it is in place, run an additional bead of glue on each side of the joint between the chassis and the support member.
Wheels, Gears, and Axles Note: Installing wheels and gears on axles can be difficult. Be careful not to bend the Delrin axle. To ease the process, insert a 1/8” drill bit through the holes. The gears and wheels should fit snugly to the axle and provide power to the wheels.
Rear Axle Assembly Step 1 • Locate the plastic gear font and detach Gear D from the font.(A letter can be found on the back of each gear) Gear D
Rear Axle Assembly Step 2 • Inspect the gear and, using a sharp knife, carefully remove any plastic flashing between the gear teeth. Plastic Flashing
Rear Axle Assembly Step 3 • Place the gear on a table with the smaller gear face up and insert one of the Delrin axles into the gear.
Rear Axle Assembly Step 4 • Carefully slide the gear 1-7/8” from one end of the axle. It should be 3-1/4” from the other end of the axle.
Rear Axle Assembly Step 5 • Slide two nylon spacers onto the axle, one on each side of the gear.
Rear Axle Assembly Step 6 • Place one of the wide plastic wheels flat on a table. Keeping the spacers in place, insert one end of the axle into the wheel. Slide the axle into the wheel until it is flush with the opposite side of the wheel.
Rear Axle Assembly Step 7 • Lay the other wide plastic wheel flat on the table. With spacers still in place, slide the free end of the axle into the wheel until it, too, is flush with the opposite side of the wheel.
Rear Axle Assembly Step 8 • Stretch a wide rubber band around each of the wide wheels. These act as tires and provide traction for your vehicle.
Front Axle Assembly Step 1 • Place one of the two thin wheels flat on the table. Insert one end of the remaining Delrin axle into the wheel until the end of the axle is flush with the opposite side of the wheel.
Front Axle Assembly Steps 2 & 3 • Slide two nylon spacers onto the free end of the axle. While keeping the spacers on the axle shaft, slide the free end of the axle into the other thin wheel until the end of the axle is flush with the opposite side of the wheel.
Attaching Axle Assemblies to Chassis Step 1 • Position the notched chassis on the table so that the notched end of the balsa is hanging over the table edge, and Lines B and C are shown. Line B Line C
Line C Line B Attaching Axle Assemblies to Chassis Step 2 • Carefully position the rear axle assembly so that: • Gear D is centered in the notched area of the chassis. • The axle is positioned along Line B between the line and the end of the chassis. • The nylon spacers are positioned within 1/16” of each wheel.
Line C Line B Attaching Axle Assemblies to Chassis Step 3, 4 & 5 • When the rear axle is positioned as described in Step 2, use small C-clamps or ask a friend to hold the rear axle assembly in the correct position. • While the rear axle is in the correct position, gently apply a bead of cool-melt glue along the sides of the nylon spacers where they contact the chassis. • Hold the rear axle assembly in place until the glue cools.
Line C Line B Attaching Axle Assemblies to Chassis Steps 6 & 7 • Place the front axle assembly along Line C between the line and the rear axle assembly. • Position the axle so that the wheels are equidistant from the chassis.
Line C Line B Attaching Axle Assemblies to Chassis Steps 8, 9 & 10 • Slide the spacers to within 1/16” of each wheel. • Hold the assembly in place and gently apply a bead of cool-melt glue along the sides of the nylon spacers where they contact the chassis. • Hold the front axle assembly until the glue dries.
Attaching Motor Assembly to Chassis Steps 1 & 2 • Find the spur gear (Gear A) on the plastic gear font. • Remove Gear A from the font and cut off any excess plastic between the teeth of the gear. Gear A
Attaching Motor Assembly to Chassis Step 3 • Insert the shaft of the motor into Gear A to within 1/8” of the body of the motor. Motor
Attaching Motor Assembly to Chassis Step 4 • Set the chassis on the table with the axle assemblies facing down.
Attaching Motor Assembly to Chassis Step 5 • Using a cool-melt glue gun, create a ½”x 1” rectangle of glue about 1/8” deep in the larger area to the side of the notch.
Attaching Motor Assembly to Chassis Steps 6 & 7 • While the glue is still liquid, place the motor on its side (with vent holes up) on the glue so that Gear A sits directly on top of and engagesGear D. Be sure not to obstruct or fill the vent holes with glue. • Hold the motor in place while the glue cools.
Attaching Motor Assembly to Chassis Step 8 • Locate the small piece of balsa you saved when you cut out the notch from the chassis. Apply cool-melt glue to one side of the balsa piece. Press it into place on the chassis directly in front of the motor. This will keep the motor in place if the vehicle comes to a sudden stop (crashes).
Attaching Motor Assembly to Chassis Step 9 • If the motor dislodges, use the tip of the glue gun to soften the glue on the chassis where the motor was. Add a small amount of glue and reattach the motor as you did before.
Solar Panel Assembly Step 1 • Connect the alligator clips to the leads on the solar panel. A. Insert one of the two leads through the small hole in an alligator clip.