Essential Kiln Operation & Maintenance Guide: Troubleshooting, Loading, Cooling, and Repairs
This comprehensive guide provides the essential steps for effective kiln operation, including time and temperature monitoring using cones, a permanent record of each firing, and troubleshooting techniques. Learn the best practices for loading shelves, ensuring proper clearance, and maintaining uniform heat. Discover cooling techniques with downdraft ventilation and fan assistance, plus safe unloading practices. Detailed maintenance procedures for electrical and mechanical components aid in prolonging kiln life. A must-have resource for potters and craftsmen.


Essential Kiln Operation & Maintenance Guide: Troubleshooting, Loading, Cooling, and Repairs
E N D
Presentation Transcript
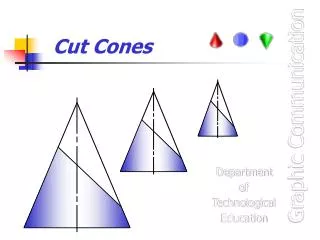
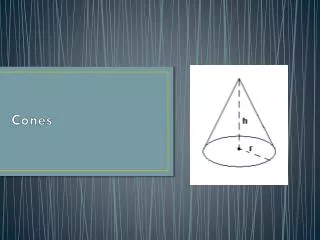
Cones • Time & Temperature • Permanent record of each firing • Inexpensive 10¢ per cone • Troubleshooting aid • Use a Cone Template for accuracy • Best way to detect a decalibrating Thermocouple
Loading the kiln • Shelves • Size - 2” less than kiln diameter • Clearance • Shelves 1” from walls • Shelves 2” from Thermocouple • Ware 2” from walls • Location • First shelf 1” up from floor
Loading, continued • Density of load • Hot & Cold spots • Uniformity • Tall items toward the center • Allow space for air flow • Stagger ½ shelves if possible
Cooling and Unloading • Run the downdraft vent system • Force cooling with a fan • Lid closed, peep plugs are in • Small fan blowing at controller • Wind velocity • air exchange around kiln • cooling time • Unload safely at (or below) 125°F
Preventive Maintenance • Electrical items • Thermocouples • Relays • Elements • Mechanical items • Lid brace & hinge • Section Handles • Brickwork
Maintenance, electrical • Opening Electrical Box • Unplug Kiln or • Disconnect power • Phillips screwdriver • Remove all screws on Left side of box
Maintenance, electrical • Thermocouple Replacement • Unplug Kiln • Open Box • Unscrew Porcelain Block • Loosen Screws and Remove Thermocouple • Install in Reverse Order
Maintenance, mechanical • Lid Brace & Hinge • Anchor pads • Lid • Body
Maintenance, mechanical • Lid Hinge • Screws • Cotter pin • Struts • Other hardware • Handles • Latches
Maintenance, mechanical • Temporary Brick Repair • Unplug Kiln • Insert pins at 30 degree angle to form a ledge • Space pins every ¾ inch
Repairs • Relays • Unplug Kiln • Remove Box • Remove Baffle • Label and Remove Relay Control Wiring • Unscrew and Remove Relay • Install in Reverse Order
Repairs • Element Replacement • Unplug Kiln • Open Control Box • Cut Element Close To Connector • Remove Pins • Carefully Remove Element • Insert New Element • Crimp On Feeder Wire With Barrel Connector • Close and Fasten Box • Use Factory Original Parts
Locate receptacle Use insulated probes Insert at slight angle Checking Voltage